
These days, we’re all finding new ways to machine embroider. From quilting to in-the-hoop, to applique, I’m amazed at the new life coming into this part of the sewing scene.
This past week I spent some time stitching out a beautiful pattern from Embroidery Online. Here’s a link to the collection, called Modern Expressions Tiling Scene.
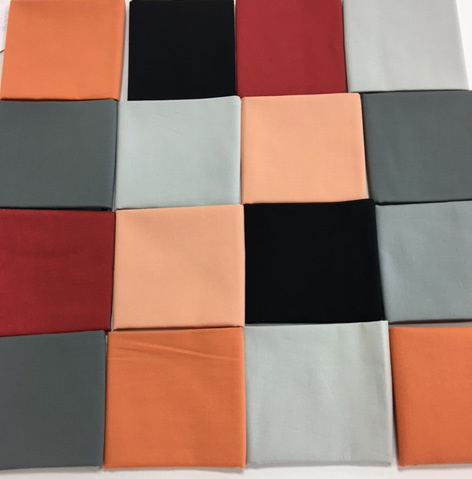 I started with a great palette and moved on from there. I don’t think I ever would have dreamed of putting some of these colors together without the designer’s keen eye. The pdf printout shows a nice layout of the design, and while my personal colors were slightly different, they were very true to the original colors. I also stayed very true to the thread colors of the original design.
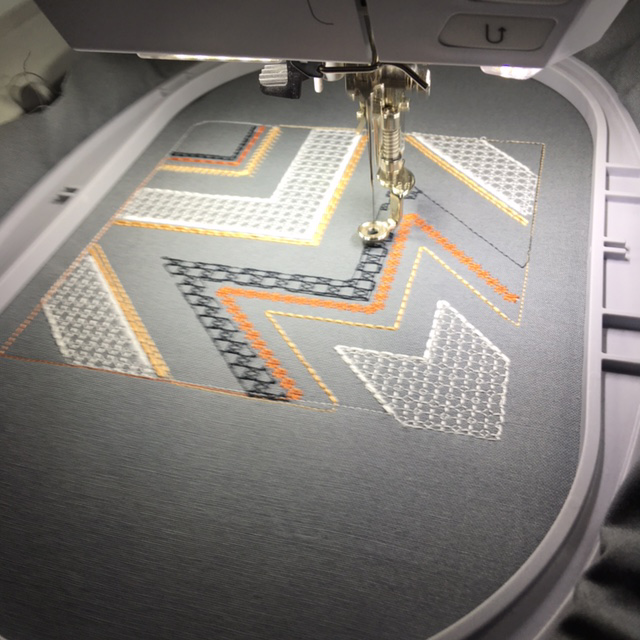
The stitch-out was actually pretty light and easy, as nothing about the design is terribly dense. Even at less-than-top-speed, each block took only about 20 minutes.
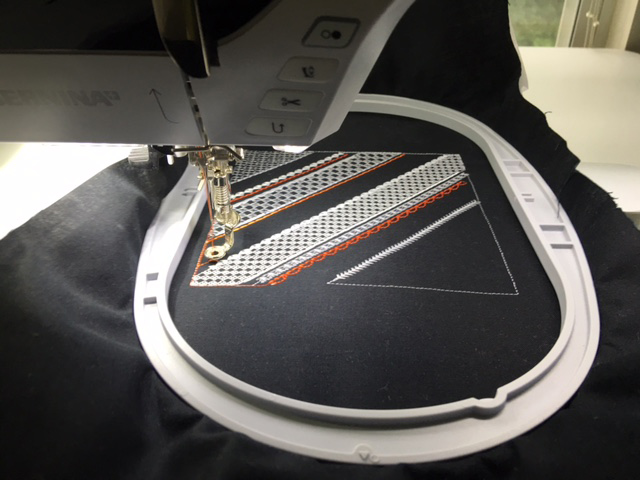
 The pattern instructions called for two layers of tear-away stabilizer, which worked very well. I had my doubts about how nicely it would press out in the end, but it lays really flat.
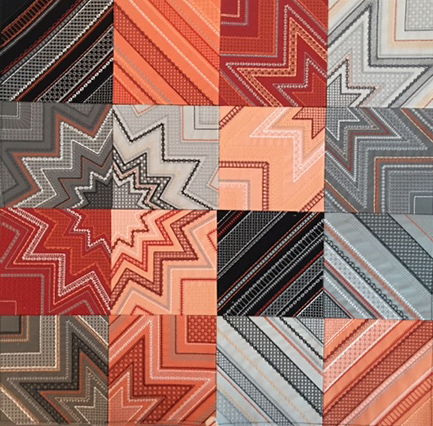
The end result is a very modern looking design, great for a wall-hanging or a table runner. This was waaaaay easier than I thought it would be. Read the instructions thoroughly, and you’ll have no problems. At the end, you trim each block 1/4 inch from the final thread color, and it really keeps your block sizes uniform. When stitching together, just hold a decent quarter inch and you’ll be fine….it’s a forgiving pattern. Press your seams open.
While I still have to quilt and bind it, I think I’ll just quilt in the ditch. Still, a great weekend project, and I really fell in love with the finished look of this. Have fun!
Pingback: Edgestitch