 I have always enjoyed Halloween more than Christmas, or whatever mid-winter holiday you celebrate. Too much pressure, too many gifts, too much hype.
And when you work in retail, Halloween isn’t much better. Most chain stores start putting their Halloween decorations out July 5. But when that first crisp fall breeze rolls in, and those first few leaves begin to fall, I get inspired. Many people do. Once the kids are all back in school and the “official” fall season starts, it’s amazing how many of us turn to our craft, our hobby or our passion once again.
So this year I am teaching some students to use the cross stitch program in Bernina Embroidery Software 7. I am not a big fan of cross stitch..at least not actually DOING it. However, I love the way it looks, and I love how easy it is to get some things done in software (which I DO love to use).
I stumbled across some lovely cross stitch designs in Just Cross Stitch Magazine.
They always include many many patterns for people to use. I scanned a few of their Halloween “ornaments”, and brought the jpegs into the cross stitch software.
Then you can use the software to create stitches following the image in the background. I wanted to keep these very simple so I could make many, but not take a lot of time. The cross stitch program within Software 7 saves the file as .arx extension.
 The next step of course, is to bring the cross stitch design into the actual embroidery software. I love this technique because it turns all those little x’s in the Cross Stitch program into machine-readable stitches. And then it’s just an embroidery design.
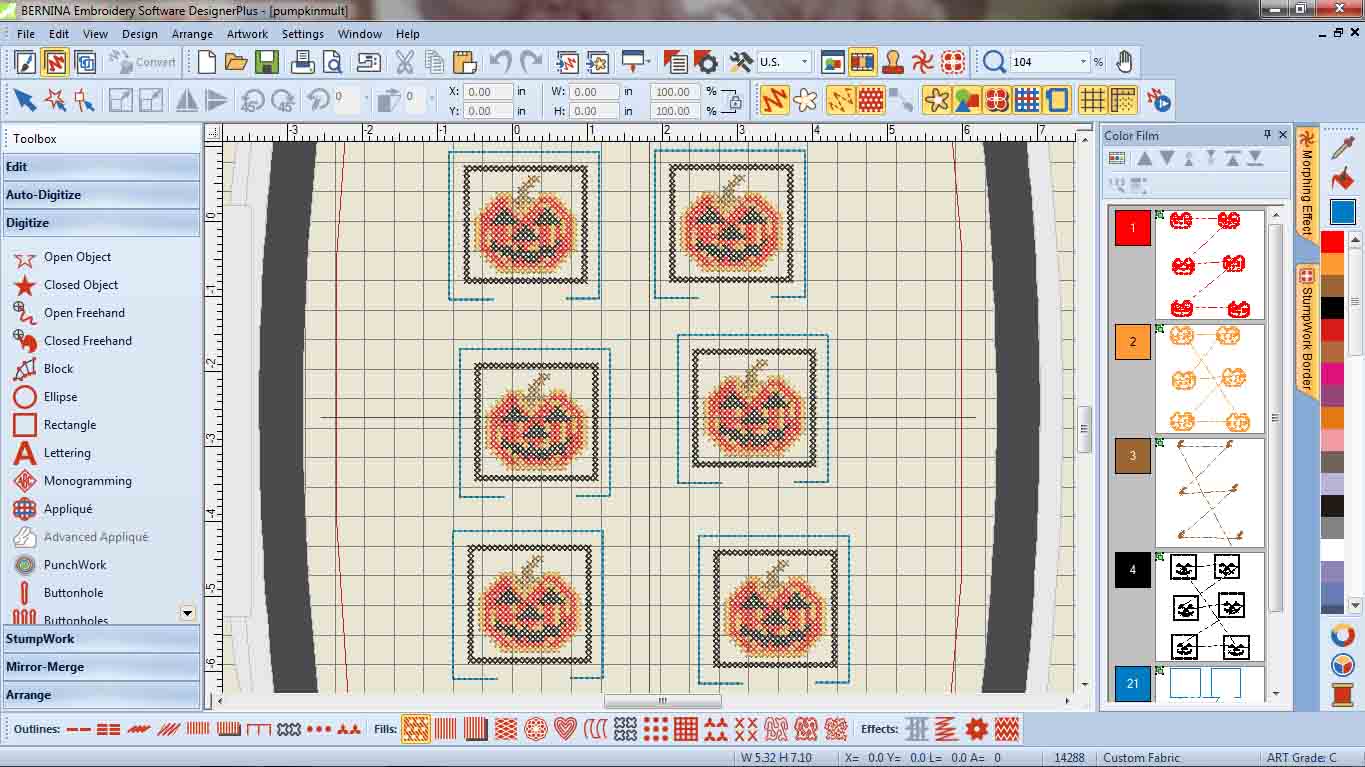 Once one file is in the software, you can repeat it multiple times. I also rearranged the color film, along the right, to stitch all of one color at once instead of all the colors in one pumpkin at a time. This is a huge step and really cuts down on thread changes.
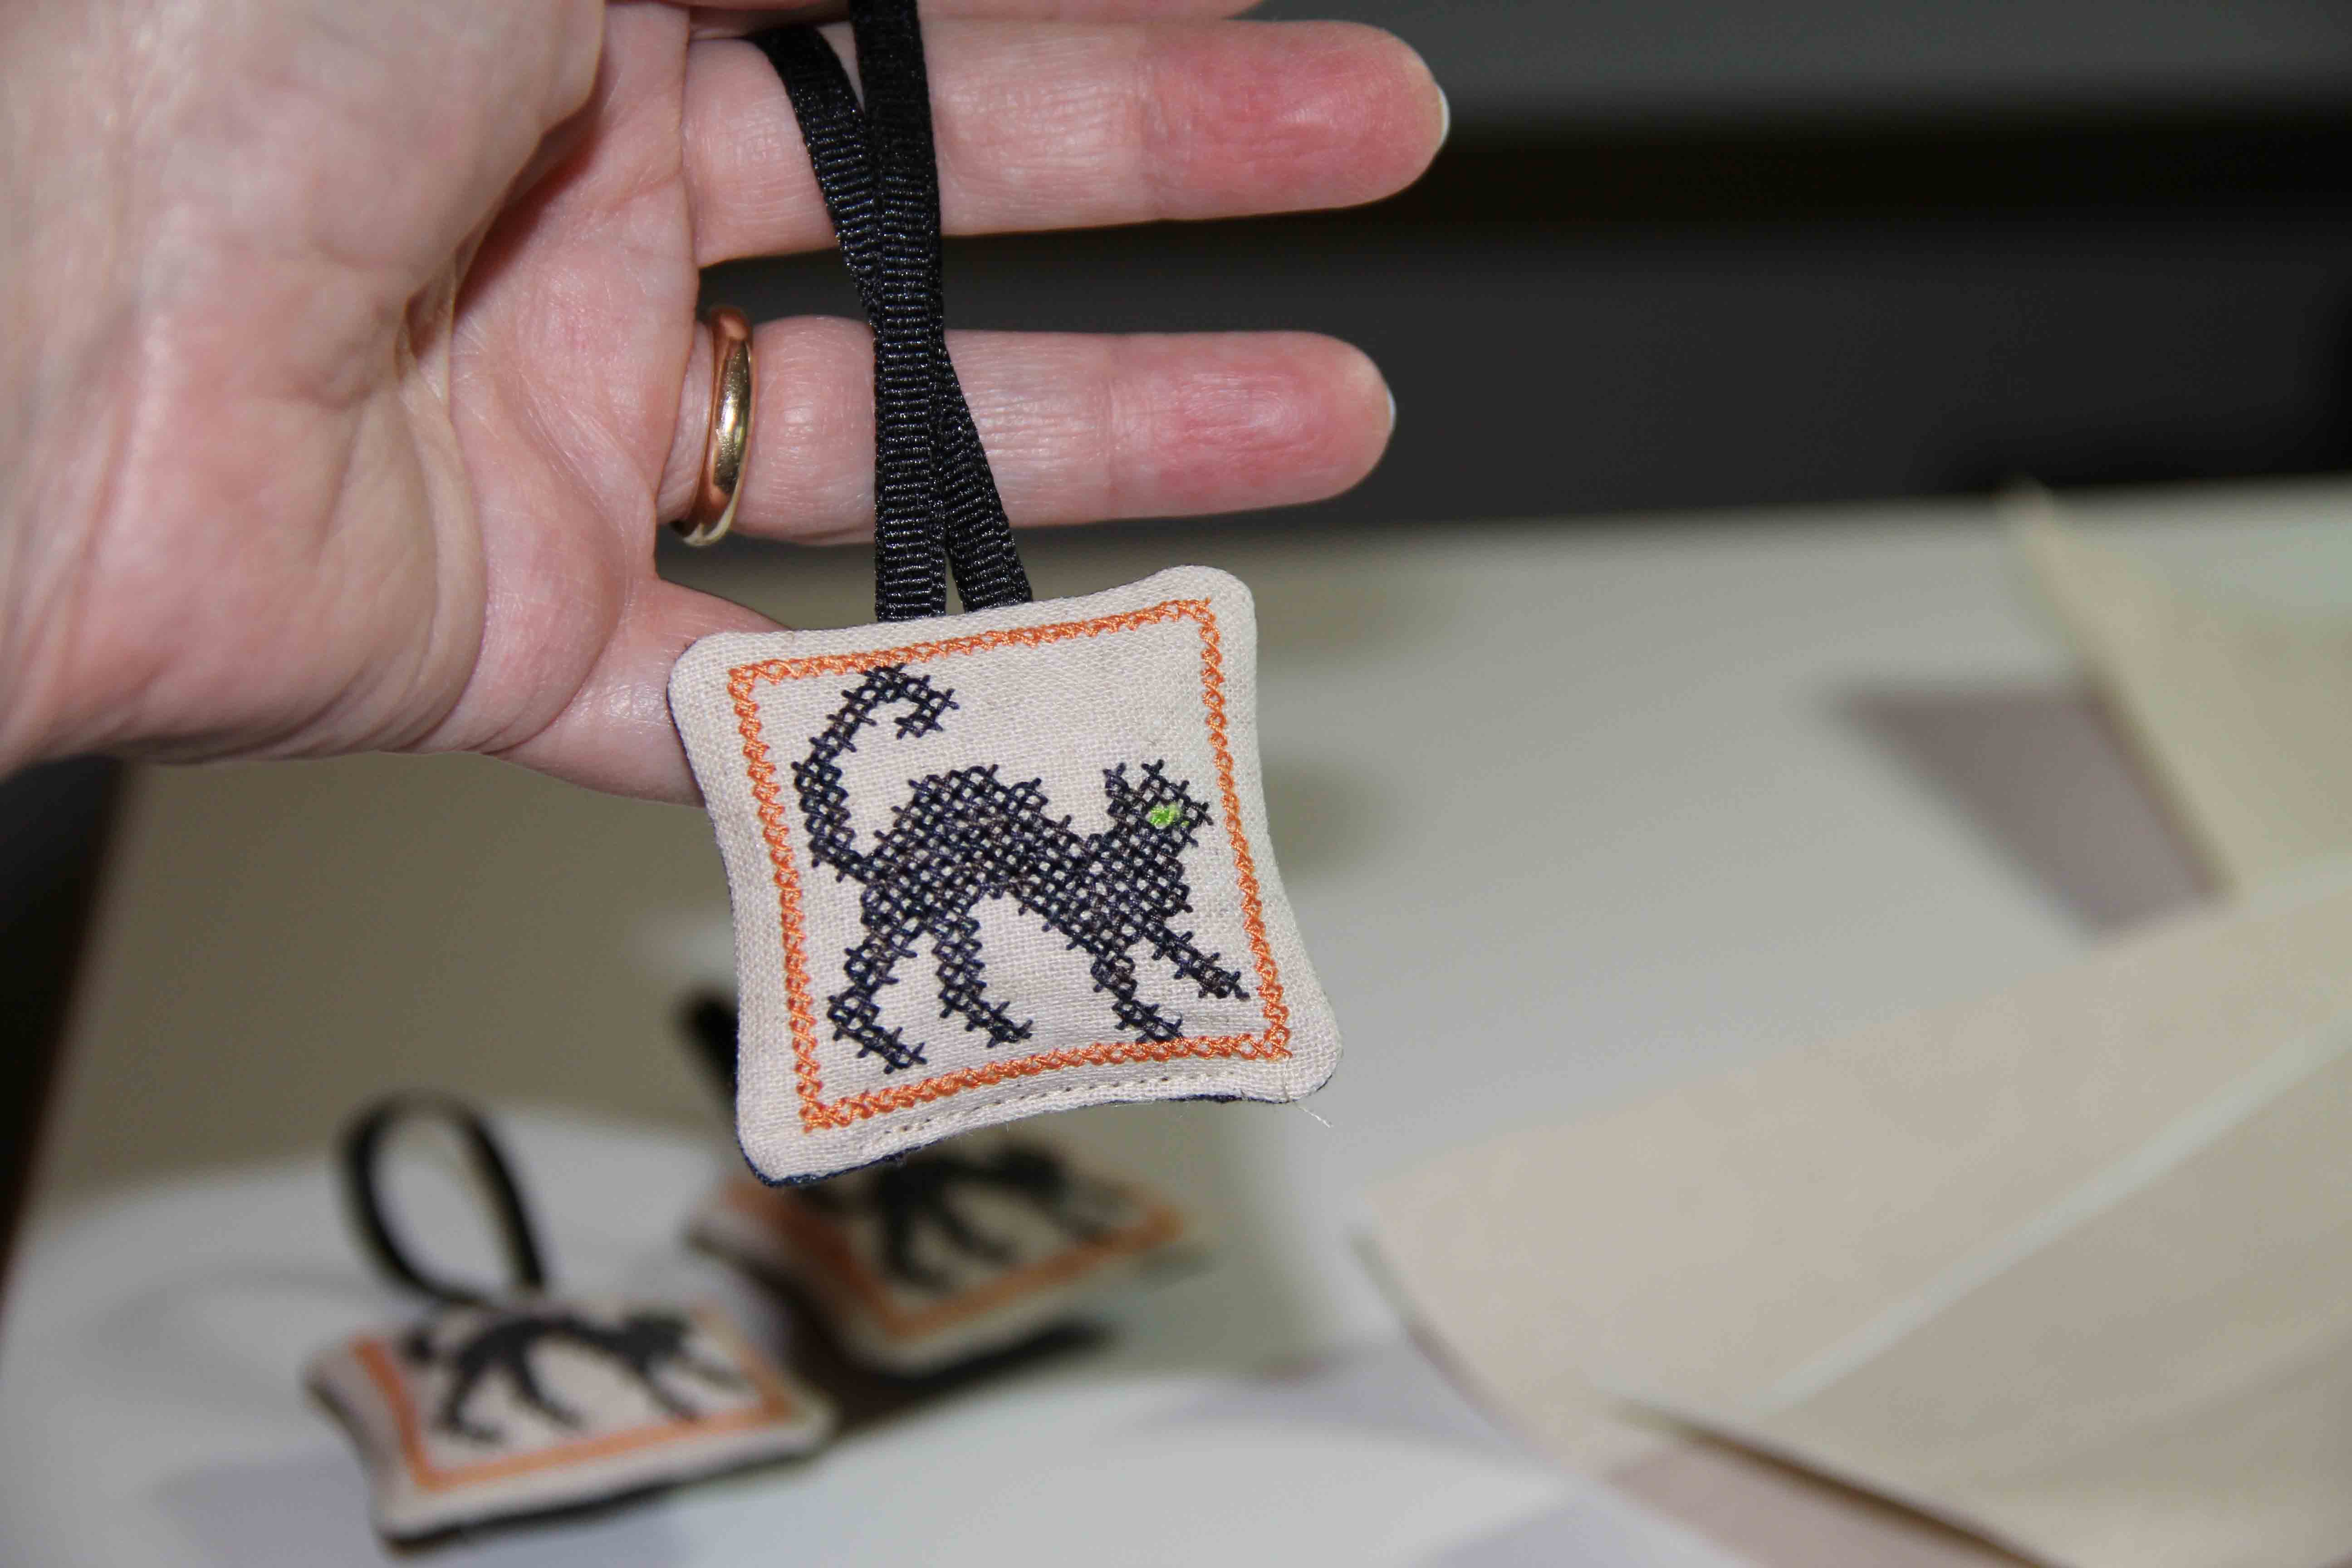
At the end, I added a double run stitch around the outside of the ornament, leaving the bottom open, so the little critters could be turned inside out and stuffed. Before that last double run thread stitches, I added the backing, with right sides together. Under the backing I taped down some ribbon, so that they could be hung. As you can see, in the hoop, they look like little ravioli.
 When all is done stitching, I cut everything out, clipped corners, turned it inside out, stuffed them with polyfill, and used the machine to stitch along the bottom closure.
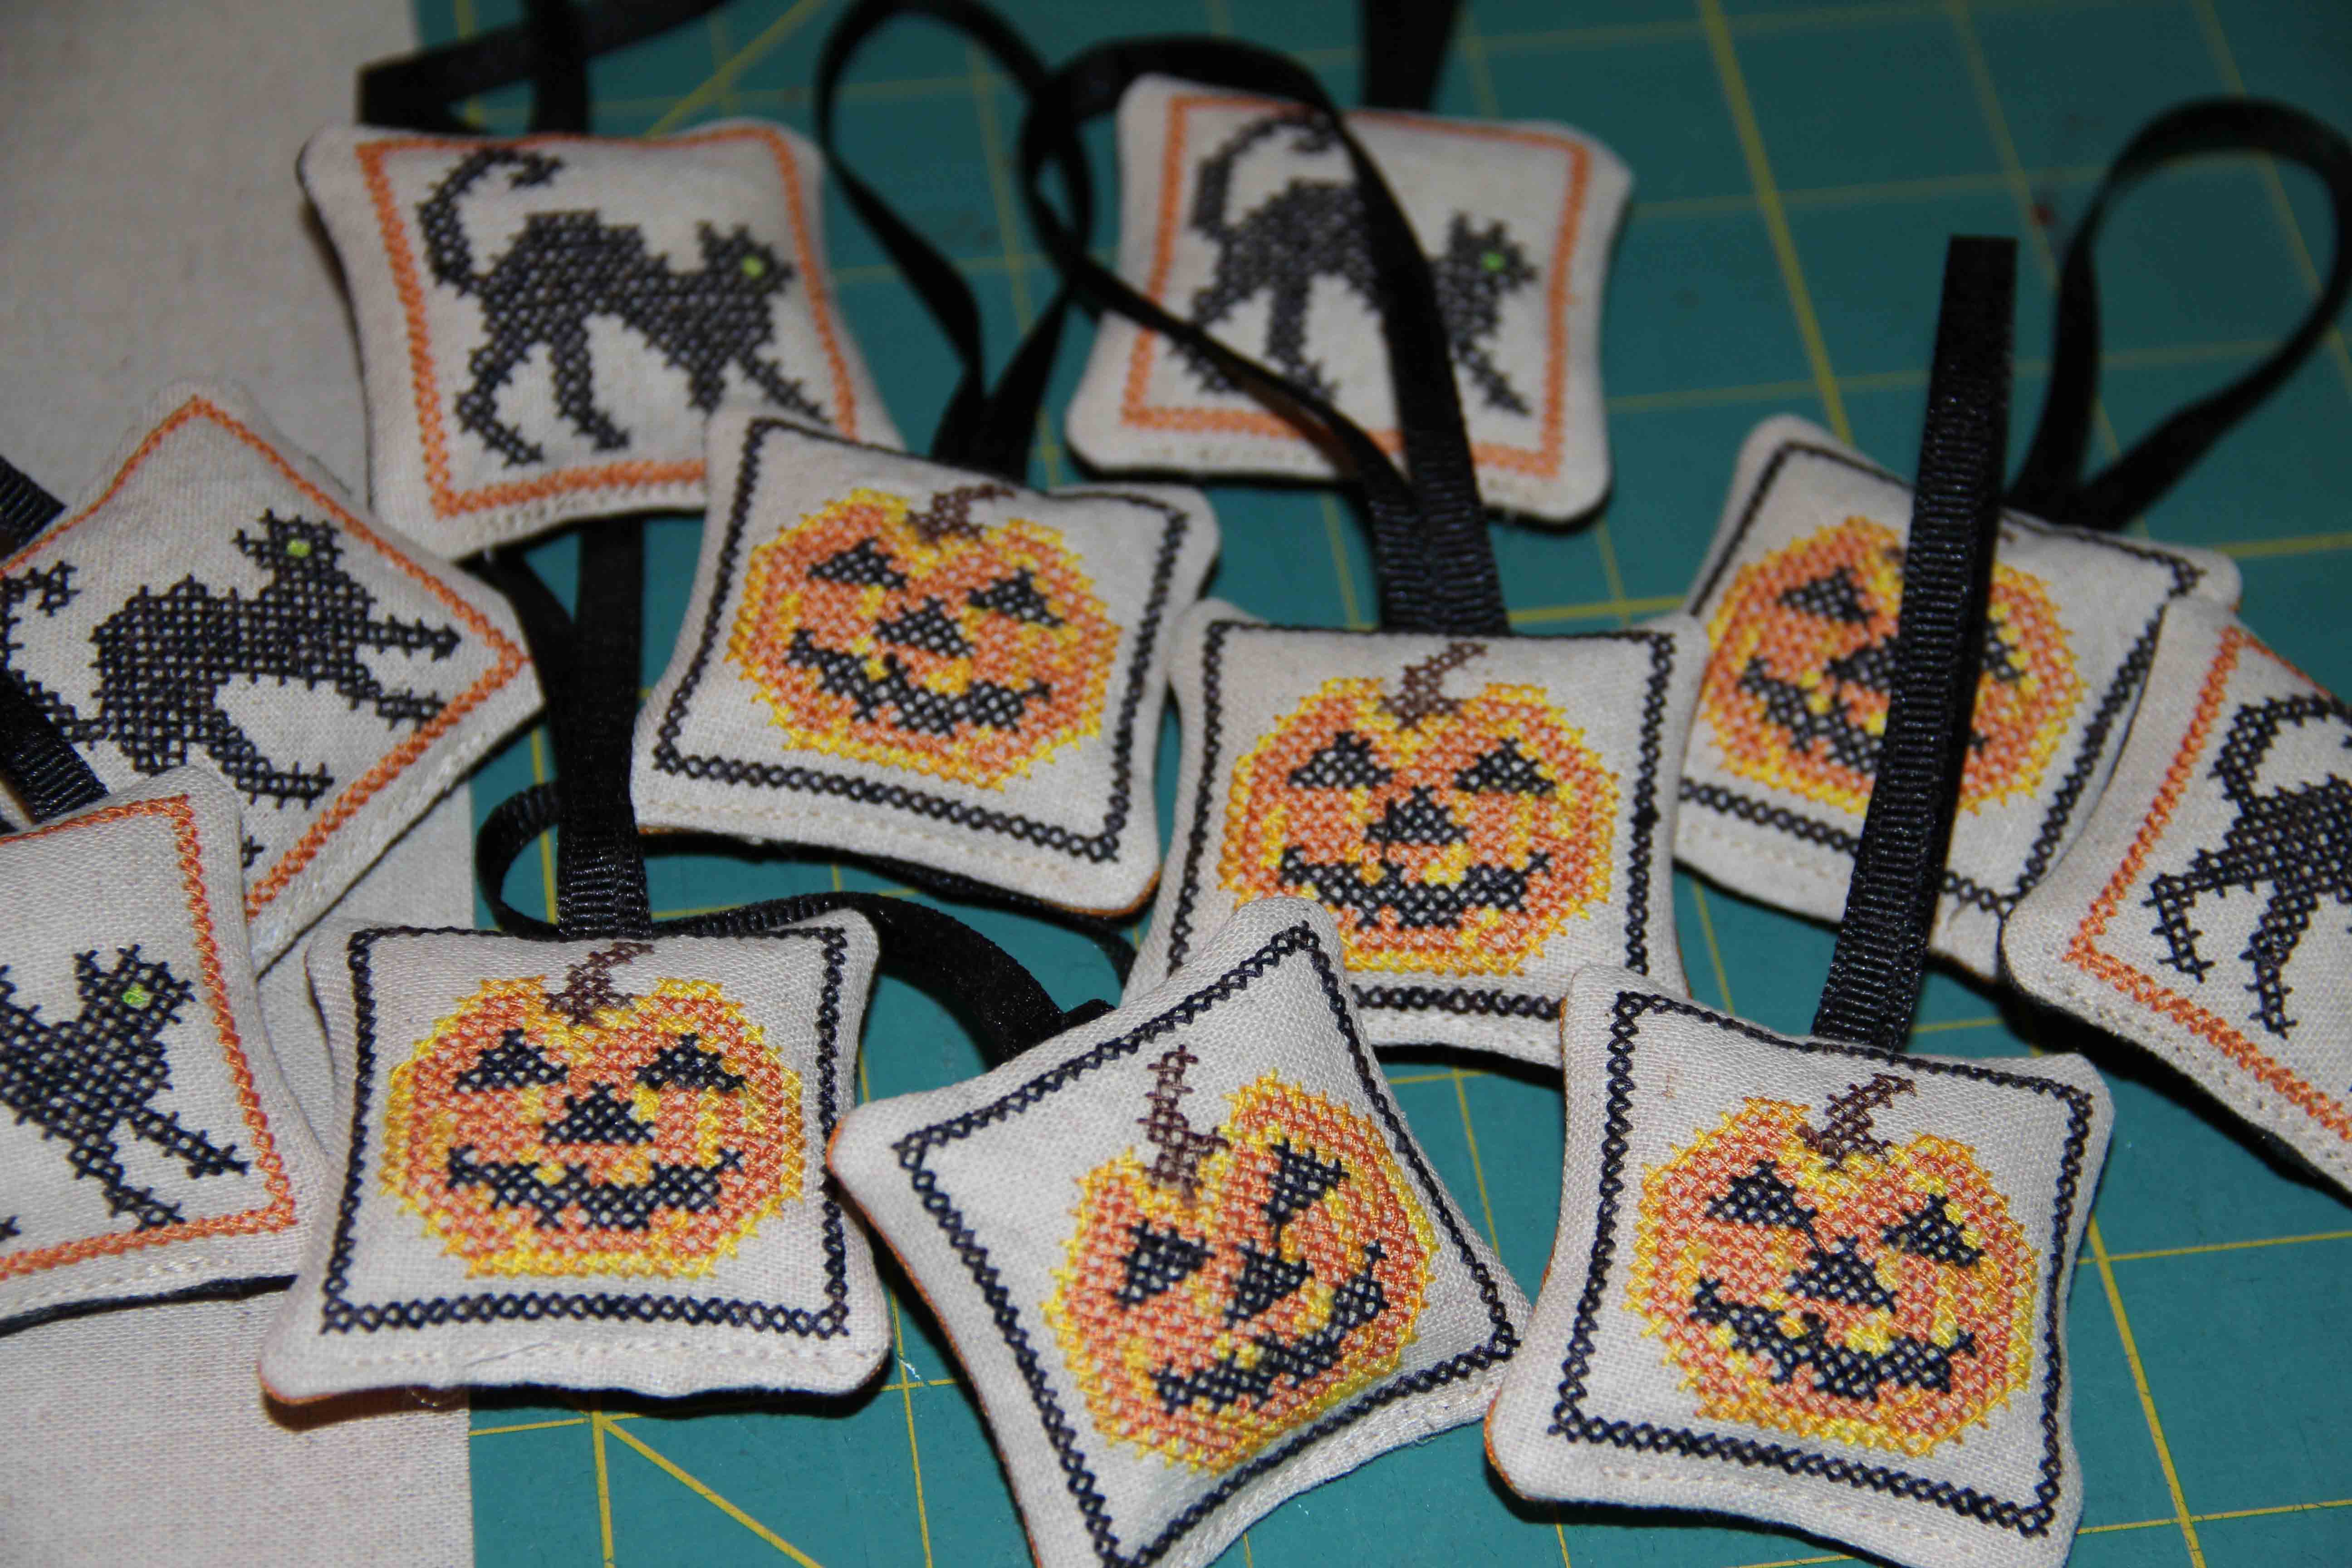
 Voila! Six or eight of them will fit into the jumbo hoop. I managed to create a cat, a witch and a pumpkin. I also made some larger ornaments with regular embroidery on them.
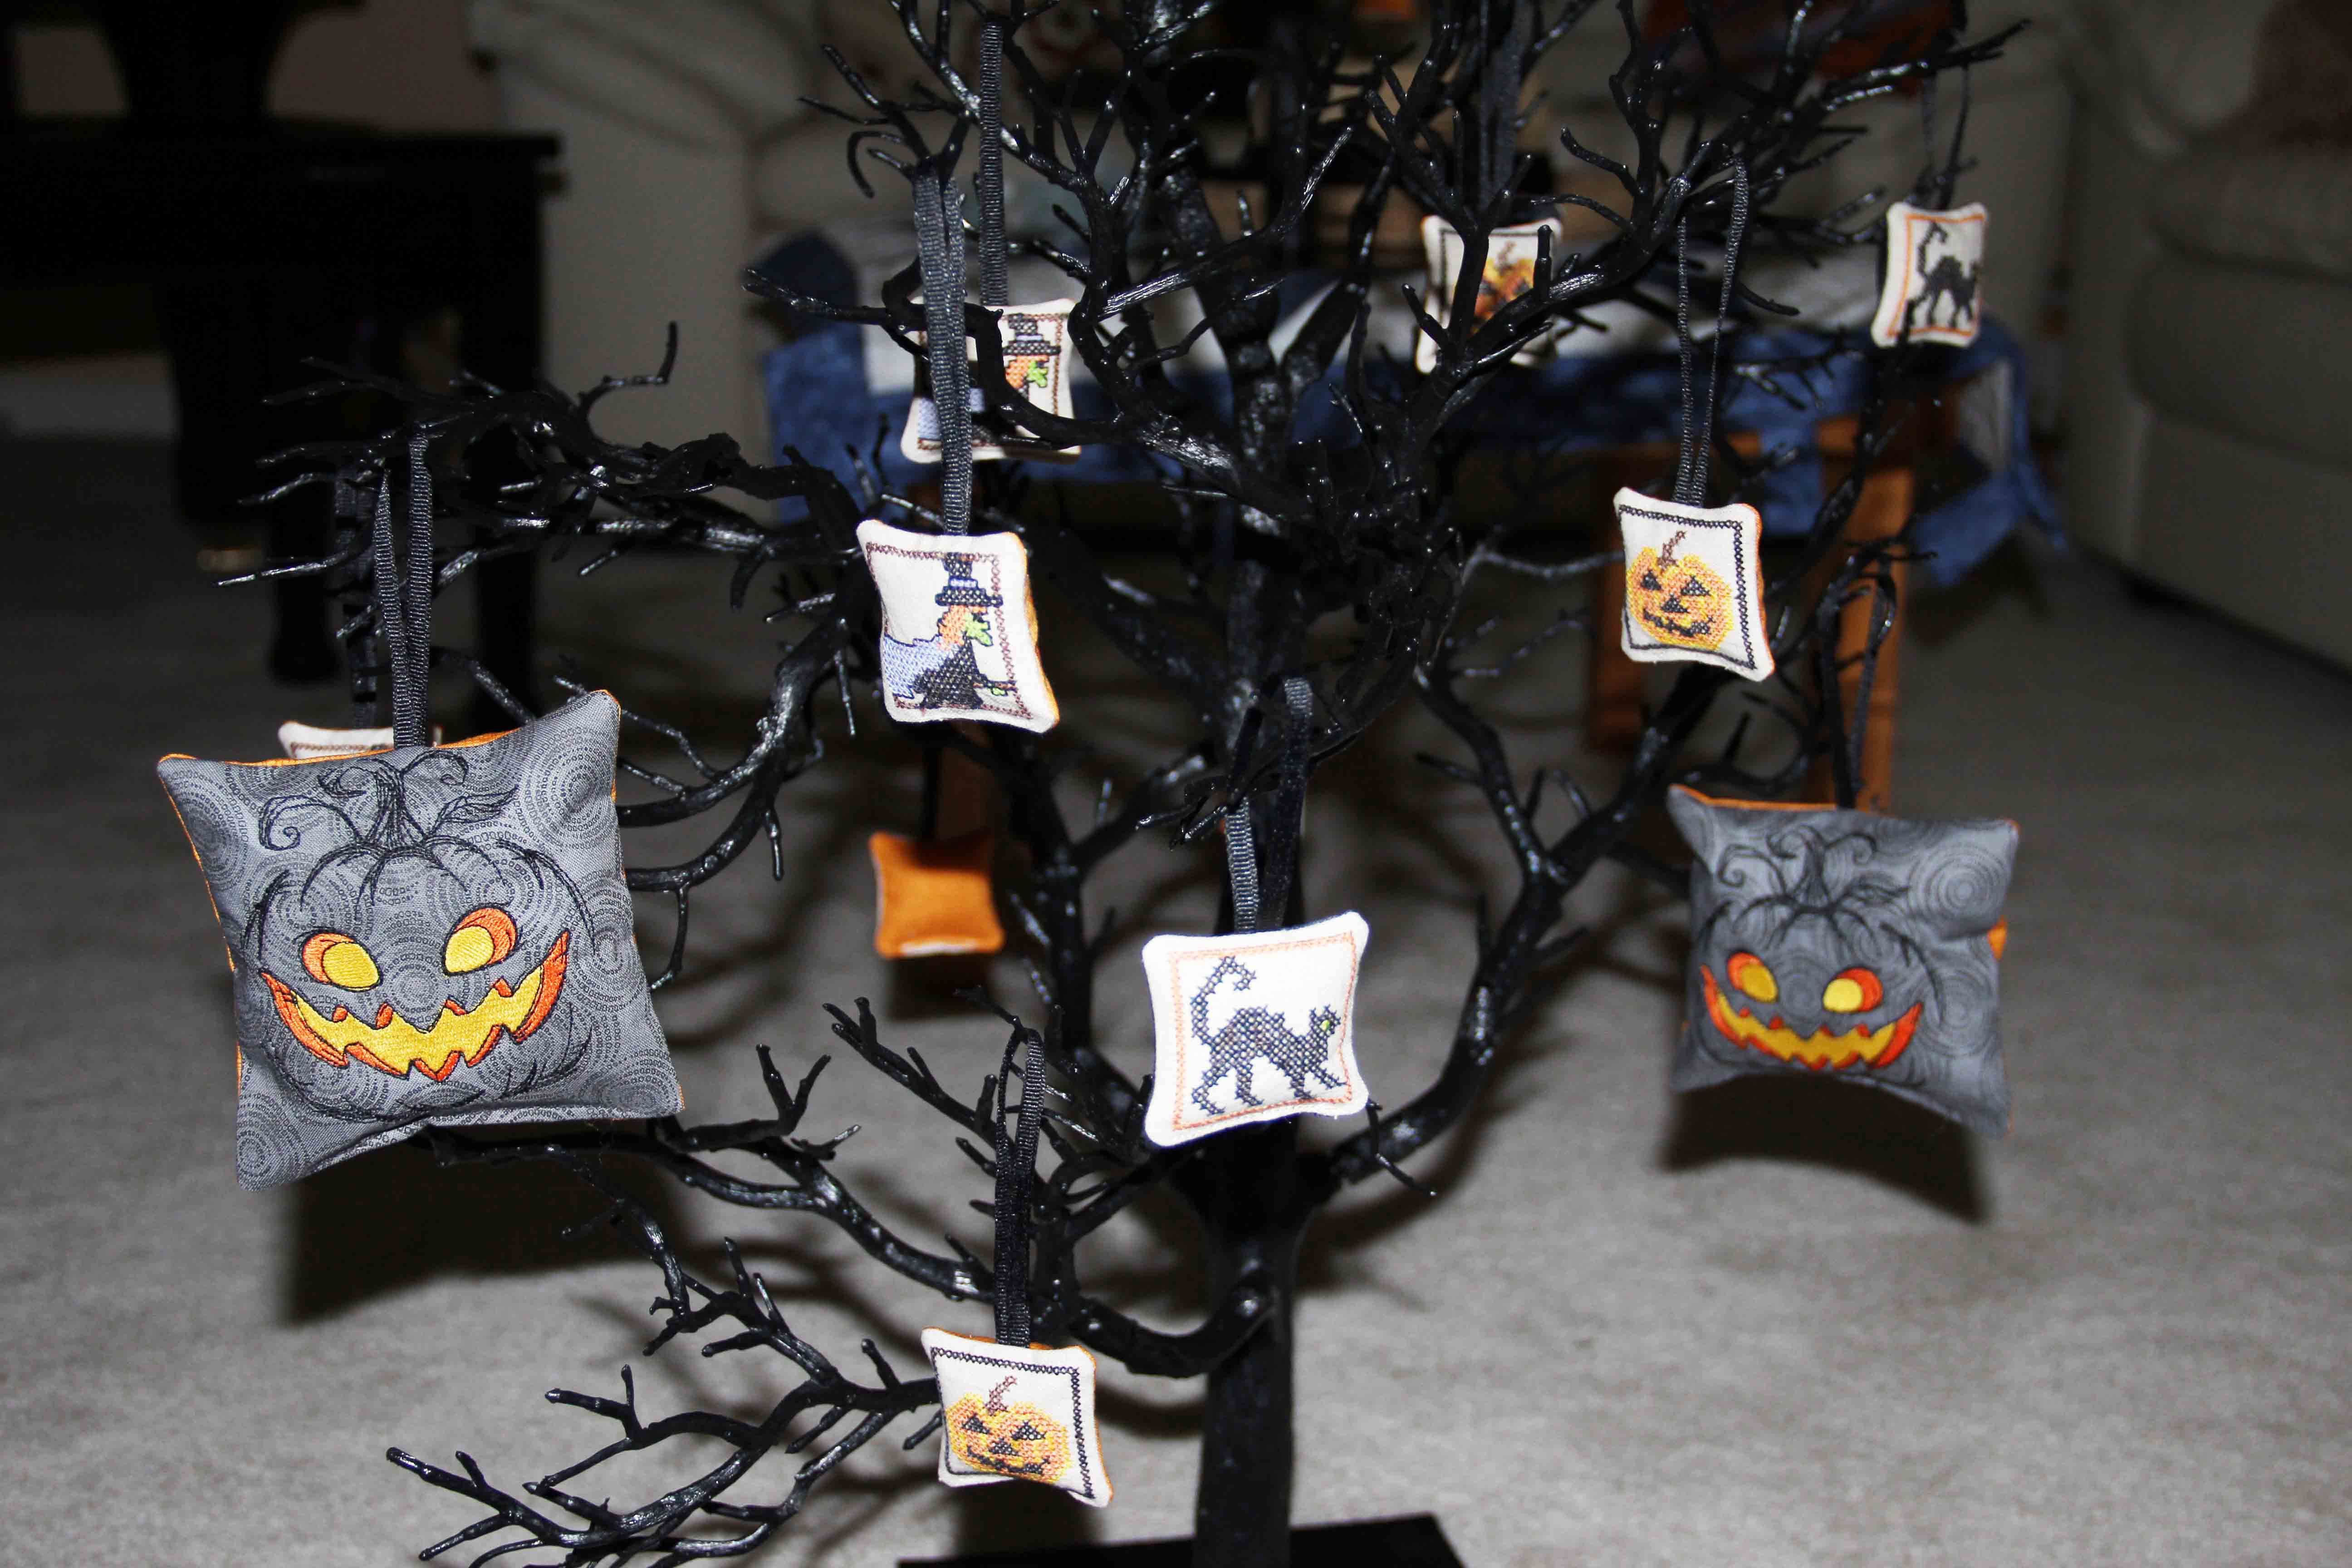
 I bought a cheap Halloween tree for the house and one for the shop…these will be on display for awhile! And if I have time, I’ll make more…it’s a little addictive. And really pretty fast and easy when you make use of technology! Gotta love it.