
So I finally got around to making one of these Sew Together bags. Have you seen them?

Here’s your convenient link to purchase the pattern. Or ask your local quilt store to get it in for you. It’s from a designer named Sew Demented. That should give you a hint.
One blogger noted that everyone wants to receive one as a gift….because no one wants to actually make one.
Here’s the thing. It’s not a difficult bag to make. It’s extremely functional. It just takes a little time and patience and the more varieties of fabric the better.
And all the cool kids are making it.
Take a peek at Pinterest.
 I had never heard of this pattern until I made the sample for our Bernina Software Inspirations class. Turns out the “software” part was the easiest thing to do. (And the embroidery software is optional…you can quilt or just leave the front of your bag plain).
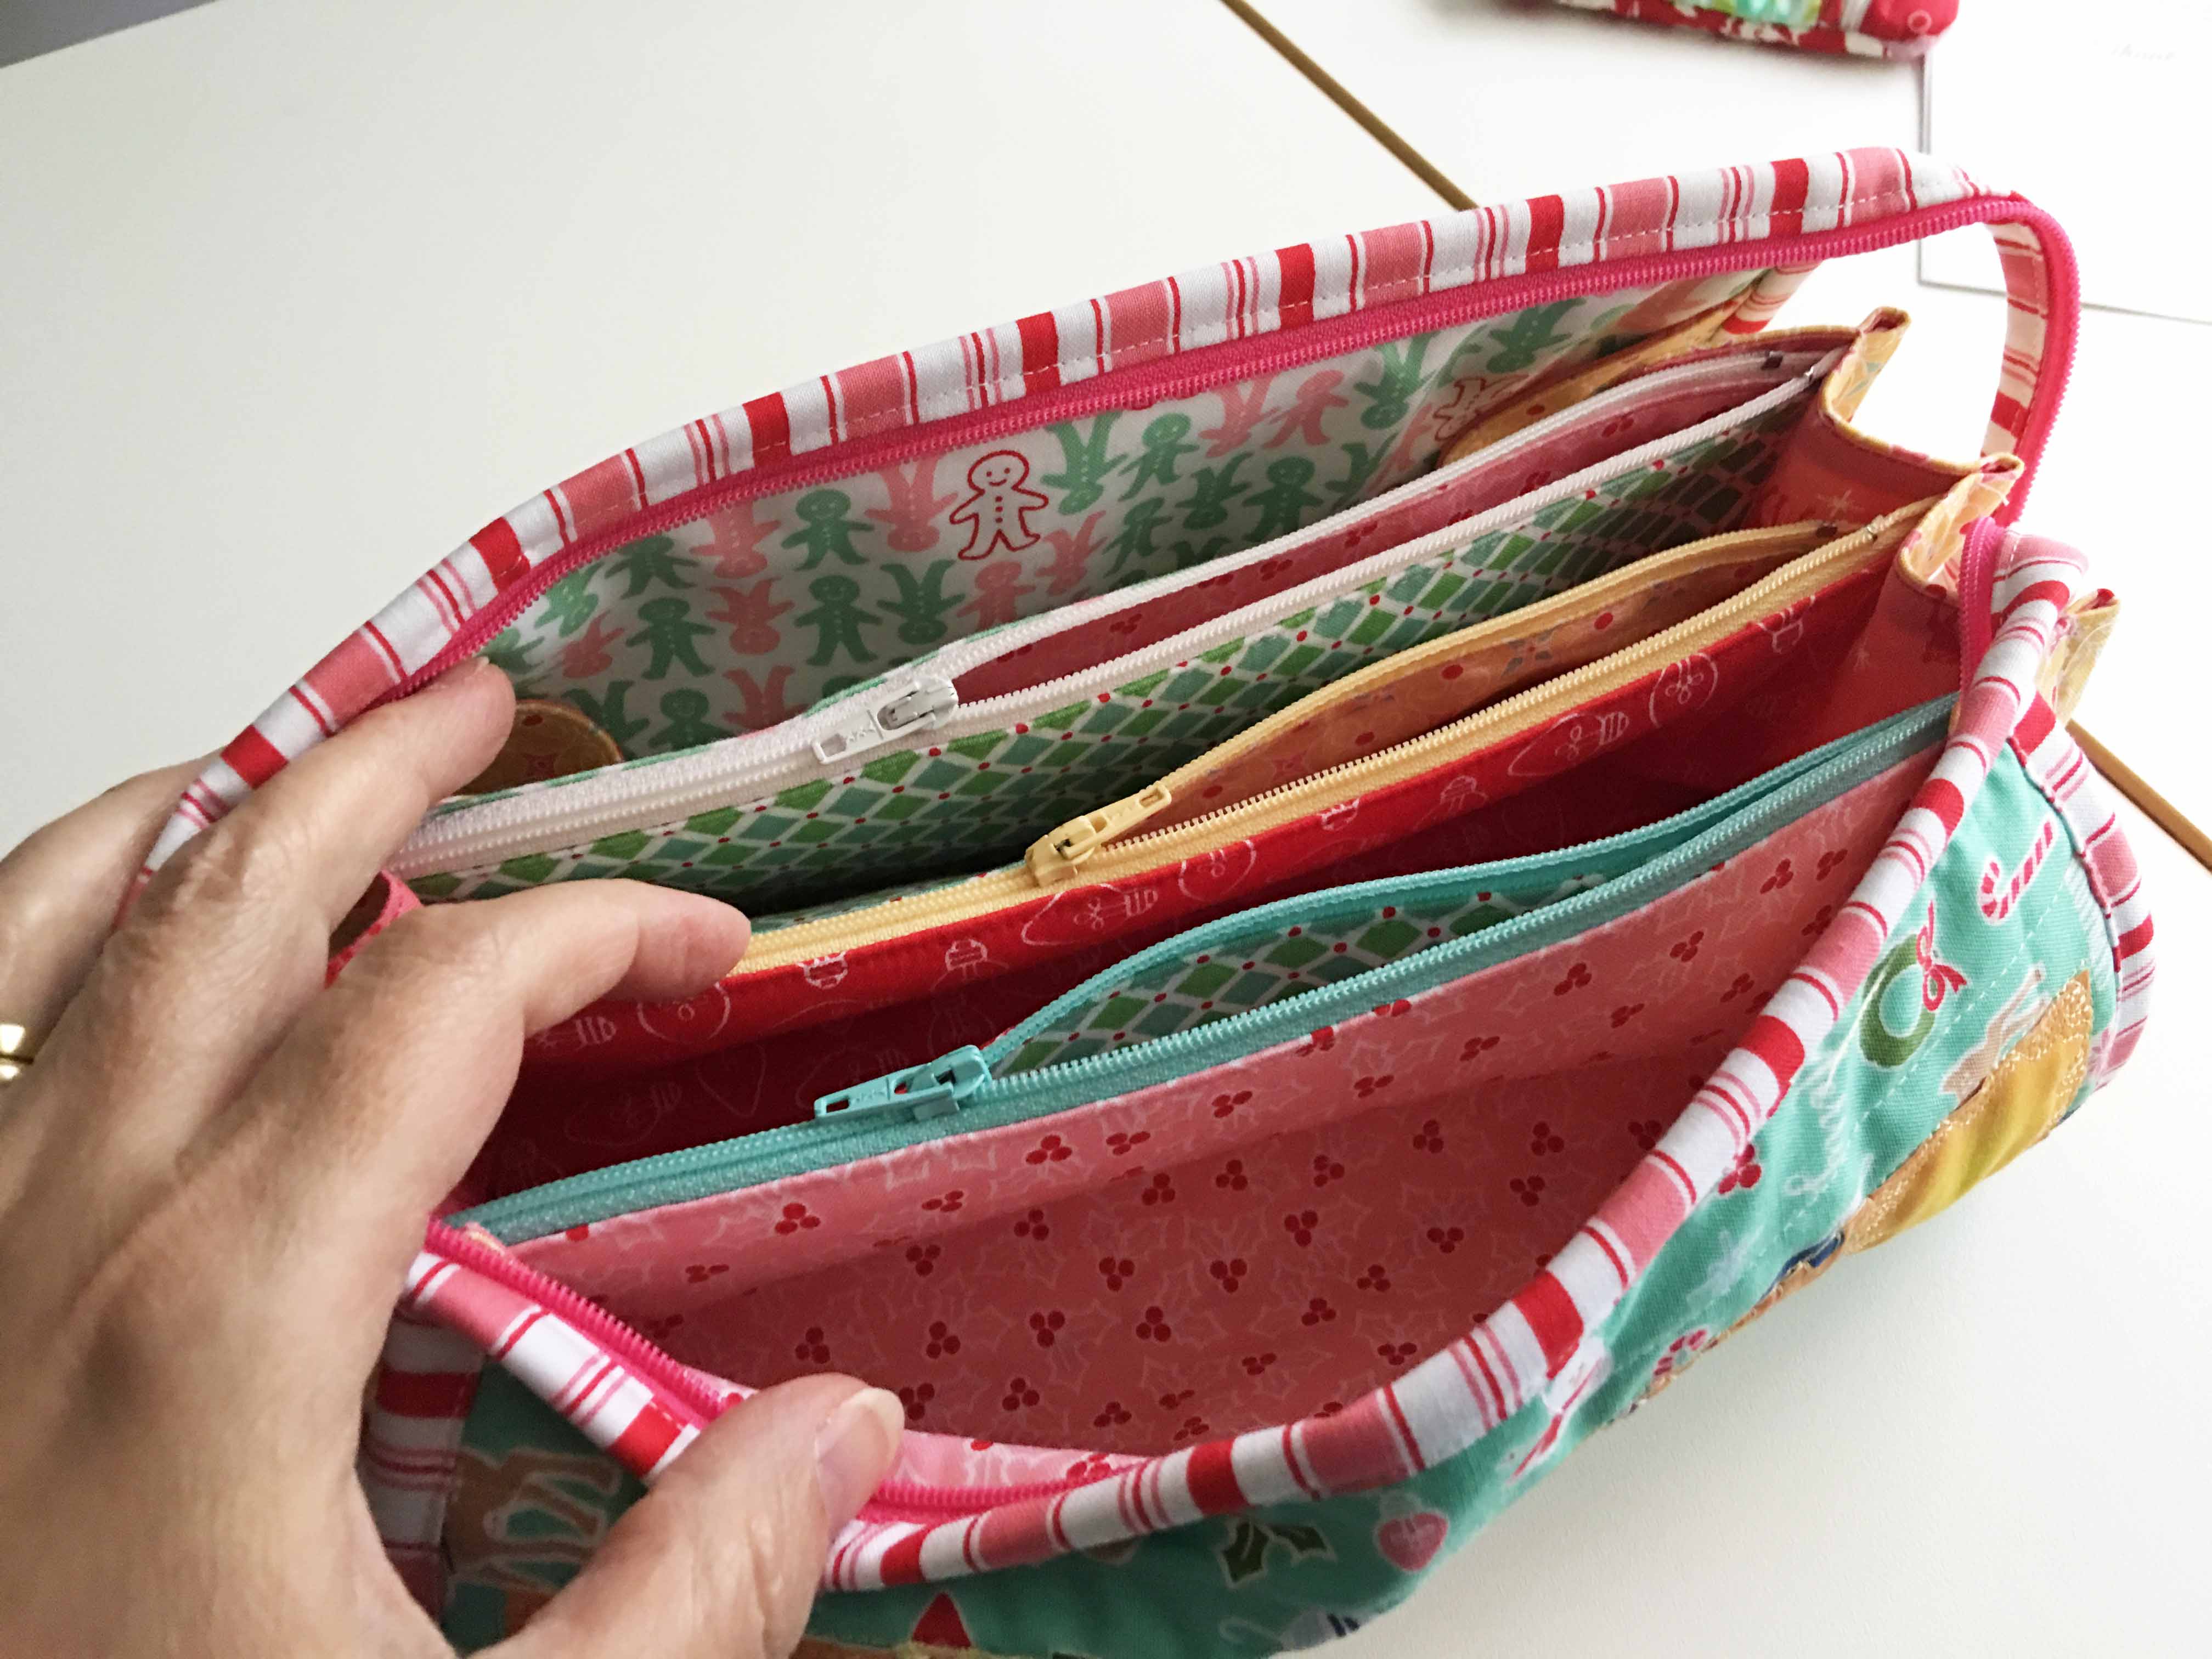
 The idea behind this bag, is that you can carry all your sewing supplies in it and keep things organized. You will see in the pictures that the bag has 3 zipper pouches with pockets in between. If you have a fear of zippers, you will overcome it completely with this bag. In my humble opinion, the hardest part of any bag project is getting everything cut ahead of time. And with this bag, you’ll want to use as many different types of fabric as possible. The fun part is how scrappy and colorful and interesting each one can be.
Grab a fabric line you love and get a bunch of fatquarters from that line. The brighter the better, and a fun binding doesn’t hurt either.
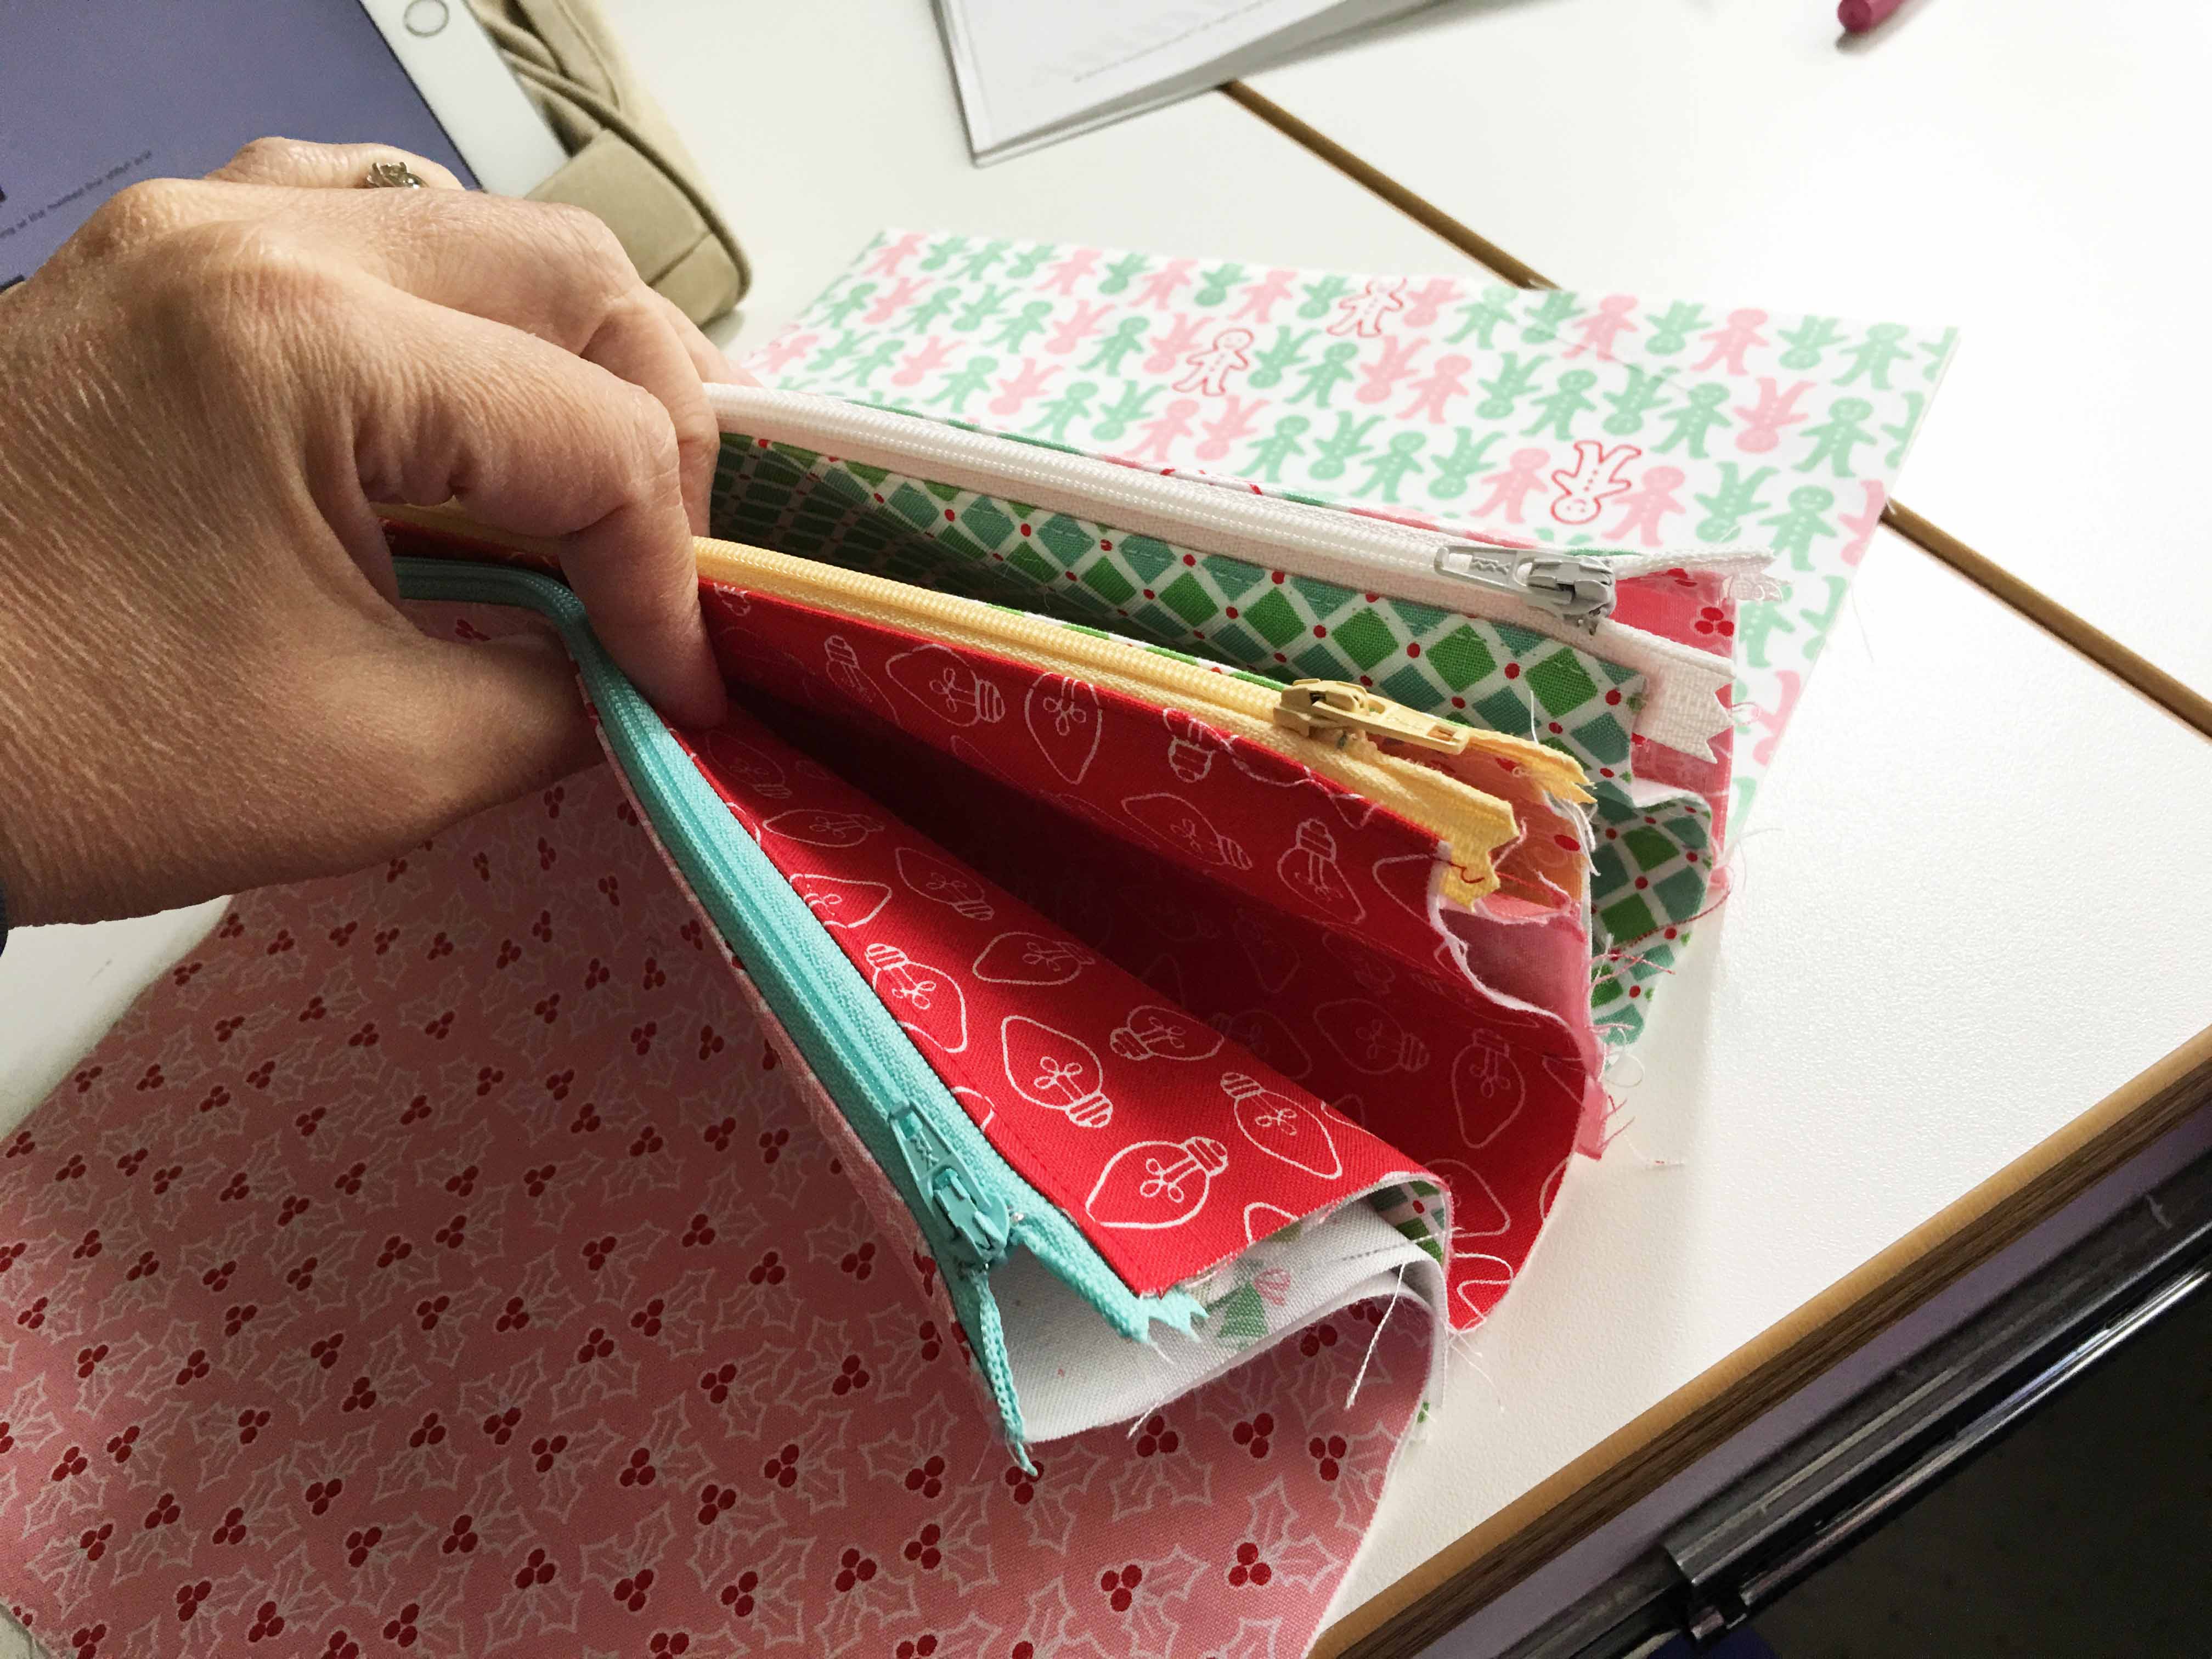 The pattern calls for you to lay your fabrics in order and you install the zippers assembly-line style.
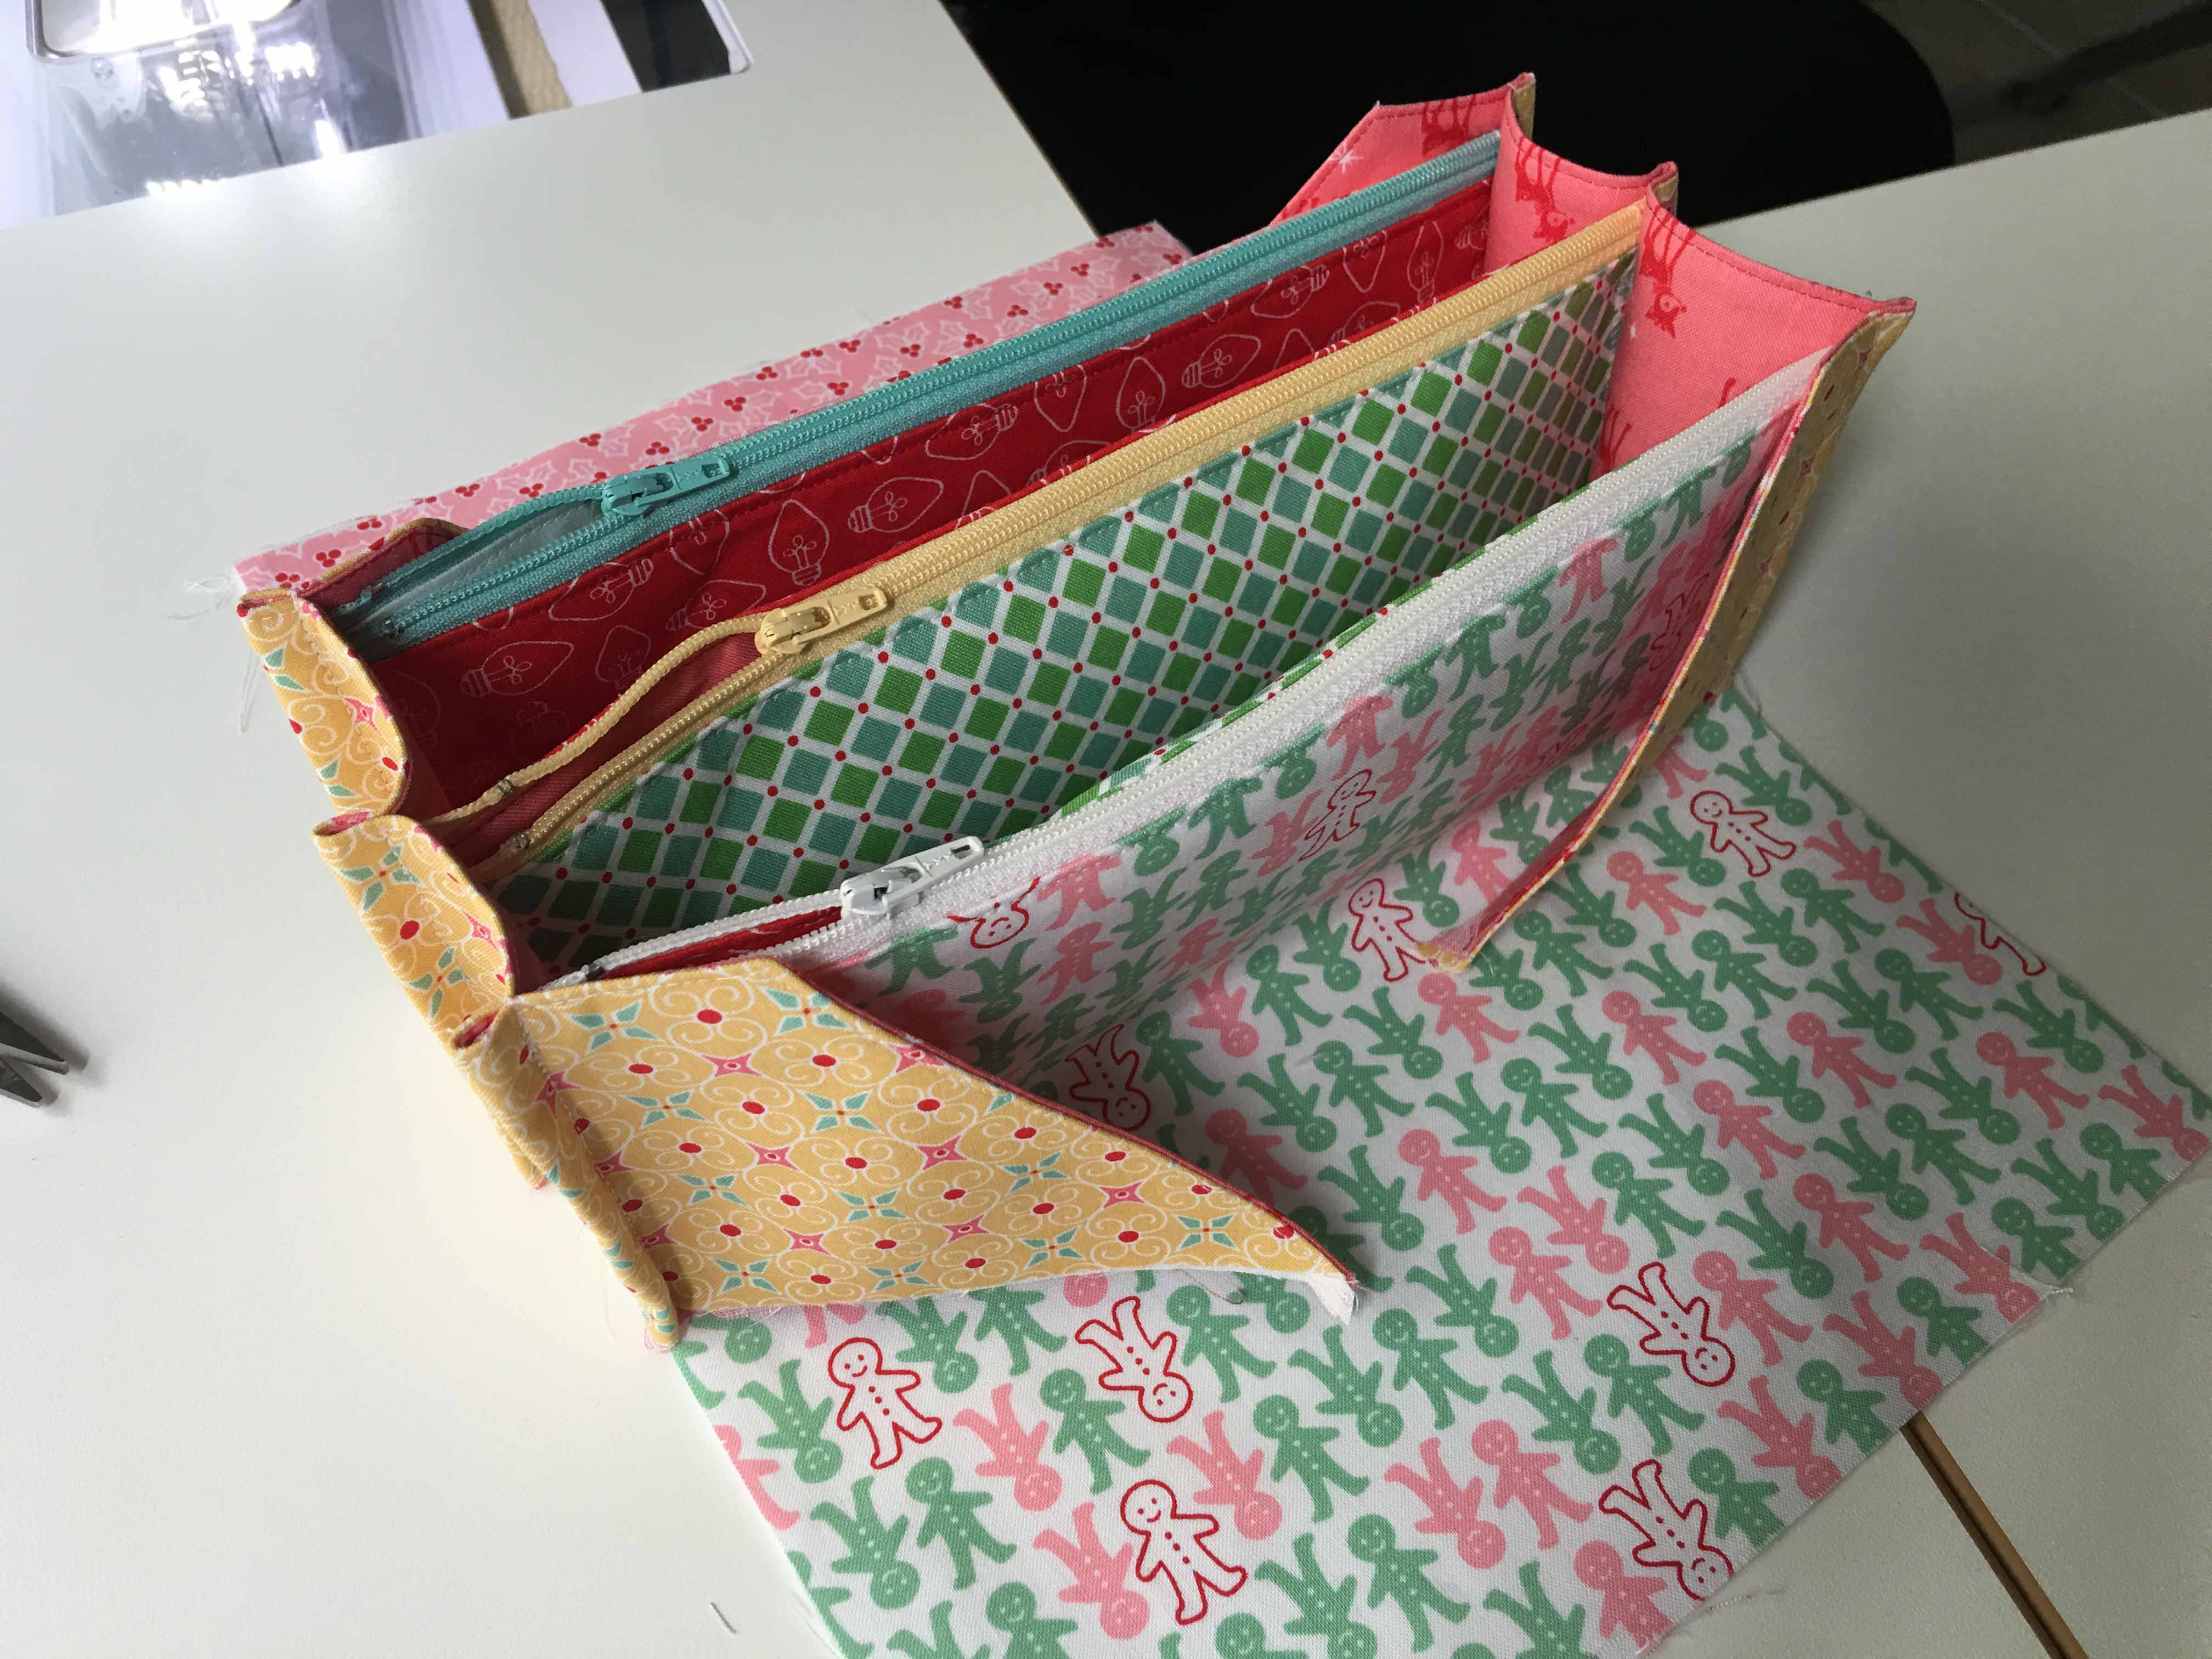 After the zippers, you attach the sides, then the exterior of the bag is attached and binding added all the way around, including the zipper which holds the bag closed. It’s pretty ingenious. Between the instructions and the tutorial, you should have no problems.
I started at 9:30 in the morning, and stopped to shop, get lunch, talk to my son after school, eat dinner….and I finished by 7 pm. The next one would go even faster because I now understand the construction, and wouldn’t have to spend as much time reading.
So go ahead! Step out of your quilting comfort zone and try one of these fun bags.