That’s it. That’s the message. I know it’s no longer October and we’ve moved on from the specific Breast Cancer Awareness Month to the festive Hallmark Channel and holiday activities. But I want to emphasize the message again.
Get your mammograms, ladies.
My sister went in September. They found something and it’s been removed. Just not as easily as we had hoped. Things like this tend to get complicated. But she is past the surgery and doing well. Of course, once she found out, I immediately made an appointment for mine. I got called back…something didn’t look right. After four agonizing days of wondering if I had the same problem, I was able to go back in and they took another picture and all was well. For now. They handed me a chocolate breast cancer ribbon and sent me on my way.
I know you’re all busy. We worry about our cholesterol, our weight, our eyes, our teeth, our hair, our families and their health, and we even worry about the planet.
But we all need to start to prioritize ourselves. It’s not our nature to do that. But I’m learning, especially as I get older, to make the time for myself. I can’t help my family or friends or anyone else if I’m not OK.
You,too. None of us is here forever. But let’s make an effort to be well while we’re here.
I had the opportunity, recently, to spend a little time at Bernina’s Creative Center in Aurora IL. During that time, Phillip Ueltschi, who is the fifth generation of family ownership of Bernina, came in to demonstrate the new line of LauraStar irons and ironing systems.
I thought I would share this with you. I have not had any time to play with these irons although in hearing and reading about them, they sound intriguing. Apparently they use something referred to as “dry steam” which doesn’t leave your clothes or fabrics damp.
The steam also does not burn your fingers or hands. It’s really kind of impressive.
LauraStar is designed in Switzerland (same place that Bernina is headquartered.) They are environmentally conscious and the irons are built to be supported and serviced for a minimum of ten years. Their steam purifies the fibers by killing 99% of germs and bacteria or mold, dust, etc. that can show up in textiles. So while you iron, you are also freshening and purifying your fabric.
As I said, I have not had any time to review these myself, from the perspective of a sewist. A new dawn in pressing and ironing? I don’t know, but it seems to me that the technology for irons hasn’t advanced all that much in the last 25 years. Seems like they’d be able to take advantage of thoughtful engineering and technology, just like every other industry.
I’m including the two brief videos of Phillip demonstrating the system. He did give me permission to put this on the blog…why wouldn’t he?
Have a look. The LauraStar systems will be available at participating Bernina dealerships across the U.S. soon. What do you think?
Once again I heard the expression “glamping.” This time it was referring to a new site in Michigan, called The Fields of Michigan…a blueberry farm that offers luxury tents on their property.
I am not going to judge anyone young enough or adventurous enough to want to spend a few nights outdoors. It can be fun. That has not really been my experience, but, hey, to each his own. For $329 per night, I’ll take the Four Seasons in basically any city or town anywhere.
But in honor of that time of year when people seem to want to celebrate camping, I am re-upping a blog post I wrote several years ago:
When is the last time you thought about where your quilting
stash comes from? Have you ever thought about the process, the transport, the
distribution? How many of us have ever even recognized on a conscious level
that quilt cotton is a plant?
If these questions seem abstruse or even mildly annoying,
you’re not alone. So few people care
about this issue. At least that’s the information I was given when I contacted
some of the largest distributors of quilting fabric around.
Moda told me there’s no market (that’s us) for organic fabric. Oh yes, they had one line of it a while ago and it didn’t sell terribly well, so…they don’t even carry any organic fabric right now. Fatquartershop.com who sells fabric online said they have nothing to do with the content of their products. In their copy on their website, they describe whatever a manufacturer tells them to say, and distribute on demand. Period.
Fabric designers tell me they do not get involved with the
fabric manufacturing process. They
license their designs and have no say in whether their designs are used sustainably/responsibly
or not. This may not be true for all of them, but it’s common practice.
So who makes the determination about whether fabric should be organic or not?
Surprise! It’s you. And me. We are the ones who define this market, and we will have to be the ones to require change.
The question is:
Do you think we need change?
Let’s talk about it a bit.
Because I’m going to make the case that we have no choice but to put
pressure on manufacturers to change their cotton growing processes. And we
might have to start with our local quilt shops.
Here’s why:
–70% of the world’s topsoil is degraded.
–It takes 1,000 years to replace 3 cm of degraded topsoil.
–With current farming practices, all the world’s topsoil will be gone in 60 years.
This is not my opinion.
This information is provided by lengthy studies done by the
Textile Exchange and reported in life cycle analyses done over spans of years.
Without topsoil, the world doesn’t eat, let alone quilt with natural fabrics.
I don’t know about you, but I don’t want to be responsible for
my kids and grandkids being unable to have food and clothing because of my
simplistic, uneducated (and, frankly, selfish) choices.
I’ve seen some people make the case that organic fabric requires more resources.
That is simply not true. Not when using any scientific methodology of measurement. Not when attempting to understand the life cycle of the product. And certainly not when we entertain the implications of the alternative. On the contrary, we now have clear indications that water use on organic farms is far less than traditional practices.
I don’t pretend to understand all of the information on these two charts, but the explanation for them was very clear: Organic farming of cotton greatly reduces water and other energy consumption, and continuing on our current trajectory is simply not sustainable.
Here is where we encounter the power of market forces.
You and I can demand that things change. Manufacturers, distributors and farmers, all have little reason to improve their processes. Inertia and monetary fears will keep them all from advancing to more sustainable processes.
But the science tells us that we will pay a price one way or another. As consumers, we either start demanding organic cotton now, or we will not likely have access to any at all in the future. The choice is that simple and that stark.
But I’m just one person.
What can I do?
-Ask your local quilt shop to carry organic cotton. Be assertive. Those designers that you love? Their designs can be made on organic cotton. But folks like Moda (who is a HUGE distributor of fabric) think you don’t care. I’m telling you it’s time to care and care deeply.
—Contact folks like Moda directly: marketing@modafabrics.com and let them know about your concerns.
–Do your own research. Here are a few links to explore:
Folks like Wrangler, H & M and Nike are starting to recognize that their own businesses will not be around if they don’t educate consumers on organic products, and make the industry more sustainable.
The organic cotton industry has increased by 11% in the US from 2016 to 2018. But that’s not enough. Where does our quilt cotton come from? India? China? the US?
I don’t have all the answers. But I will continue to follow up. In the meantime, I will continue to work down my stash of fabric, and I plan on only purchasing organic fabric in the future. This is a statement I can only make because I’ve done a bit of homework on this and believe it is the best path for me.
I’ll be exploring more of the current manufacturers soon. The good news is that there ARE organic quilt fabrics out there. We just aren’t aware of them.
I leave you today with a current picture of my own garden out back. Our Midwestern loam is the finest on the planet. Everything grows here. But we need to be responsible stewards of the land, of our money and of our resources.
Not just the ones who had children at a very young age, but also now those who had them at a normal or not-so-very-young age.
I first started quilting in my twenties when all my friends had babies. I made dozens and dozens of flannel baby quilts, most of them hand-tied and filled with the fluffiest polyester money could buy. The parents and kids loved them.
I moved on to more traditional quilting, took classes, and eventually started teaching. But I never forgot how I got started.
Babies.
These days, I’m doing a lot on diapers and onesies. It took some experimenting, but I have found the best methodology.
Keep it simple.
Onesies absolutely do not support a whole lot of stitches. Even some fonts are iffy, depending on the number and size of the satin stitches.
Use two layers of polymesh stabilizer.
I use OESD cutaway polymesh. I experimented with one layer and just didn’t think it was enough. Depending on your design, you may even want three layers. A traditional cutaway adds way too much bulk and stiffness, so go with a polymesh. I also tried fusible, but that distorted the look of the onesie. I’m not a fan of 505 spray so I don’t use it when hooping.
Use a ball point needle.
If you’re familiar with embroidering on knits, you already know this. But if you usually embroider on quilt cotton, it’s easy to forget to change out the needle. Onesies are very stretchy and the fabric really separates when you use a ball point or “jersey” needle. It makes a difference in the longevity of the embroidery, because a ball point separates the threads of the fabric instead of cutting right through them.
Washing Instructions.
I use rayon thread (Isacord) which is bleachable and holds up well when washed. I throw onesies right into the washer and dryer…even in hot water and high settings.
The fabric, 100% cotton, always shrinks a bit. And the embroidery may curl because of that. The best way to fix this is to lay a towel on your ironing board, and lay the onesie face down against the towel — with the embroidery against the towel. Iron the back of the onesie without steam until everything is laying flat again. No problem.
I sew on a Bernina and you can see that with their free arm, it’s really easy to stitch on a onesie without a lot of pinning, clipping and gyrations to keep the back out of the way.
Finally, use a 9 month size or larger.
Maybe it’s possible, but I never attempt to embroider a newborn or 3 month size. I just don’t see how I can stretch it enough around the hoop. I’d have to switch to the very smallest hoop which has a tiny field of embroidery. Most of the onesies I’ve done are size 12 month. They still look relatively small, and get smaller after washing. But they are large enough to work on comfortably.
Sending love and blessings to all my friends and co-workers and friends of friends and co-workers who are keeping the earth populated. There’s really nothing quite like participating in the ritual of welcoming the very newest generation.
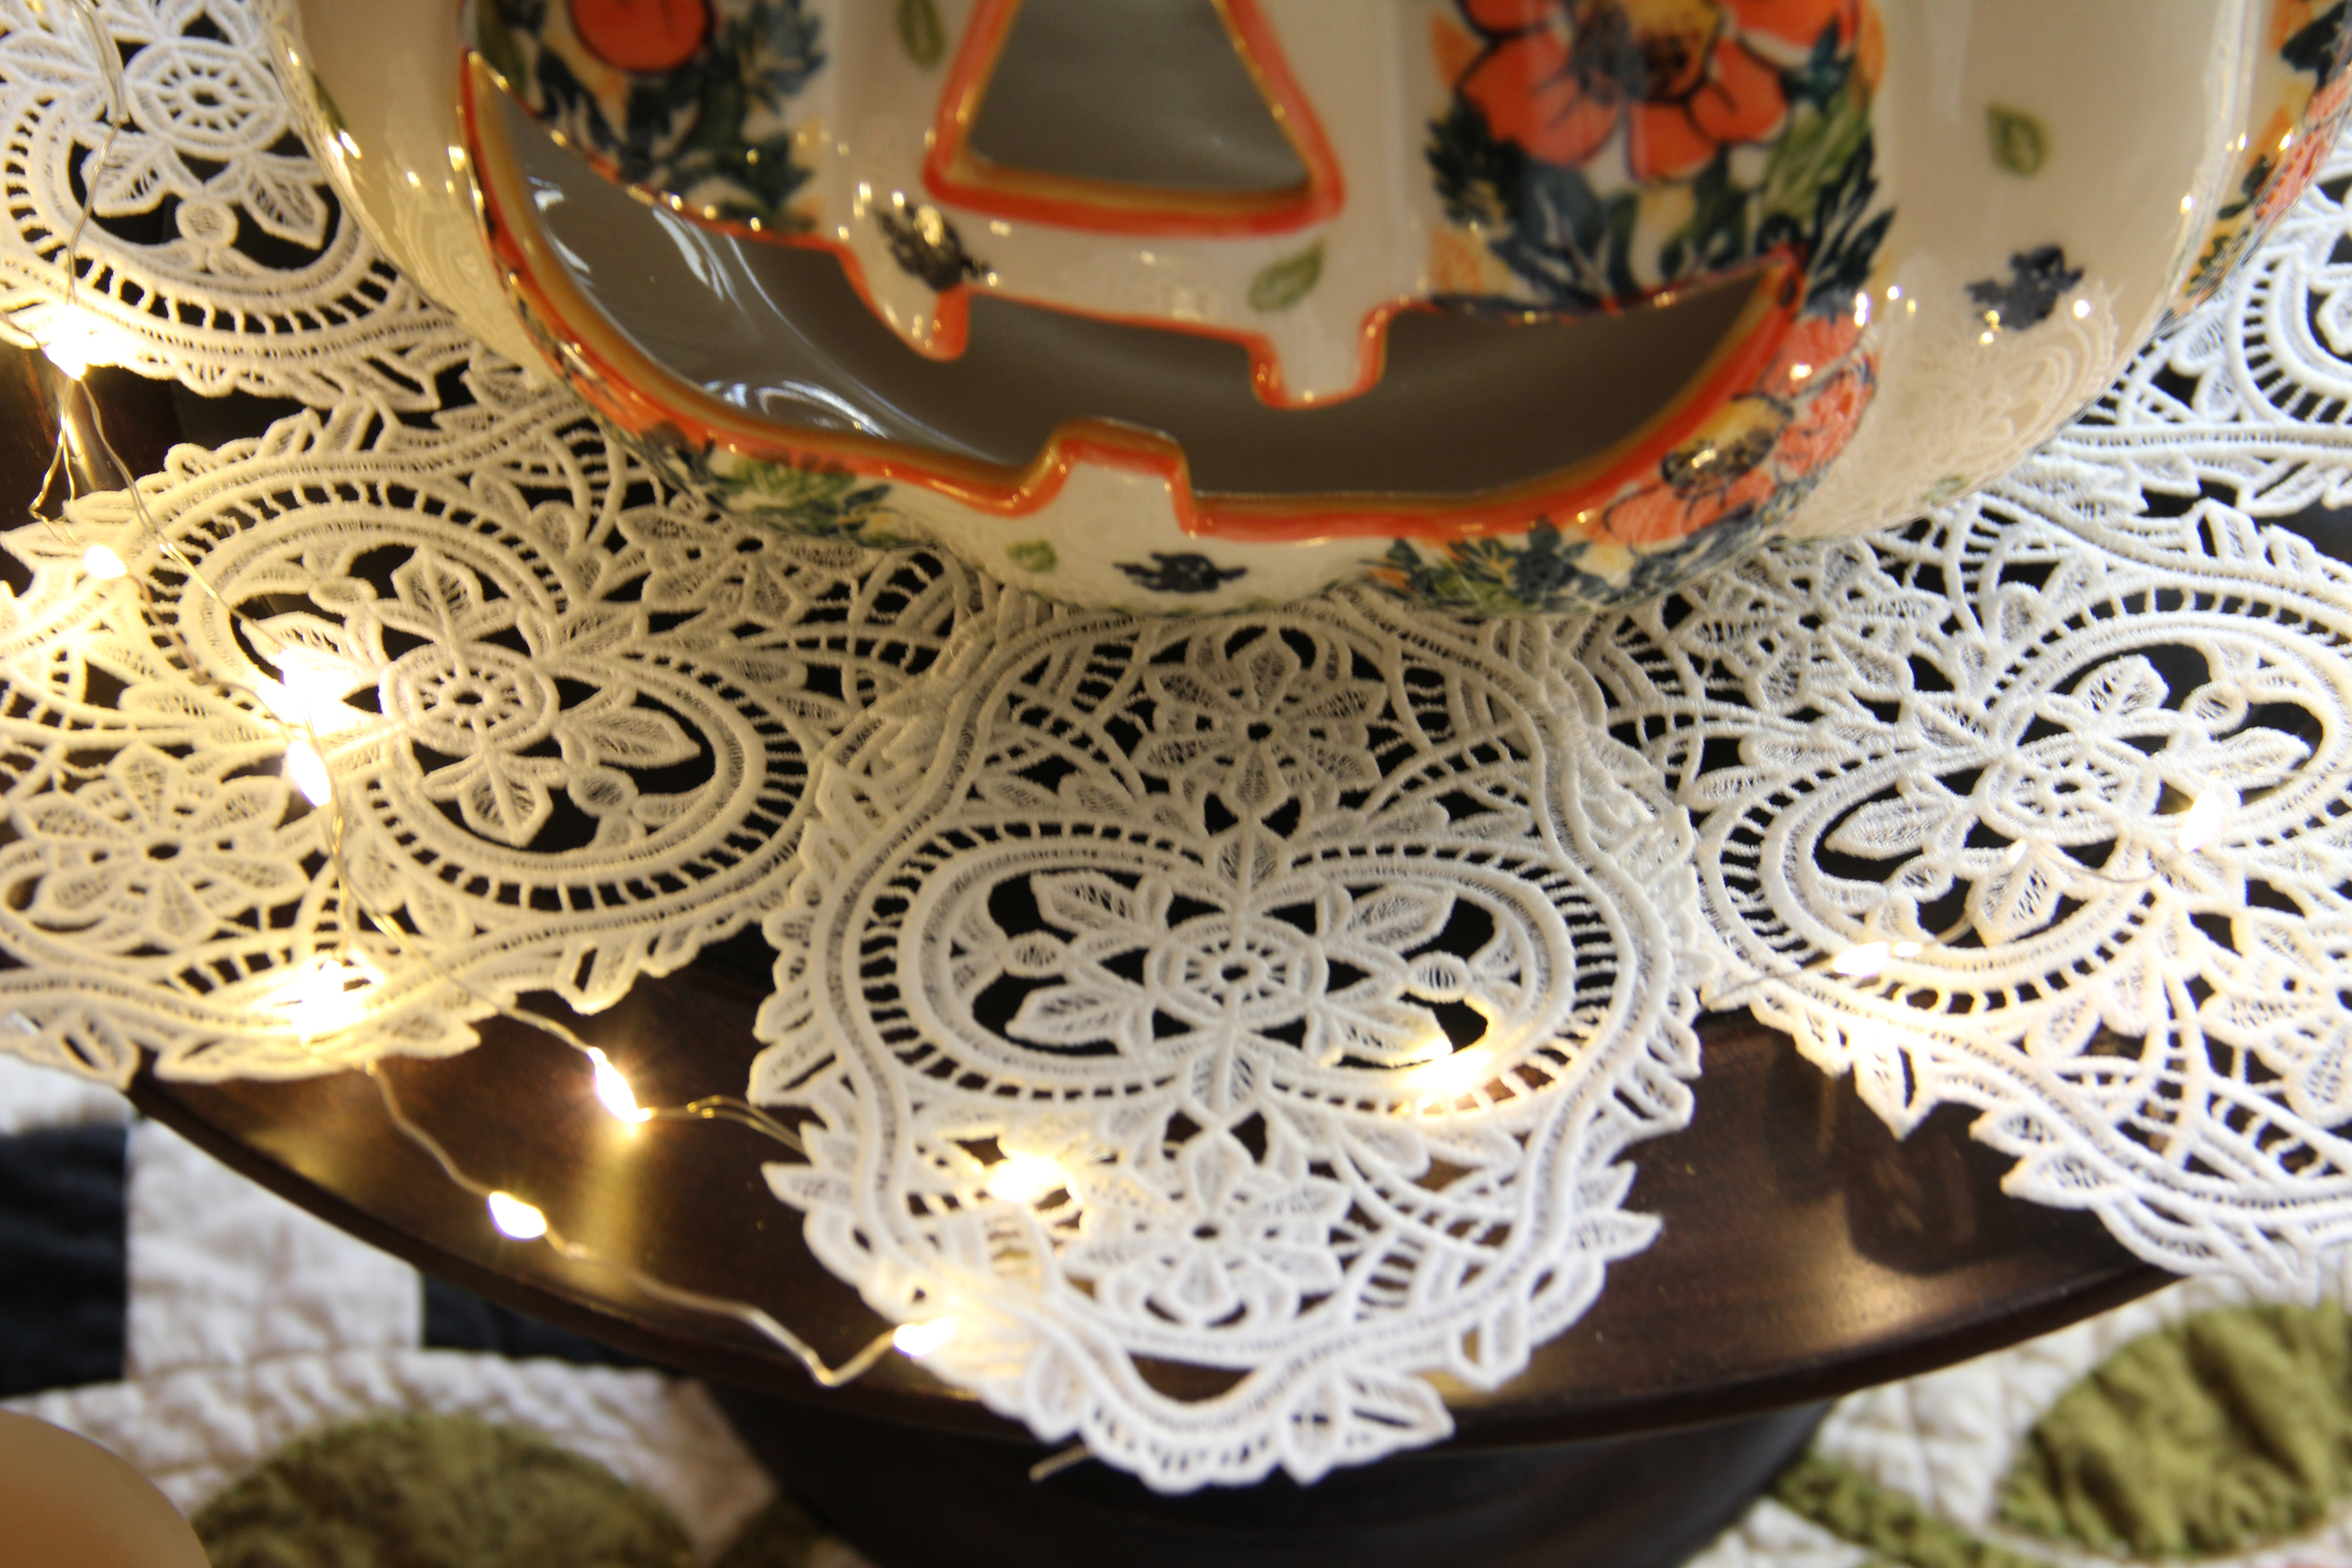
Machine embroidery has so many uses, but the one I’ve been dabbling in the most lately is freestanding lace. I’ve blogged about it a few times in the past. You can read those posts here and here.
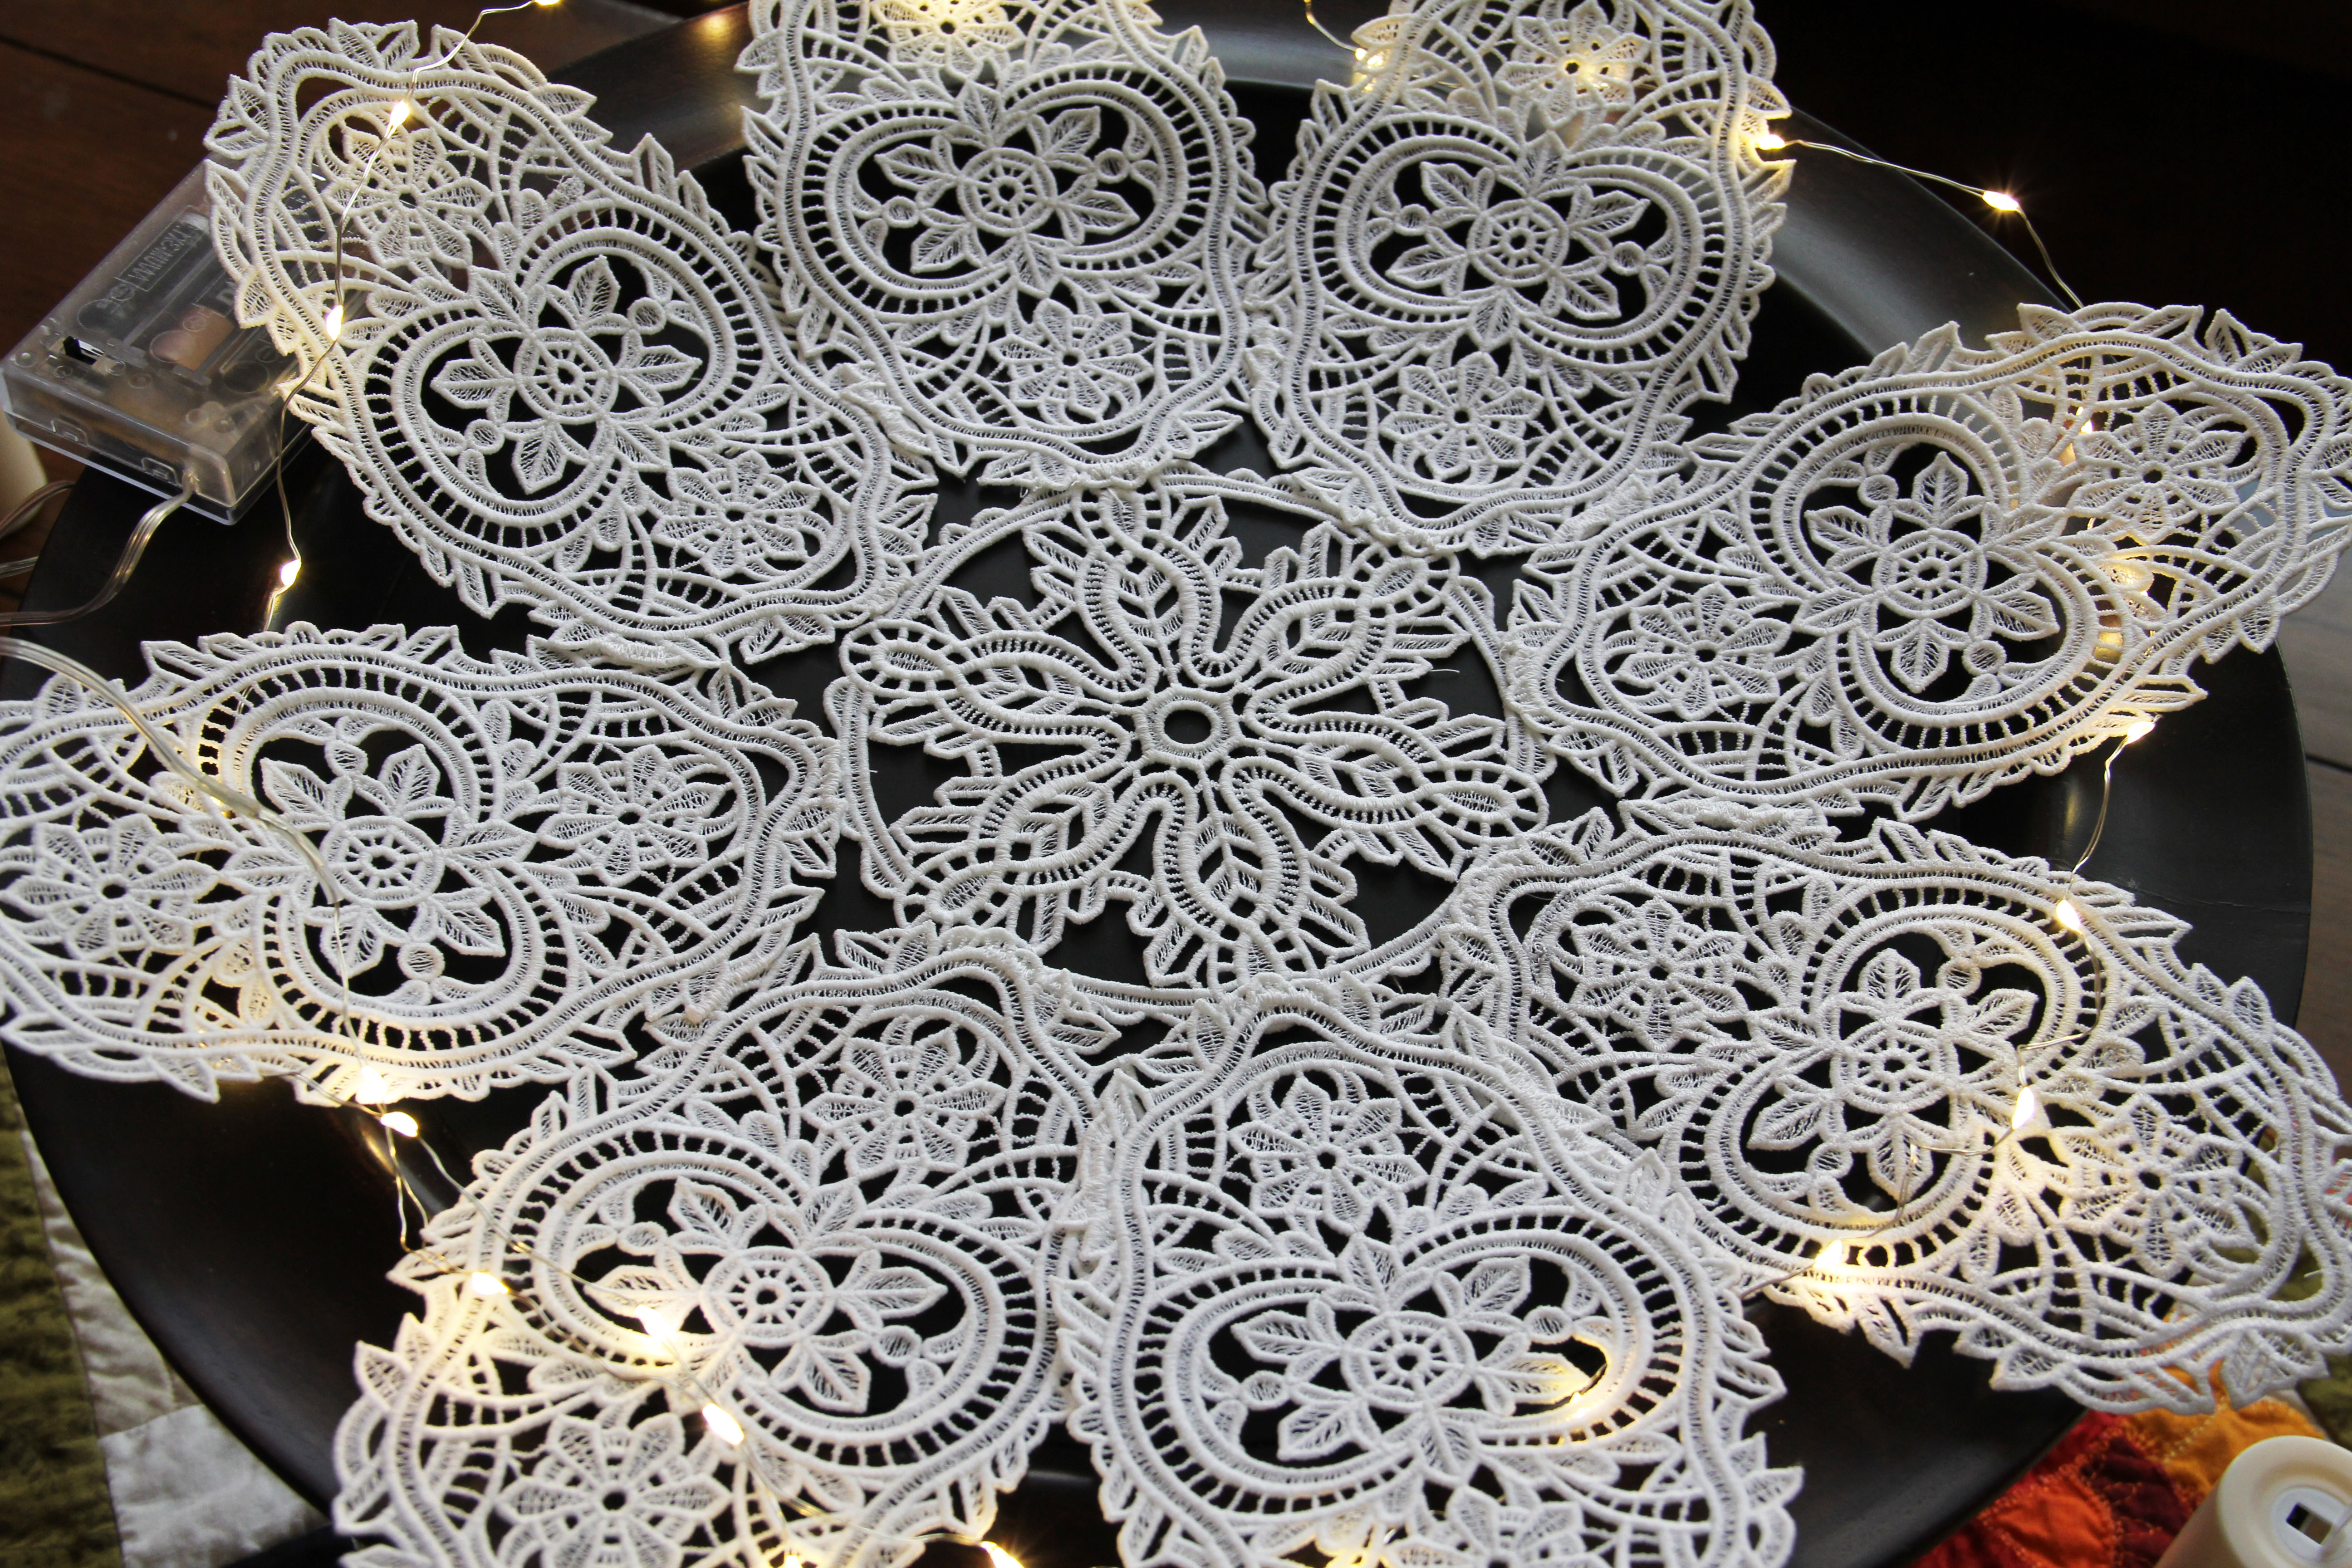
Lately, I tried something new and I wasn’t sure how it would turn out. I took a simple lace embroidery, meant to be a small doily.
Then I stitched a number of them together after creating a design in software to see what it might look like.
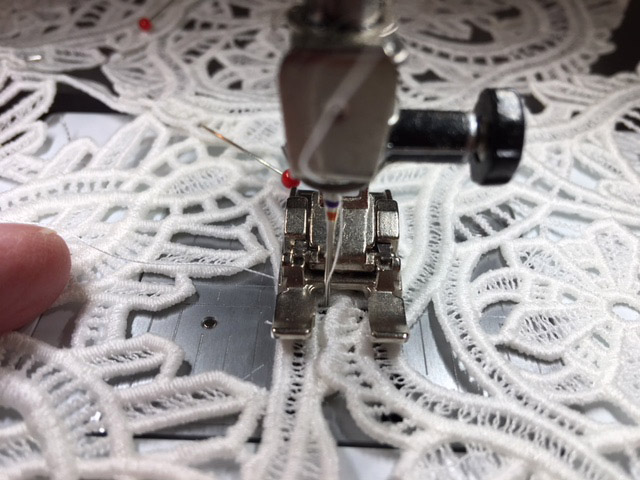
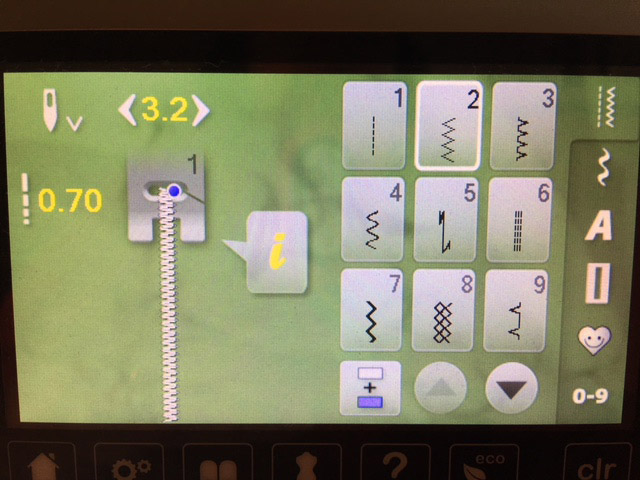
All you have to do is use a simple zigzag with an open-toed foot on your machine.
Just pin the multiple pieces together and sew the zigzag in various points to hold it together.
Keep the zigzag stitch narrow and tight, and it will be hardly visible on the finished piece. I went forward and back-stitched, just to make sure it would not unravel.
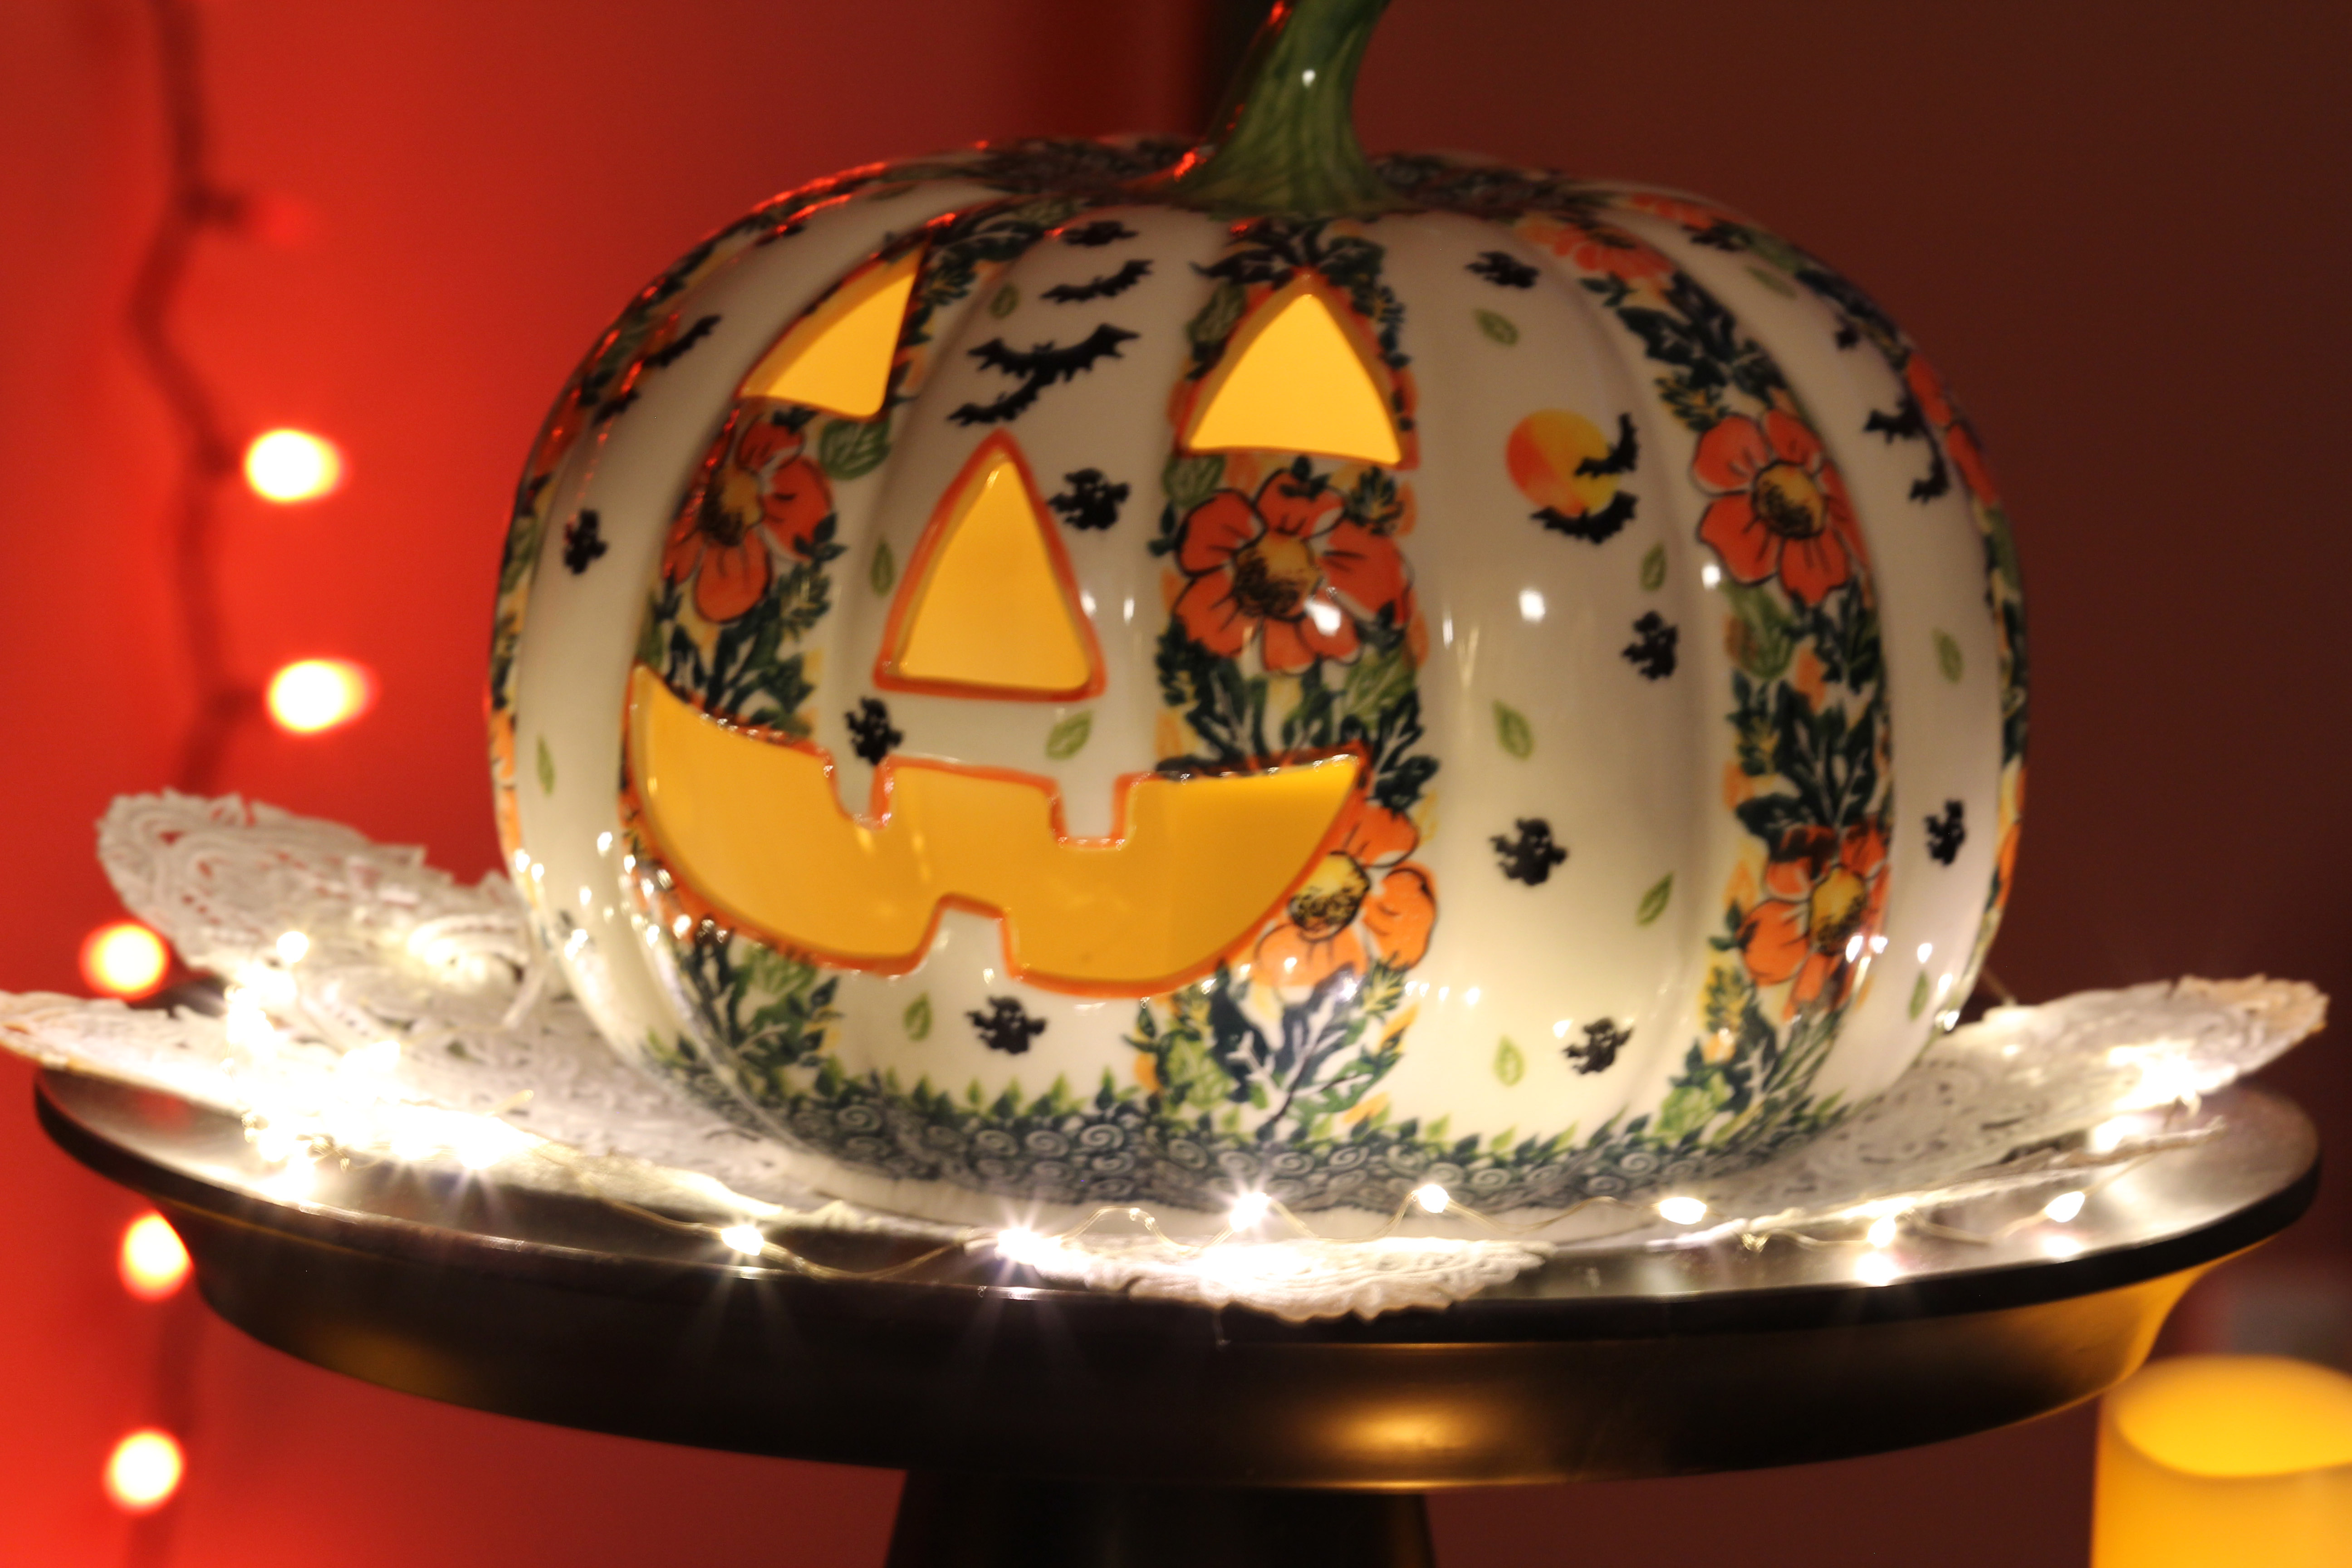
The finished product turned out better than I had expected.
While I am using it now for Halloween, it obviously will be gorgeous for the holidays, as well.
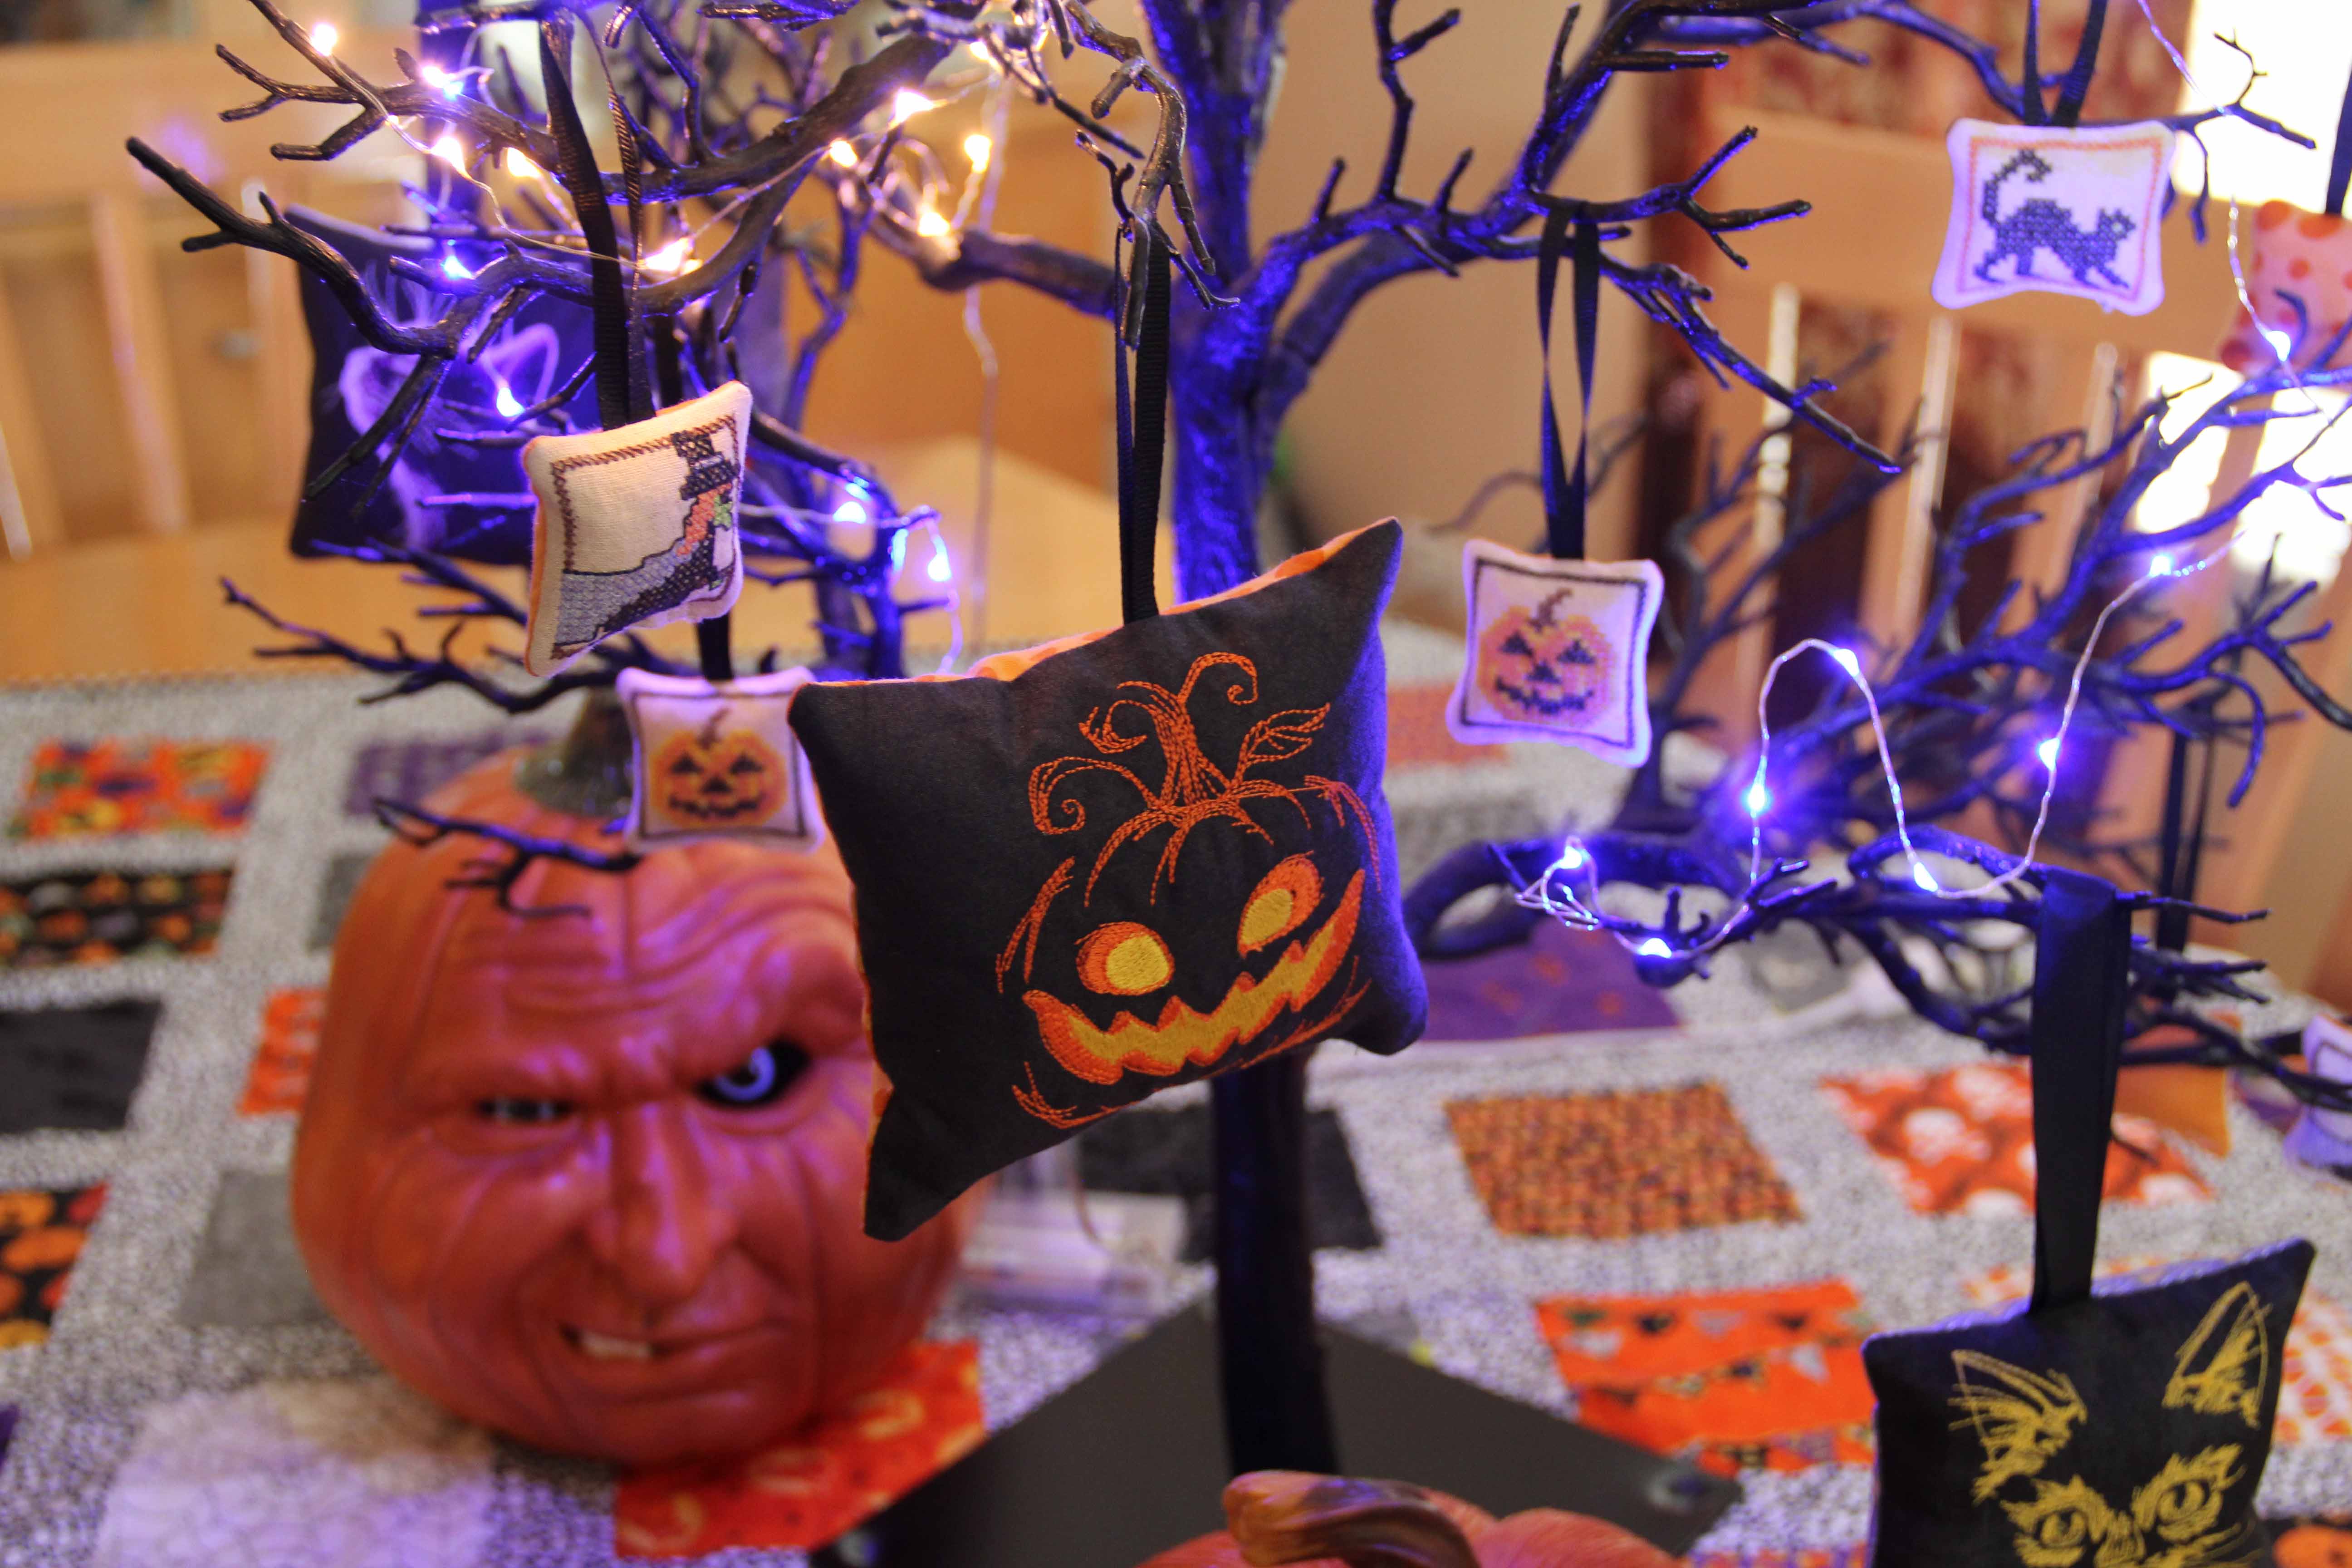
I also have to admit that I am in love with these tiny LED lights, lit by battery packs. Of course, they cannot stay on all evening as my orange lights do around the fireplace, but the teensy ones on the Halloween tree and surrounding this ceramic pumpkin are just perfect.
Like those ornaments? I’ve made them over the past couple of years in machine embroidery. You can search “Halloween” on my site or view one of the posts right here.
I hope I have inspired you to make more use of your machine embroidery. It’s fun and festive and the ideas are endless.
I know. You’re a quilter. Or maybe you enjoy machine embroidery. You don’t need a serger to have a happy life.
But I’m here to tell you that you can use it in many useful ways, even if you think you won’t. If you never want to have one, that’s OK. But let me try to persuade you just a little.
Why You (Might) Need a Serger:
To make quilt backs. I use my serger all the time for this simple reason. It is the fastest machine to do a very straight and very sturdy stitch on long pieces of fabric. Afterward, I just iron the serged edge to one side. This is especially helpful when the back of the quilt is rather scrappy and I am assembling multiple pieces. Just keep your edges straight, and off you go. Easy peasy.
To make duvet covers. You may or may not want to do this, but I use a nice comforter on my bed that needs a duvet. I always make my own, never purchase one. I piece them together just like quilt backs. Usually I have one print on one side and another print on the other, so when I flip the comforter I get a contrasting, yet coordinating look.
Curtains and valances. This is the very best way to make things for the home. I have different valances for different seasons in my kitchen. They get lots of washing and re-hanging over the course of the years. They have to be able to withstand all of that and a serger keeps the raw edges from unraveling. Of course, the edges that you will see are turned under but seams and ruffles really last with a serger.
Pillow cases. I use the easiest pattern for pillow cases ever (not the burrito style–google it if you don’t know about that.) The Ready Set Serge is great for simple serger ideas and I have used a number of her patterns over and over and over again.
Garments. This one is a no-brainer, but if you’ve never sewn garments, it may not be obvious to you. It’s the best way to give your sewing a finished look without elaborate things like french seams or other couture techniques. This is the tool for quilters who occasionally sew a garment.
Knits and any stretchy fabric. Sergers were designed for this. They can pound through sweatshirt fabric like nothing else. Leggings? Bathing suits? Stretchy fabric for a skirt? All perfect on a serger.
Simple bags. With the onset of the “bring-your-own-bag” movement, I have often found myself using leftover fabric (sometimes not-so-leftover fabric) as grocery bags, farmer’s market bags and carry-alls. I prefer cloth bags to anything else because I can throw them in the washing machine…and often do. The finished serged edges keep them from fraying and they withstand wash after wash.
I hope this persuades you to think again about a serger. I know that for folks who do more garment sewing than I, the serger is priceless. But even as someone who is mostly a quilter and machine embroiderer, I find that the serger is the perfect complement to my sewing.
And here’s the thing. Once you have one, and learn to use it, you won’t know how you ever did without.
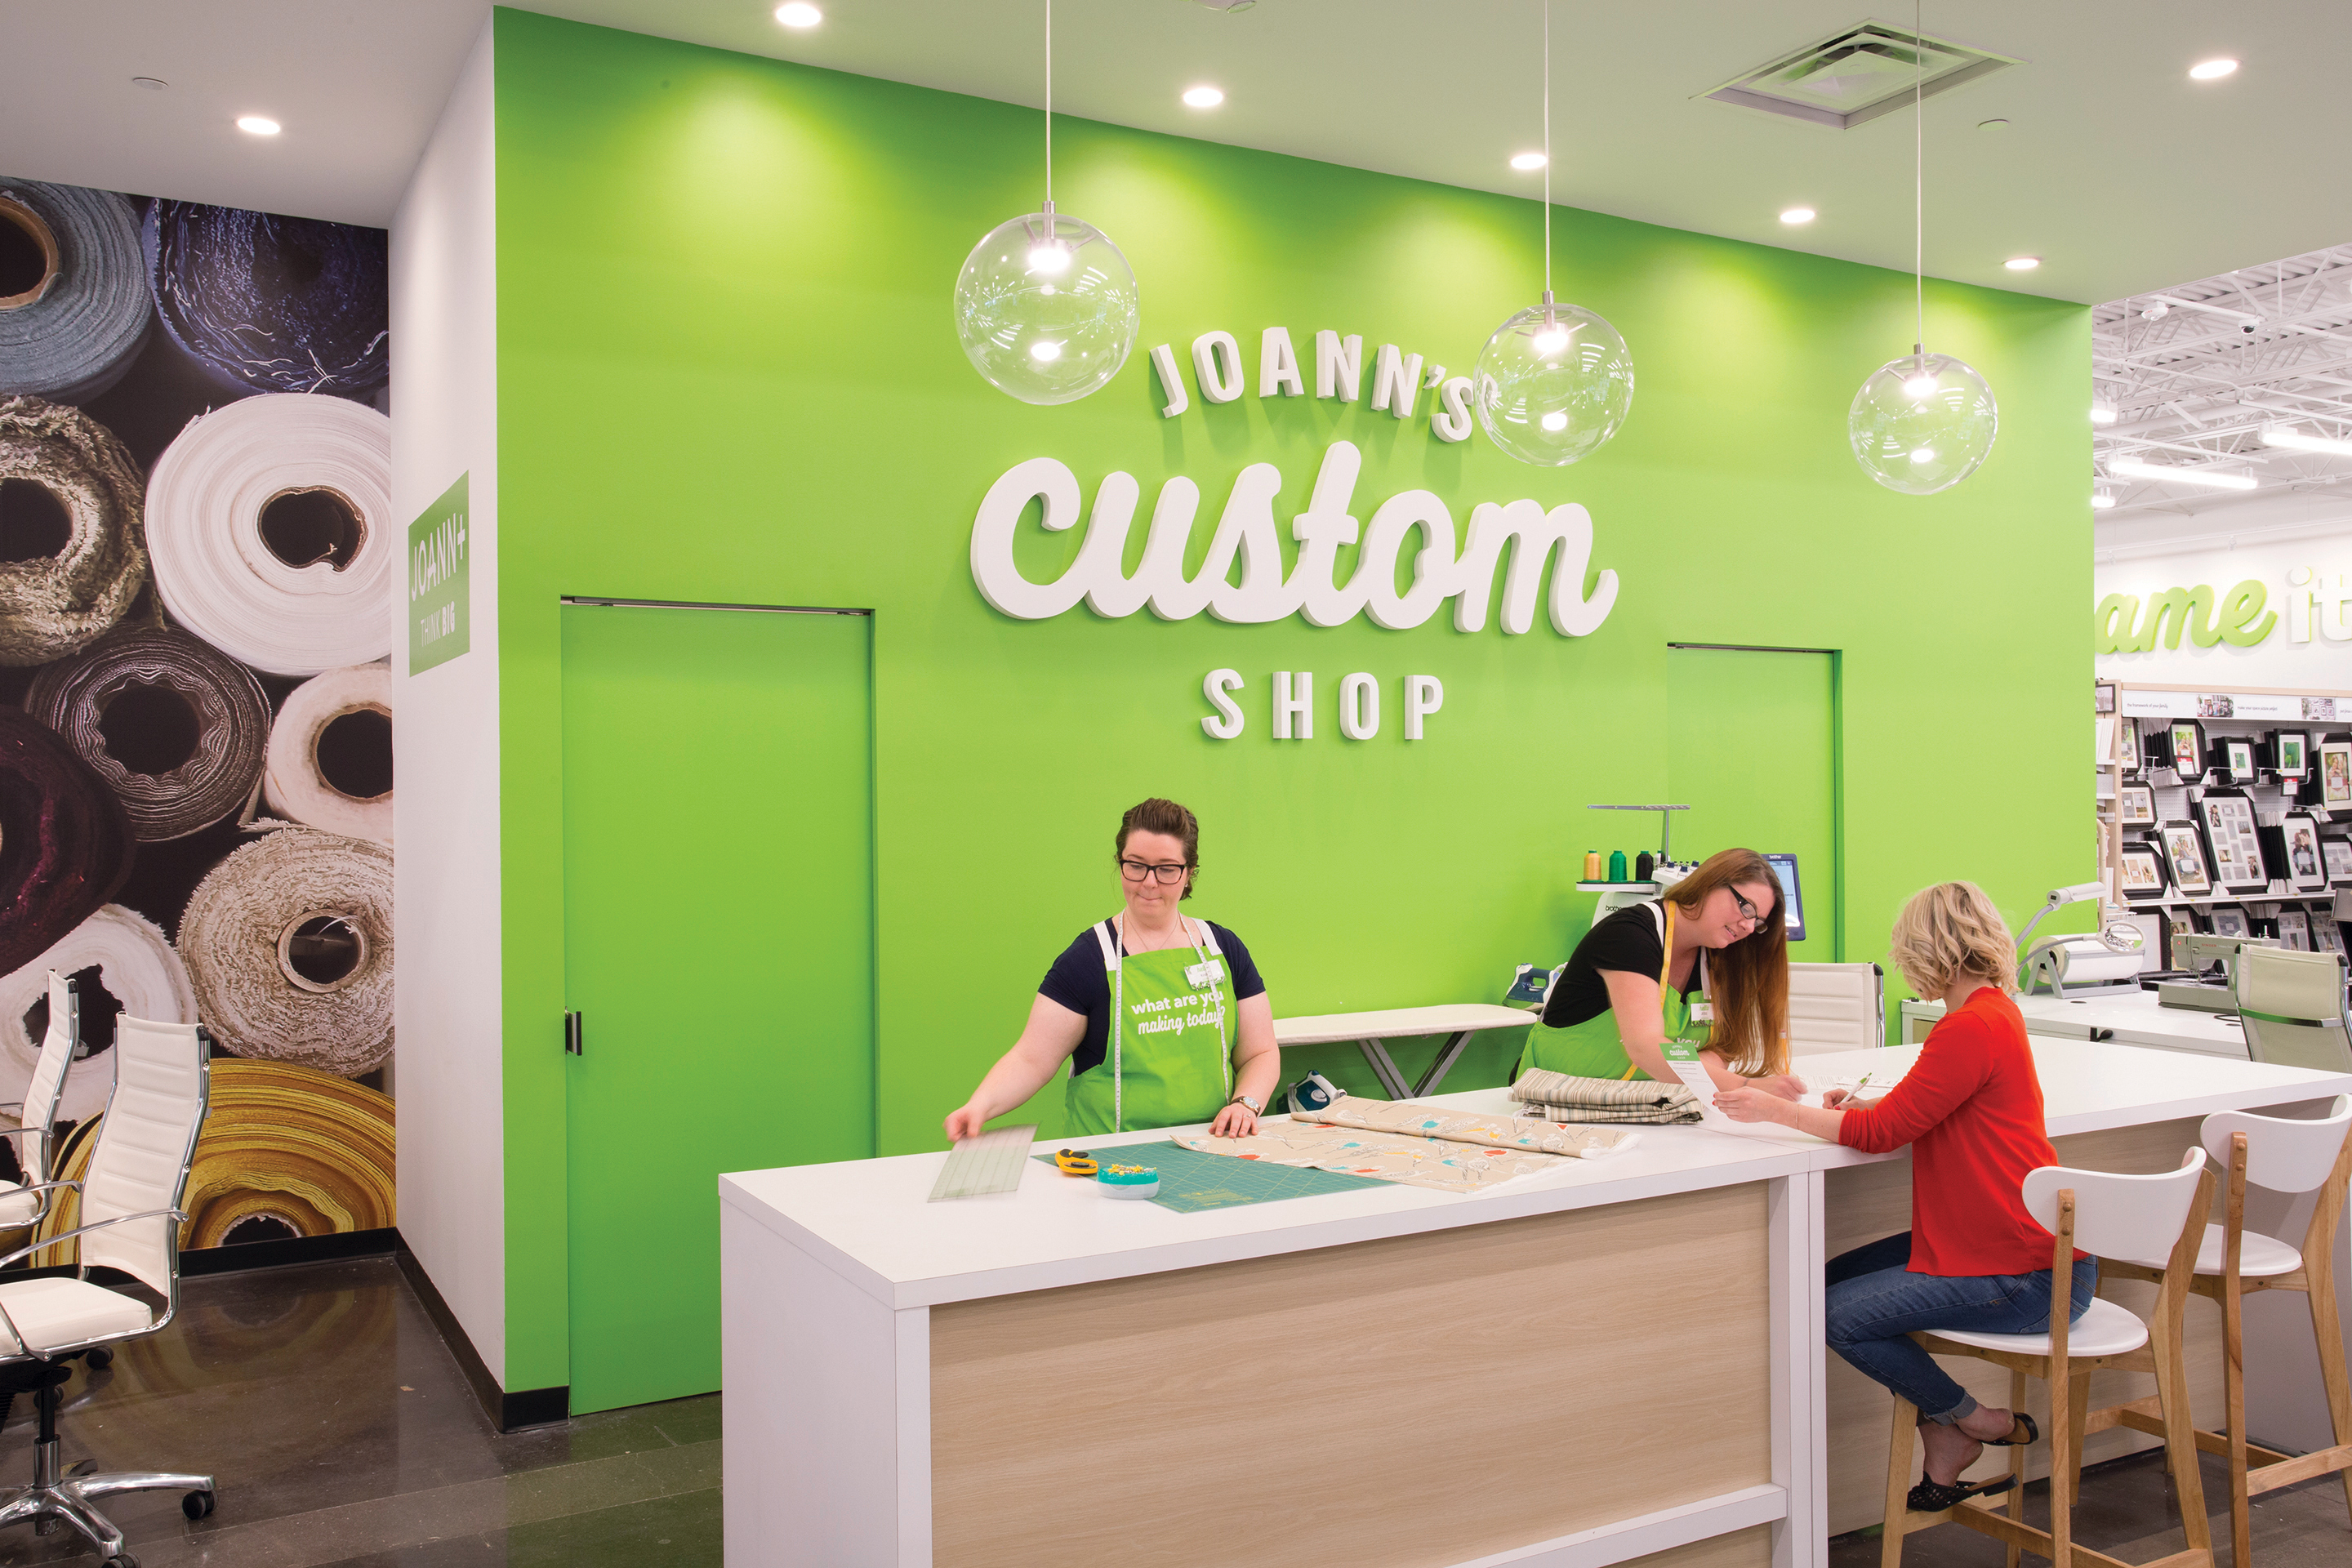
This August, Joann’s Fabrics is celebrating its 75th Anniversary by giving a gift to all of us who love fabric, crafts, paint, DIY, etc.
They are getting a makeover, and all I can say is: It’s about time.
I do like to go to my local Joann’s, but I can’t tell you how many times I’ve wanted to throw things on the floor at the checkout line (or the fabric line) and walk away. Either they don’t have enough help, or the help doesn’t care, or the place is just a mess or all of the above.
And yet, if I need plastic snaps, or a white button, or home decor fabric, or any number of sewing notions and I need it NOW, it’s the place we go.
They are starting with a name change…from Joann’s Fabrics to just Joann’s. Because they want folks to remember they are so much more than just fabric. (Honestly, I think that’s just their marketing department catching up to real life, because who of us already didn’t know that’s where to go for storage or plastic flowers or beads or…whatever.)
But the most exciting aspect is that they will be updating their 800 stores this fall and into next year. They already have a prototype store that’s been updated in Columbus OH.
Who’s up for a road trip to Columbus?
New features in Joann’s stores:
A cutting bar: You’ll be able to check in, and get a text when your fabric is cut. In the meantime, you can wander around the store. Anyone who’s ever stood in line while folks dawdle and chitchat or worse, know this can be a frustrating and time-consuming wait.
Creator’s Studio: I love this idea. You can rent a sewing machine, grab a cup of coffee, a cookie, or attend an event or class. The studio is positioned in the middle of the store, not shoved away in a corner. It’s meant to revolve around community…possibly a place for bees to meet? I don’t know how this will work but am anxious to see it in action.
A Custom Shop: Tailoring, custom design? Sounds like they are working toward a specialization that very few other places have. (With good reason.) I’m guessing this would be a place for alterations and some custom services, possibly home dec.
Expanded merchandising: They are planning on carrying more sewing machines from different manufacturers, for every budget. Obviously, this gets complicated because sewing machines need service, but we’ll see where this goes.
All of this is great news for anyone who loves crafts of any kind. And we already know that all crafts overlap. Sewists are often also knitters or scrapbookers or bakers (or gardeners…hey, Joann’s don’t forget about that!) We need a place to go that’s inspiring and caters to customers’ needs.
Of course, we still love our independent quilt shops, and they will ALWAYS be our first choice for quilt fabric. But in a world where so many shops are disappearing because of online competition, it’s good to know that someone is investing in us.
And in our $3.7 billion in discretionary spending.
$3.7 billion in total estimated quilting industry spending for 2017. (Holding steady from 2014, which was at $3.76 billion.)
$442 is the amount the average quilting household spent in 2017. (Up by 48% from 2014.)
The survey found two main groups of quilters: Dedicated Quilters and Under 45 Quilters.
Dedicated Quilters:
Female
Average 63 years old
Well educated (70% went to college).
Affluent ($95,900 household income).
Spends average $3,363 per year on quilting.
85% prefer traditional style, 37% modern quilting, 20% art quilting.
Account for 72.2% of total industry expenditures.
Purchased an average of 99 yards of fabric the last year (Well, this made me laugh. How many quilts can you make out of 99 yards of fabric? Quite a few. Hence, the reason we all have a wonderful stash!!)
Under 45 Quilter:
Affluent ($98,000 household income)
Prefer modern quilting
Websites (75%) and online video (63%) play a stronger role for education and inspiration than total sample
Blogs are important to this group
Even though they are employed, they still devote 10+ hours a week to their craft
Some things to consider:
97% of Dedicated Quilters are purchasing fabric in person at a retail location. But 66% also purchase online.
83% of all quilters will purchase 100% cotton thread (hello Aurifil) in the next 12 months.
54% purchase batting in queen size
In the last year 26% purchased a new sewing machine. Average price $2212.
50% of Dedicated Quilters use social media, like Facebook. (Up from 14% in 2014.)
But what’s happening in the garment industry?
If you are a garment sewist, you have seen some major changes lately as well. Many quilt fabric distributors are now also featuring rayon and denim in their current lines, and often include garment patterns as part of their collections.
CSS Industries, Inc. now owns: Simplicity, McCalls, Butterick and Vogue. That’s a LOT of consolidation. Why? Because new indie designers and pattern makers are basically taking over the industry, and leaving the old brand names in the dust. Those “Under 45-ers” listed above want to sew their own clothes. They want it in their own patterns and in their own sizes.
But the old guard garment industry didn’t realize that patterns as currently packaged are incoherent to someone learning on their own. In the old days, of course, your mom or grandma taught you to sew clothes. That doesn’t happen any more and younger sewists need help. Along came sites likecolettepatterns.com. (Patterns that teach, in current trendy designs.)
Furthermore, distribution channels are basically gone for garment fabrics. JoAnn’s, Walmart, Hobby Lobby? Please. If you’re making a Halloween costume, sure. But something you want to wear and spend some time and effort making by hand? Not a chance.
So where does this leave the state of the sewing industry?
In a creative and strong place. With the Nextgen sewists/quilters already on the rise, and technology and social media filling the gaps in learning curves (not to mention our physical curves like cashmerette.com), the industry is poised for change and growth. We seem to be insatiable in our desire to create and to learn and to connect. Social media makes all this possible in fresh ways.
Yet we are still addicted to the feel and touch of fabric, making me believe that we currently have a brick and mortar “hole” to fill. Who will transform the retail and customer experience for us? Who will bring the online and offline advantages together? Consider it a challenge.
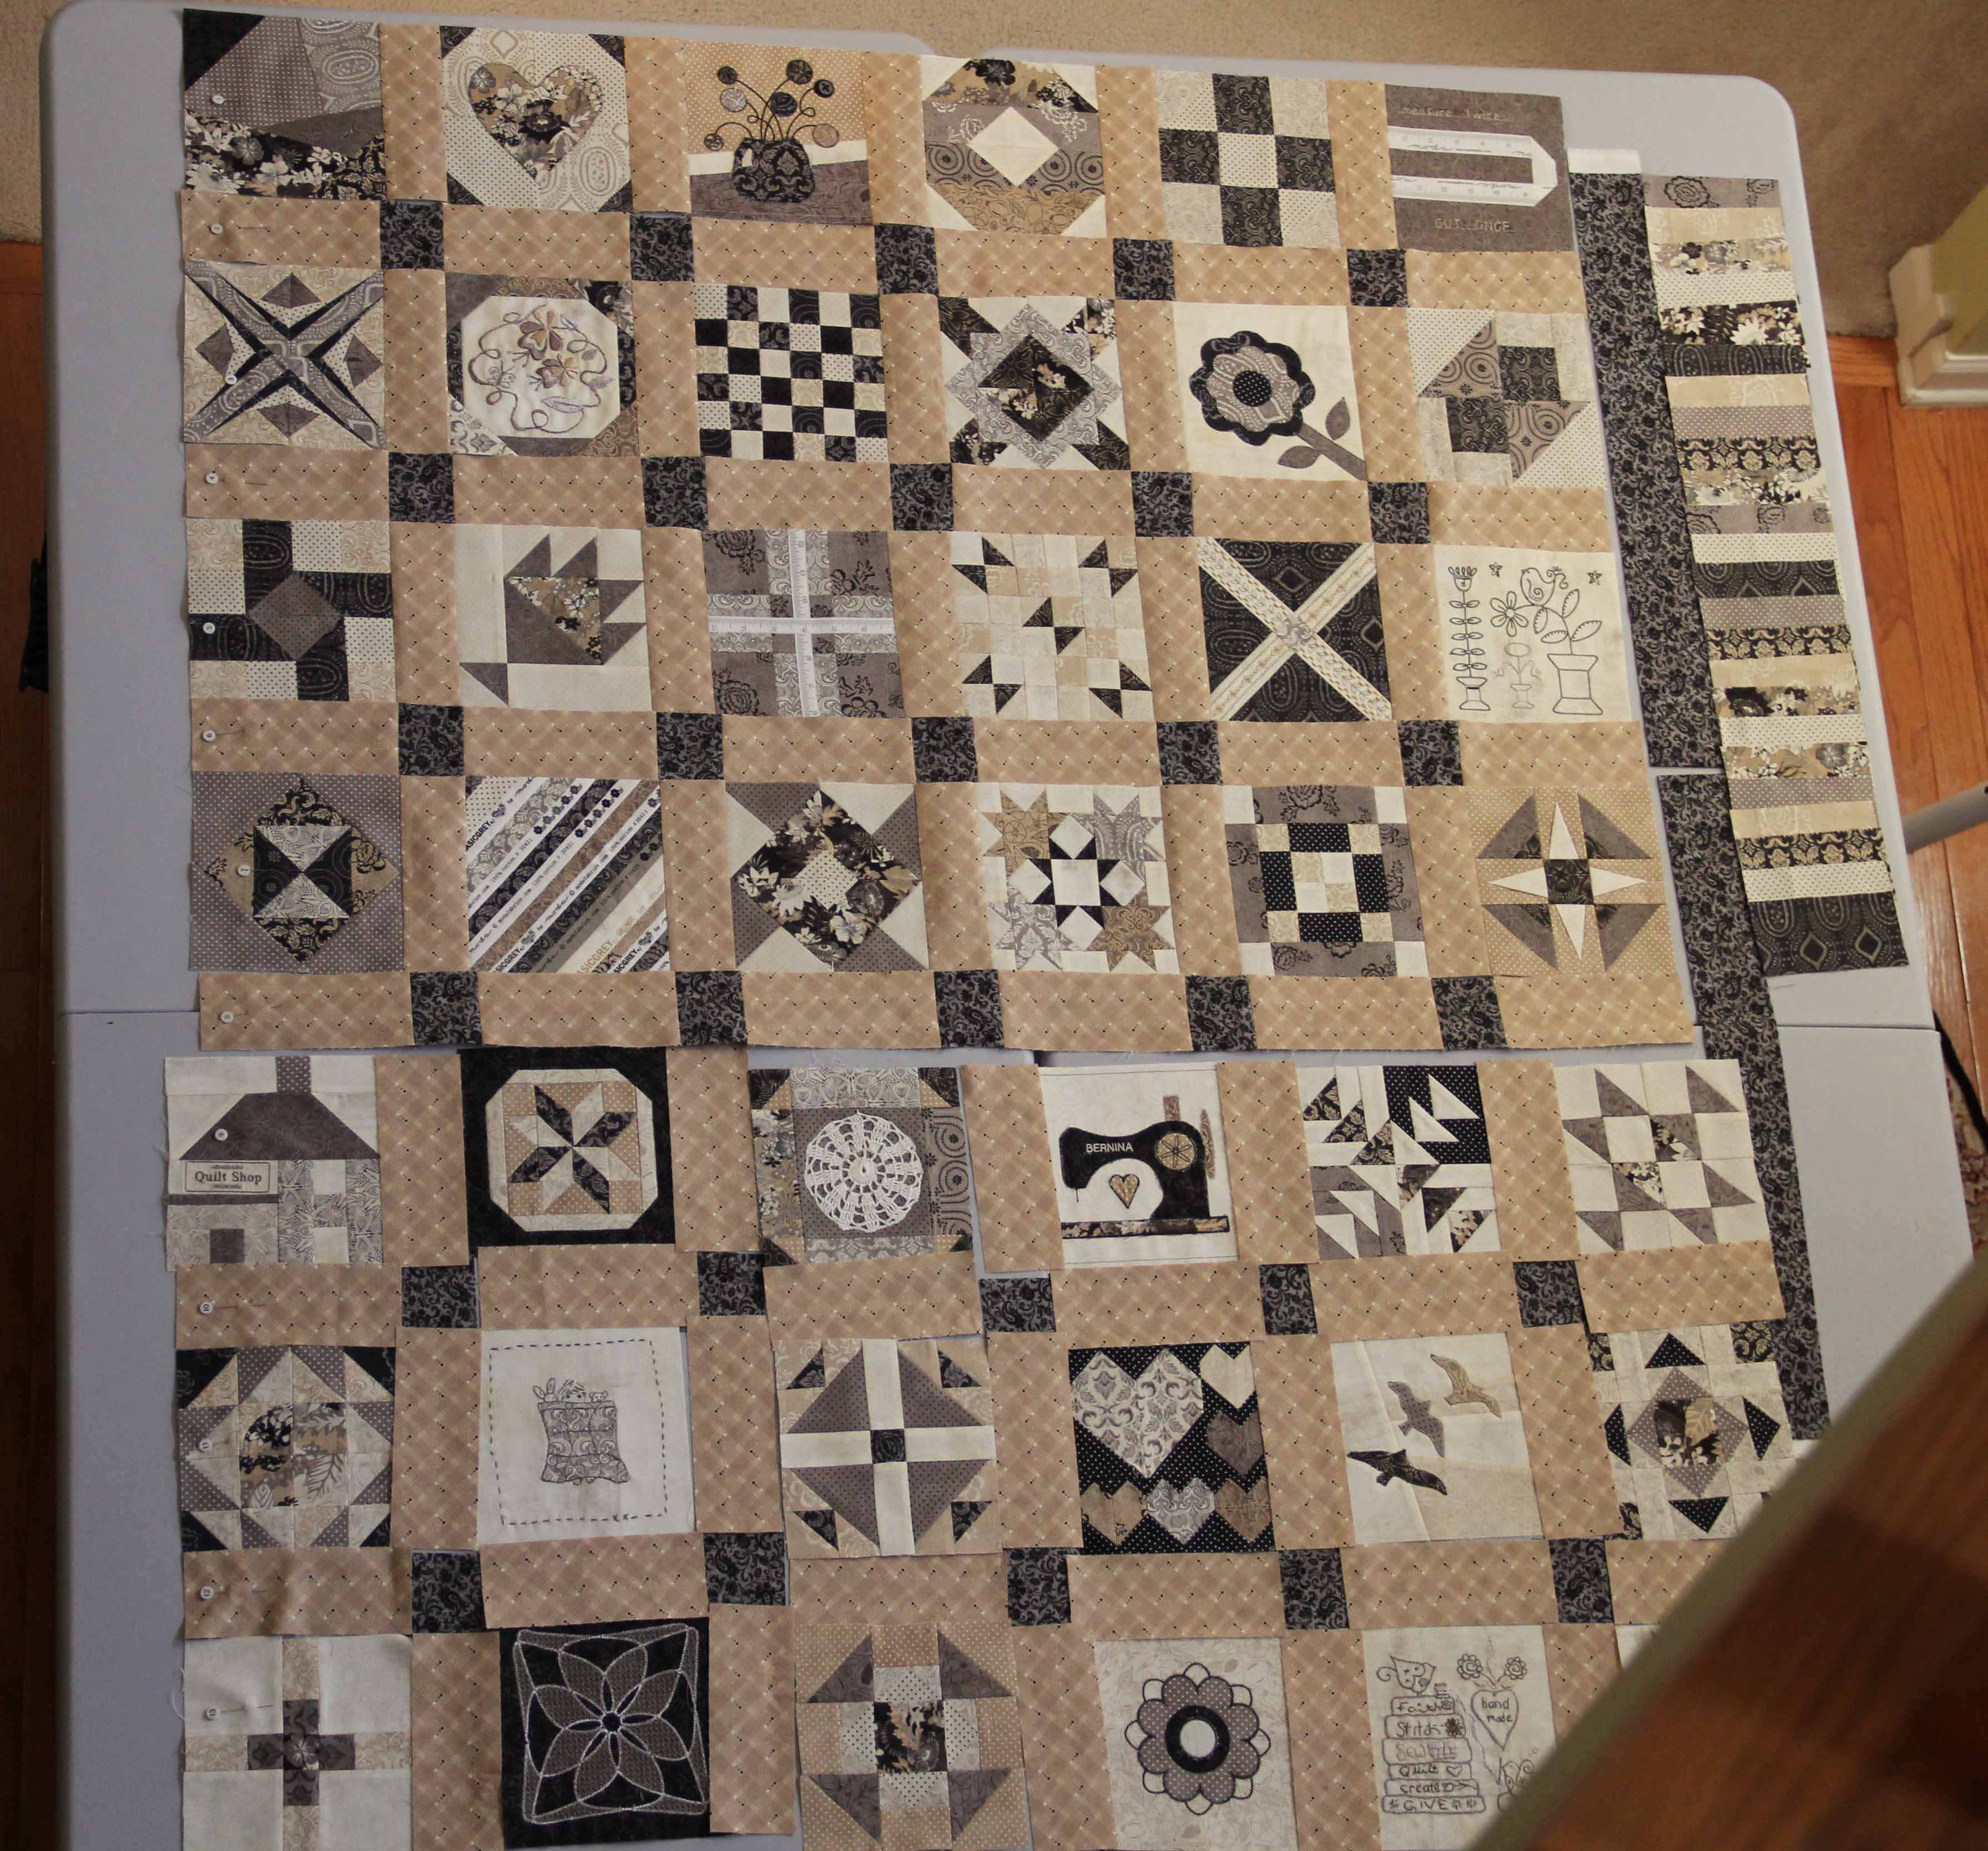
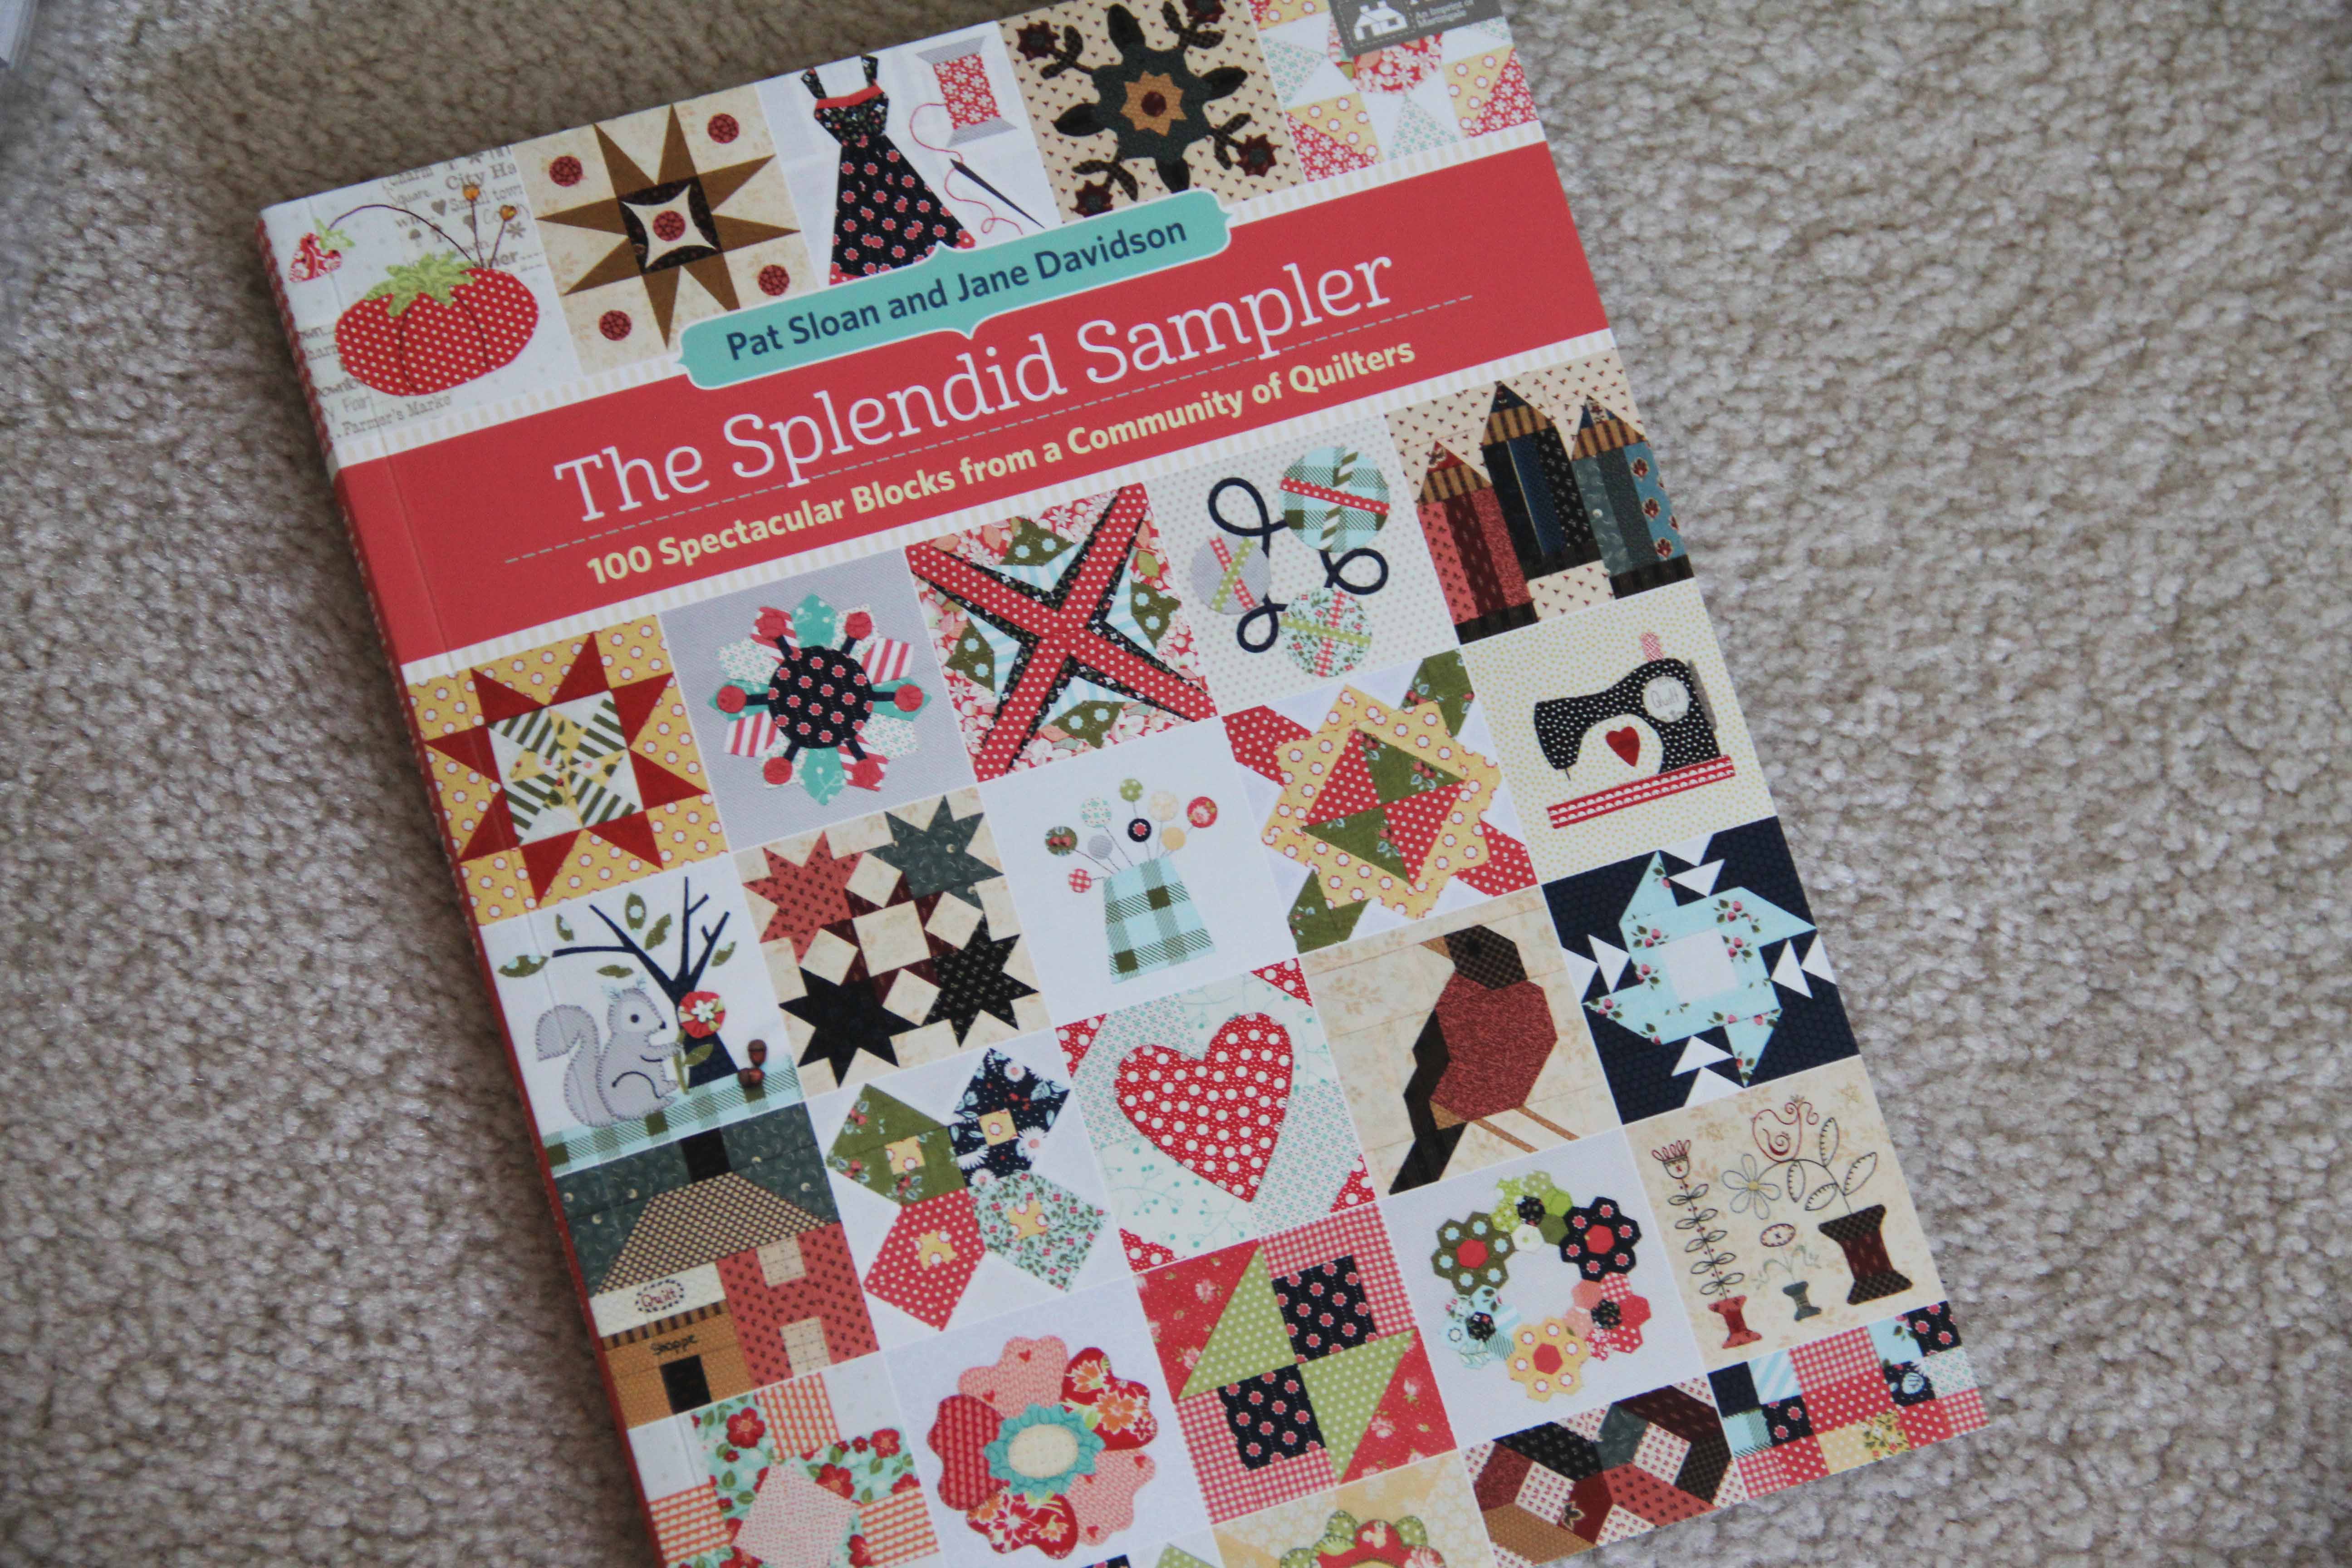
Finally, I am moving forward with my Splendid Sampler quilt. I wrote about it here and here.
I would like to say that I completed all 100 of the blocks, but alas, life happens and I am a firm believer in stopping while I’m ahead. At first I did every block that came my way, regardless of the techniques.
I quickly realized that I never want to sew hexies. I mean *never*. Especially not 1 inch ones. And I realize that I may make enemies this way, but not everyone likes the same thing and that is just fine. If you love tiny hexies, bless your heart. If you like bunnies and squirrels on your quilt, bless your heart as well. And if you really love tiny paper-piecing, you’re probably going to heaven too.
It is laid out in our foyer, and I am finalizing the way to finish it. As you can see, I was pretty strict about the color palette. Thankfully, I still love the colors. Something about the neutrality of it makes it slightly less traditional. As you can see, I’ll probably stick with the dark inner border and a “piano key” outer border. I have so many scraps left over, I will easily be able to use them up as the border. I gain a little size there too.
I vowed a long time ago not to make quilts that are larger than twin size because:
I have no room to store them.
I don’t want to pay someone else to quilt them and I absolutely cannot handle queen size on my domestic machine, at least not with any quality.
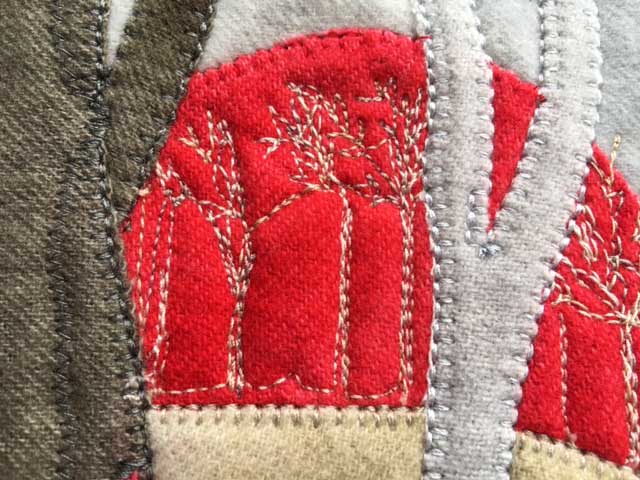
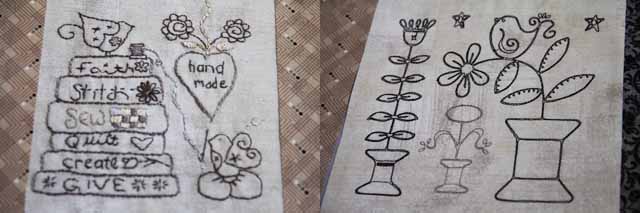
But I did learn some new techniques. And I reignited a love of hand embroidery, which is quite popular right now.
It really does take a lot of time. As you can see, the left side is done by hand, the right side I just digitized and stitched out in machine embroidery. Sometimes the new block would be announced and I would think (I’m being honest here), “Not another hand embroidered block. I don’t have time this week.” At that point I was reminded of Indiana Jones in the scene with the Samarai wielding the giant sword. Indy, exhausted, whips out his gun and shoots him. After days of finishing one hand-stitched block, if another came up, I just went to the computer, digitized it in software, and within an hour, machine embroidered the next block. It’s cheating, I know.
But it looks great.
Over 20,000 quilters started this project back in February 2016.