Of Endings and New Beginnings

The quilt shop where I worked closed this week.

I don’t think very many people understand what a small quilt shop does for a community.

Yes, we sold machines and fabric, notions, patterns, doo-dads and what-nots.

But that’s not what a quilt shop is all about.  We also provided support.  And inspiration.  And education.

And friendship.

We loved our customers and became close.  And they came to visit us when they had enough of the outside world, when they needed a place to unload, to unburden, to be among like-minded people.

We celebrated with them and mourned with them. And they with us. We all grew together and processed life through cloth and fabric, needle and thread.

The purchases?  They were just an extension of all that wholeness. We didn’t close because we weren’t doing well.  On the contrary, the shop was doing great.  But sometimes life intercedes and the owner was unable and unwilling to deal with the crushing demands on her time from her home life and work life combined.

I could go on about the number of quilt shops in this area that have recently shut down, or the economy, or the aging of the quilt-making market.  But I know better.  I’ve been around long enough to see that to everything there is a season.

I was fortunate enough to work there from the time that my son started first grade to the time he entered high school.  What a season!  From crayons to perfume…or deodorant, in this case.

I know that these things are cyclical. The market will re-emerge in a different way. Our customers will find their way to new and exciting shops and relationships, and the world will keep turning.

I will never stop sewing. In fact, I have some new and interesting plans for this blog. Endings provide the catalyst for new beginnings. Stay tuned.

Straigh line quilting on domestic machine

Here’s the quilt I was working on from my last post.  Completed, just need to add the label. Crazy squiggly lines through the color, straight and narrow through the grey.

The ombre blue on the back turned out to be exactly what I wanted.
Ombre modern quilt back
Colorful binding signals the end of this project.  But we never really finish our work as quilters, or as artists. We’re always ready for the next project.

I’m ready. Are you?

Women, Sewing and Art

We had some family in from out of town this week, and a day-long trip to the Art Institute of Chicago was on the agenda.

Let me start by saying that I checked with the information desk and they had no problem with me taking a few pics and posting them to a blog.  So that’s what I did.

As you know, the Art Institute is an overwhelming and inspiring experience. After a bit of roaming, I came across a painting of a woman sewing. On a whim, I took a picture.

(Just as an aside, I hate when I see people running up to a painting and taking a picture.  That is not how it is meant to be enjoyed. Look at it. Study the brush strokes. Discover the color palette. Contemplate it. Enjoy it. But whatever you do, don’t run up and take a picture and then run to the next.  That’s silly.  Lecture over.)

That said, I decided to record what I could of women sewing.  A few samples:

Renoir was the first I happened to see. It’s lovely…with such movement.  I did, however, study her hands.  What was she sewing that was so bunched up?  That’s not really how one would hold something for embroidery or detailed stitching.  Though her right hand is perfectly positioned to pull a needle through the fabric, her left is a bit awkward.  The white lace near her left arm is, I suspect, entirely an afterthought.  Go ahead, hold your finger over that piece of white lace. The whole painting recedes into mid-tones. While it is still gorgeous, it lacks enough contrast to draw your eye somewhere.  With that touch of white, your eyes go directly to her work and her hands, and it even lights up her face.

This one is done by Camille Pissarro around 1895.  Titled “Woman Mending.”  I studied her hands once again.  She might very well be sewing.  Or she might actually be knitting in some way.  Her project is rather amorphous.  Yet, I recognize her expression.  I have the same one when I’m trying to figure out what I did wrong.  After these two paintings, I started to wonder if male painters truly understood in any way how women work. They recognize that women are doing SOMETHING with fabric or yarn. The detail is so precise in every other aspect…down to the carvings on the leg of the table.  But what this woman is actually doing?  Based on this painting, it’s a mystery.

Ahh. Diego Rivera, 1936.  The Weaver.  As we move into the 1900’s, we see that women’s work becomes a bit more of a fascination.  It’s not just pretty things in a young woman’s hand, but a skill, a craft.  He even pays homage to her by including the tools of her trade. He admired this woman, I’m sure of it.

This last one I saw was from the 1800’s, St. Rose of Lima. She was a patron saint of the Dominicans, and the story says that she embroidered to raise money for her family and for the poor. In this painting, she is creating the symbol for Christ. (This pic is taken from a pamphlet I brought home from the museum.) I love that her work is clearly shown, and that her sewing was her employment.

I hope you enjoyed this little jaunt through the Art Institute. If, like me, you haven’t been there in over 20 years, I encourage you to visit again with new eyes.  While you’ll see plenty of women as subjects — in portraits, as madonnas and mothers, lovers and muses — these are the women I found that had a project. A purpose.

A reason to create.


The Trouble with Wool

The trouble with wool is…

There is no trouble.

Sorry.  It’s just lovely to work with.

Let me take that back.   The trouble with wool is…

It interrupts all the other projects I absolutely have to get done (because I’m sick of looking at them.)  I found a new project that just fascinated me because it is fairly complex.  I never start with an easy project.  I fall in love with the idea of a project and find out as I go along that maybe I bit off more than I can chew.

But this particular one is lovely.  Shown below is just the start of some of the pieces.

This pattern is from Wooly Lady.  The instructions suggested copying everything onto freezer paper, tracing it, ironing it onto the wool, cutting it out and then peeling away the paper.

I bought the whole wool kit from Wooly Lady (not cheap, OK?) I found that I just did not have enough of the fuscia wool.  So I substituted a rich red, which I think will be just fine.

Here is the whole thing cut out and pinned down.  I realize that I will have to take it apart in order to start stitching, but of course, I really wanted to see the layout. I wasn’t going to fuse anything down, but soon realized that the pins will cause distortion, so I’ll be using Misty Fuse to hold down the pieces while I stitch. I’ve never tried it on wool, but I think it’s all I’ll need, since everything will be stitched in place.

So after all that cutting, the fun begins. The pattern calls for a blanket stitch on basically everything, with some decorative stitching throughout.

Can I finish in time for spring?  I certainly hope so.

What do I still have to complete?

  1. My splendid sampler quilt.  I still have some blocks to do, even if I skip some.  I have ordered the book and am waiting for it to come in.
  2. My queen size hand-quilted quilt.  Yeah.  What was I thinking?  I am not Amish.  I will never be Amish. But it sits on the floor in my sewing room taunting me. The truth is, the quilt is more than 2/3 done.  A little bit of effort would get me over the top.
  3. My improv quilt.  At least I have a good idea as to how to finish this.  All I need is another 15 hours a day, and the energy to fill those hours.
  4. My knitted scarf.  Oh, so close!  Just a few more rows and cast-off!  Geez, I need to just DO IT!

As all quilters know, I have  another 10 projects in bags and containers that I have never started. Those new placemats for spring and summer?  I’ll probably squeeze them in.  A simple Magic Inch quilt from those fantastic people at Modern Quilt Studio?  Yeah, I can get that done in no time.  The cute throw pillow idea I just saw while out shopping this morning?  How easy is that in machine embroidery! And I’m getting sick of my old pillow cases and duvet cover…those are fast and easy…

The trouble with wool is…probably me.


So You Think Improv is Easy?

When I was in college, I found myself in an Improv class.  I’m sure I wanted to take some sort of communications credit and the class was full, so in order to fill the elective, I took the only other alternative:  Improvisation.

I was terrified.

I prayed that the class would be an intellectual discourse on the history of theatre, comedy, acting etc. Nope.

The teacher asked us to introduce ourselves in this way:  The first person just had to say his name.  The second person had to say her name and the name of the guy before her.  The third person had to say her name and the name of the two people prior. You can see where this was heading.  Twenty-six people in (of COURSE I sat in the back), we were all giggling awkwardly, and, I’ll be darned, even the last person remembered everyone’s name. (Now, if we got up and moved around, or…heaven forbid…changed clothes, all bets were off.)

Our next task in the class, was to gather in a large circle. One at a time we each had to pretend to open an umbrella, hold it over our heads, and close it again.  Simple, right? The first few people did the obvious.  Then one person added a shake before they closed their “umbrella” and it suddenly seemed more real.  The next person added a twirl over her head, and before you know it, we were all really seeing each others’ umbrellas. Adding little tiny details mattered when it came to believability.

For our final grade, each person had to produce a skit.  It was the student’s responsibility to:

  1.  Describe a scenario.
  2. Cast characters from within the class.

That’s it.  The skits only lasted 5 minutes or so, but I never laughed so hard during finals as I did during that class.  Something about Improv brings out the silly in people.  It’s like playing, but it’s a lot more about interaction with others.  One of the main tenets of improv is you must always accept another’s reality. So if someone says “What about the kids?”  you can never say “We don’t have any.” (This example is taken from the book “Something Wonderful Right Away” by Jeffrey Sweet.)

All of this brings me to improvisational quilting…or improvisational piecing, which comes first. I wanted to do something freeing, use up some fabric and make something that has not been done by anyone else…at least not in the exact same way.

In order to do this, I had to set up a couple of rules for myself, much like the final in my Improv class:

  1.  I had to use the colorful jelly rolls of ombre fabric.
  2. I am not allowed to square everything up into even-sized blocks. It has to be more free-flowing than that.

That’s it.  Those are my two rules.

As you can see, the fabrics themselves have movement.  The colors are cheerful and I had plenty to work with…at least to start.

I can safely say that I have no idea where I’m going with this.

But I love it.

The challenging part comes in the curves and Y-seams.

If you’re not used to sewing curves, it can be daunting as there are just so many variables to keep nice and neat. It takes a little bit of thoughtfulness.  Just like improv acting.  Go with it. Try it.  Don’t say no to the crazy seam.

It might just create “something wonderful right away.”


Machine Embroidery Valance

I love one-of-a-kind.

If it  hasn’t been done before, I’m in.  Even if it has been done before, but it can be done slightly differently, I’m in.

What I’m not really interested in doing is creating exactly what someone else has already created.  Let’s be honest, here. Nothing under the sun is really new any more.  We all receive our inspiration from someone, or something, or some technique.  Original ideas come from many places, but they almost always require inspiration from somewhere, and we all learn from one another.

That’s OK.  As long as it’s new to you. I don’t judge people who take a pattern and re-create it exactly as the book dictates. That’s how we learn. We aren’t all designers. I’m not…at least I don’t get paid to be one.

But my favorite projects come to me like a whirlwind, and I have all to do to scribble them down before they disappear.  The end product is not always exactly what I had planned, but I know when I have a starting point.

My challenge:  To create a project based on some digitized rulers created in Artwork Canvas within Bernina Embroidery Software 8.

I started with the 3 black ruler shapes, wondering how to place them in an interesting project.

I knew I wanted to use a sewing theme, and I also wanted to incorporate Amanda Murphy’s Sewing Room embroidery designs. I thought they were cute and fresh. (See the link below).

Sitting at the computer one day, I had an idea.  I don’t ever design on a computer.  It’s just not fast enough to capture the idea before I talk myself out of it.

So I grabbed the back of the closest sheet of paper and scribbled out this initial design.

valance-plan2I thought I’d make a table runner, with all the embroidery designs lined up in a row.   I thought about adding buttons scattered around the design, since the theme has thread spools, scissors , rulers, etc.

I didn’t have any fabric at home that was close to my reach that was in the right shape to hold all the designs.

So I stitched a number of half fatquarters together (fat-eighths).  I think they were leftover from this project.

And I printed out some templates to see if I was getting close to my original thought.

valance-plan1It was going to work.

I began embroidery, and once the embroidery was complete, a friend at work (hey Bobbie!) asked if I was making another valance…this time for my sewing room. (You can check out the last time I made a valance here.)

I had actually been thinking of it as a table runner, but when she said valance, I suddenly saw that too!

I continued with the quilting which for some reason was a part of the original scribble and I couldn’t depart from it.  Here are a few of the detail shots.

sewingvalance3sewingvalance2sewingvalance1


I’m sure you can see why I wanted to use Amanda Murphy’s embroideries…but it actually works pretty well with the digitized rulers.

Here’s what it looks like complete.  It’s quilted all over using a walking foot, and the back is turned down to form a rod pocket.

sewingvalance4It will be at the shop for a while, but I can’t wait to hang it on the window in my sewing room. I moved the random-sized buttons to the middle to give it a look of continuity. I love the Barbie-style dresses.

You can make the rulers if you attend Bernina’s November Software Inspiration class at your local dealer.  And if you don’t have software, I’m sure you can find a measuring tape embroidery or replace it with another design.  The point is not to make the same valance I made, (although you certainly are welcome to do that) but to make it your own!  Have fun with the idea, and create something new and original for your own home.

Crazy is Good

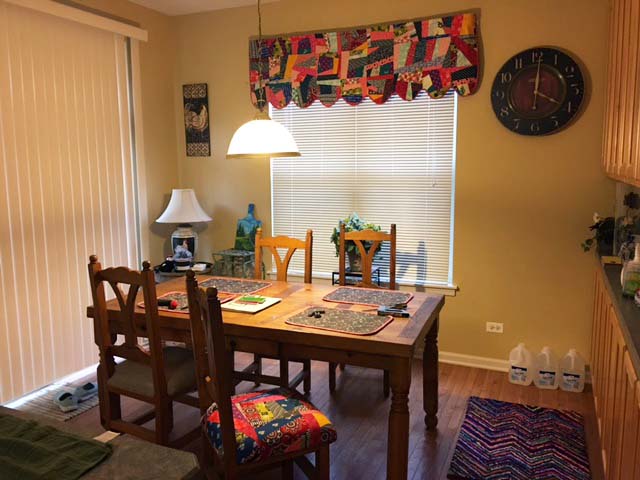
I was sitting at the kitchen counter one day, staring at the valance over my window.  I’m ready for something new.  I get this from my mother who changed curtains in the kitchen to match every holiday and season.  In the fall, we had leaves, after Thanksgiving, holly and berries, in the spring, the lovely florals went up…you get the picture.

I don’t have cafe curtains, though I have thought about them.  But sitting there, staring away, I had an idea.  What about a quilted valance?  Better yet, what if I made matching seat covers for the chairs?

Suddenly I was excited about a project.  All I wanted was colorful and different.  So that’s what I made.

window3
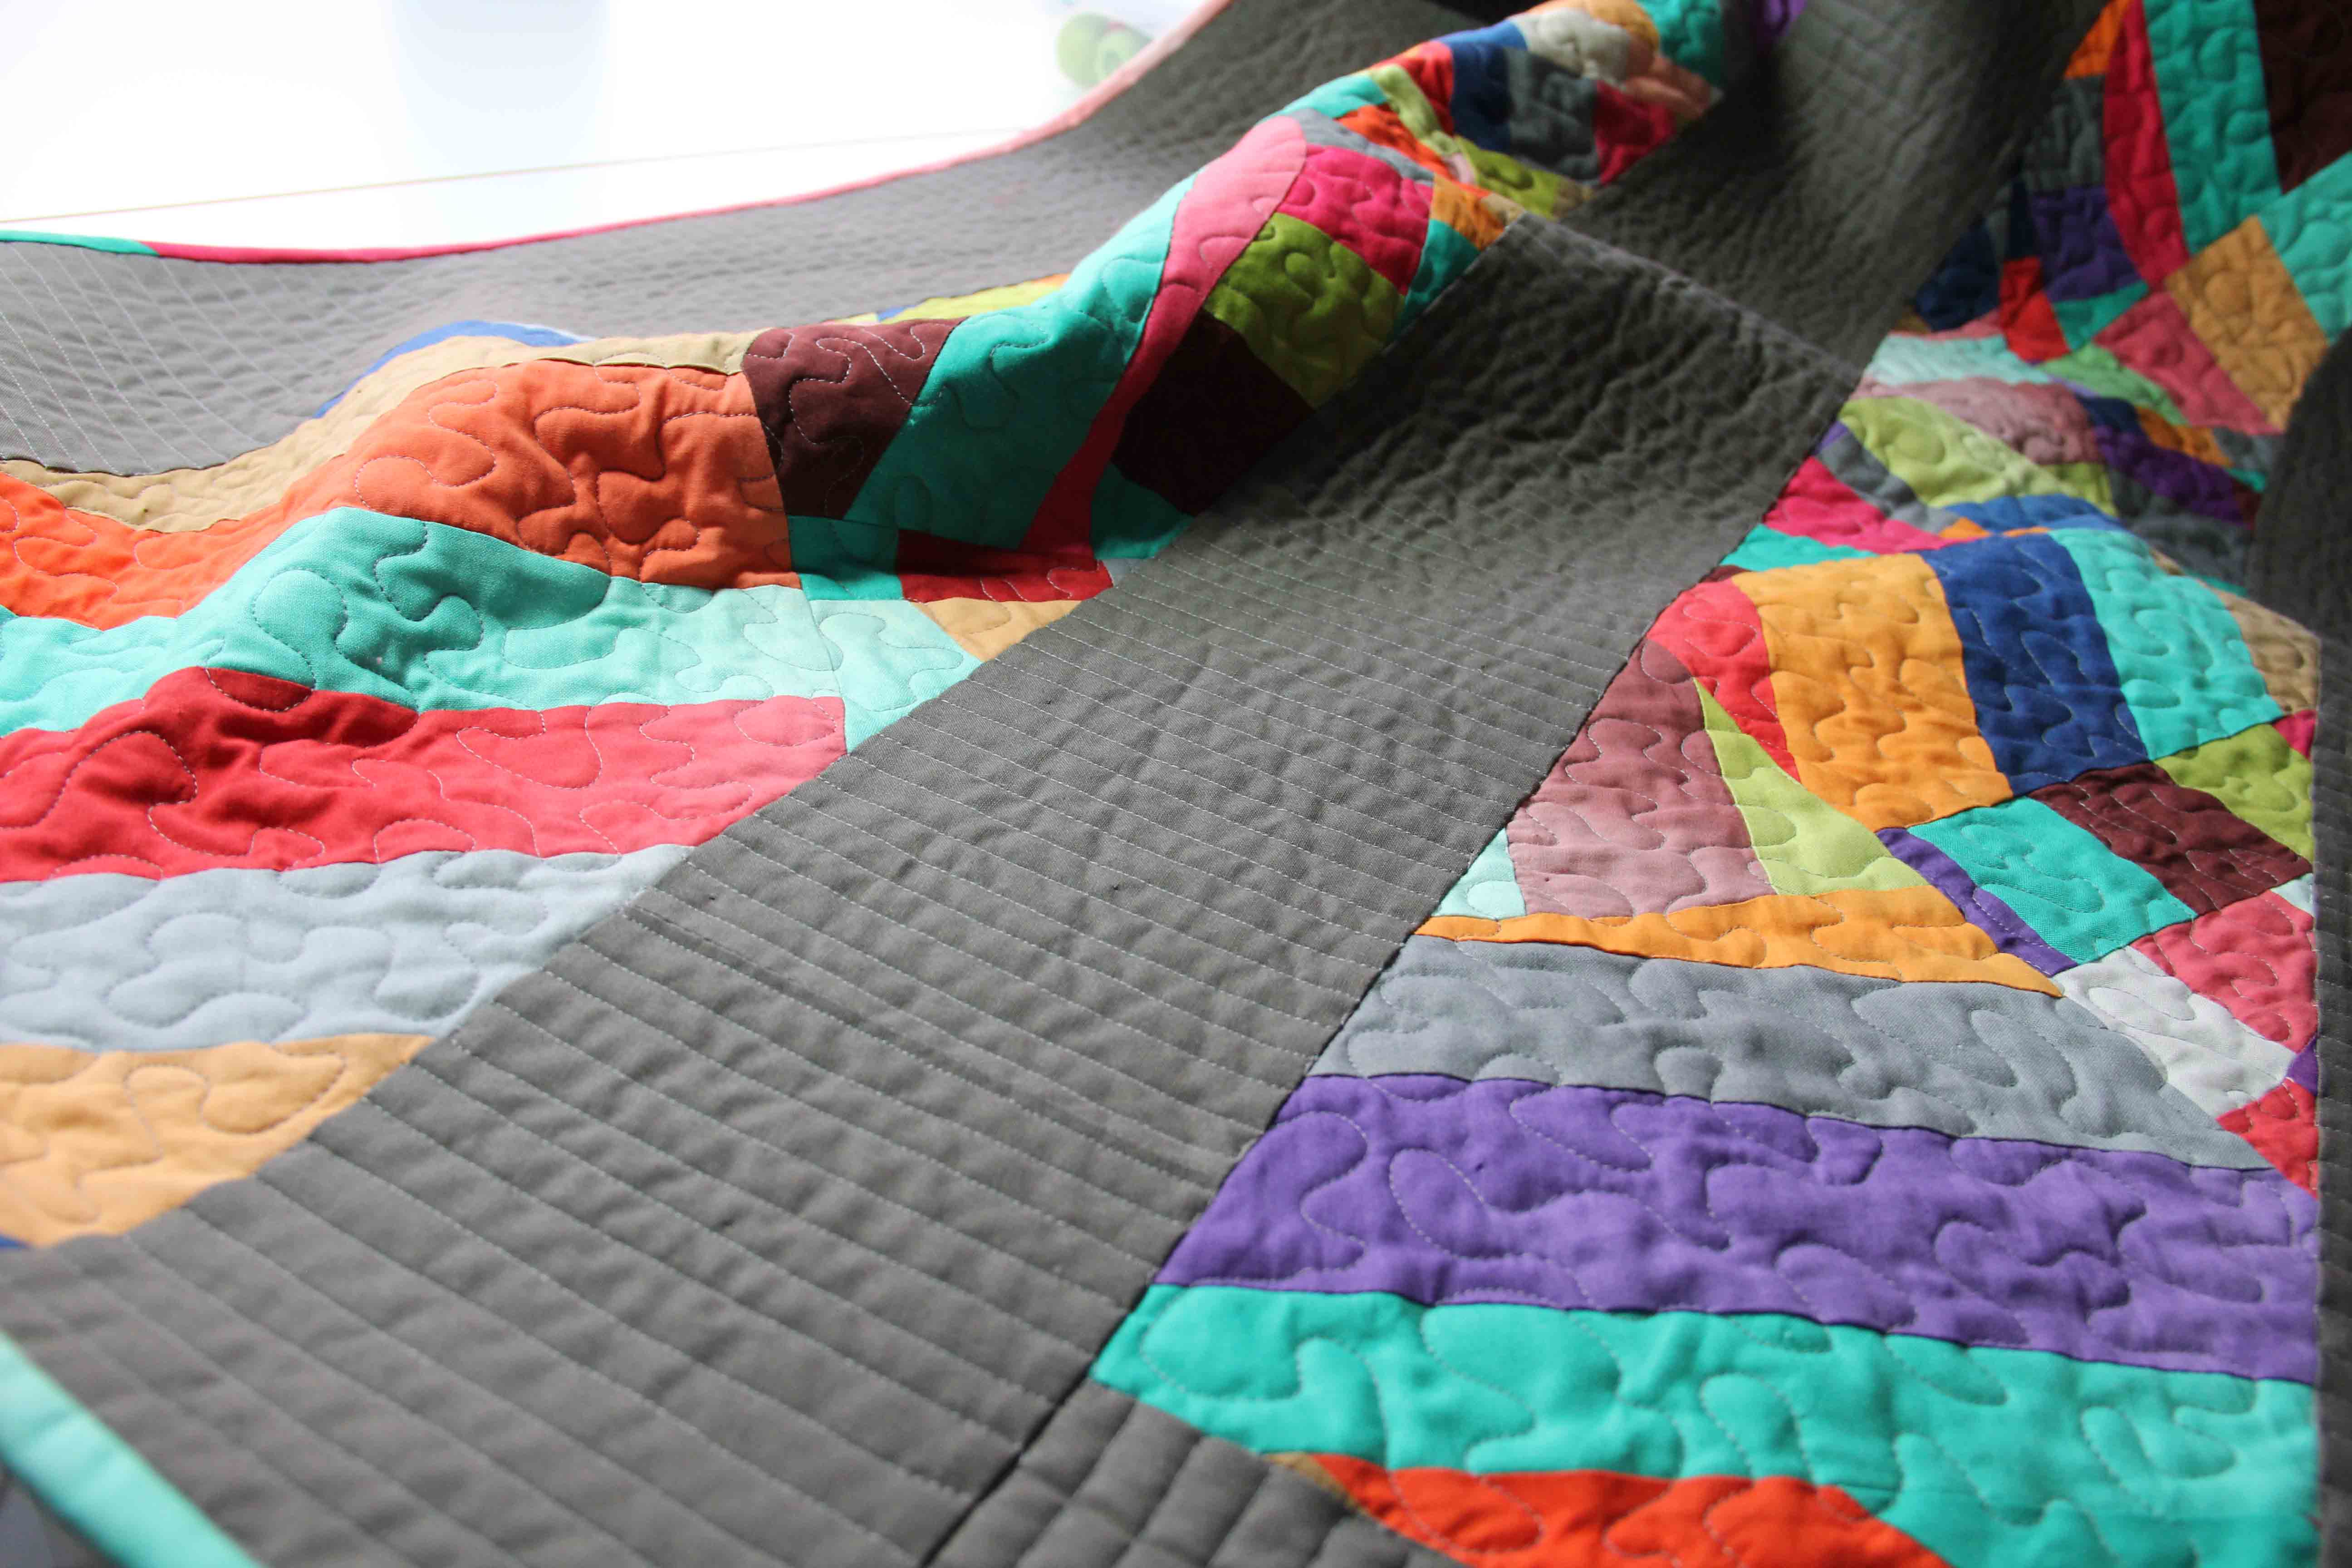
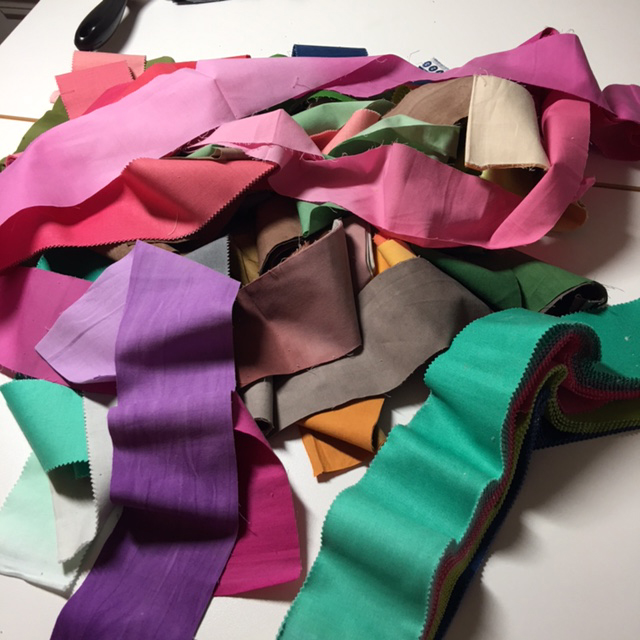
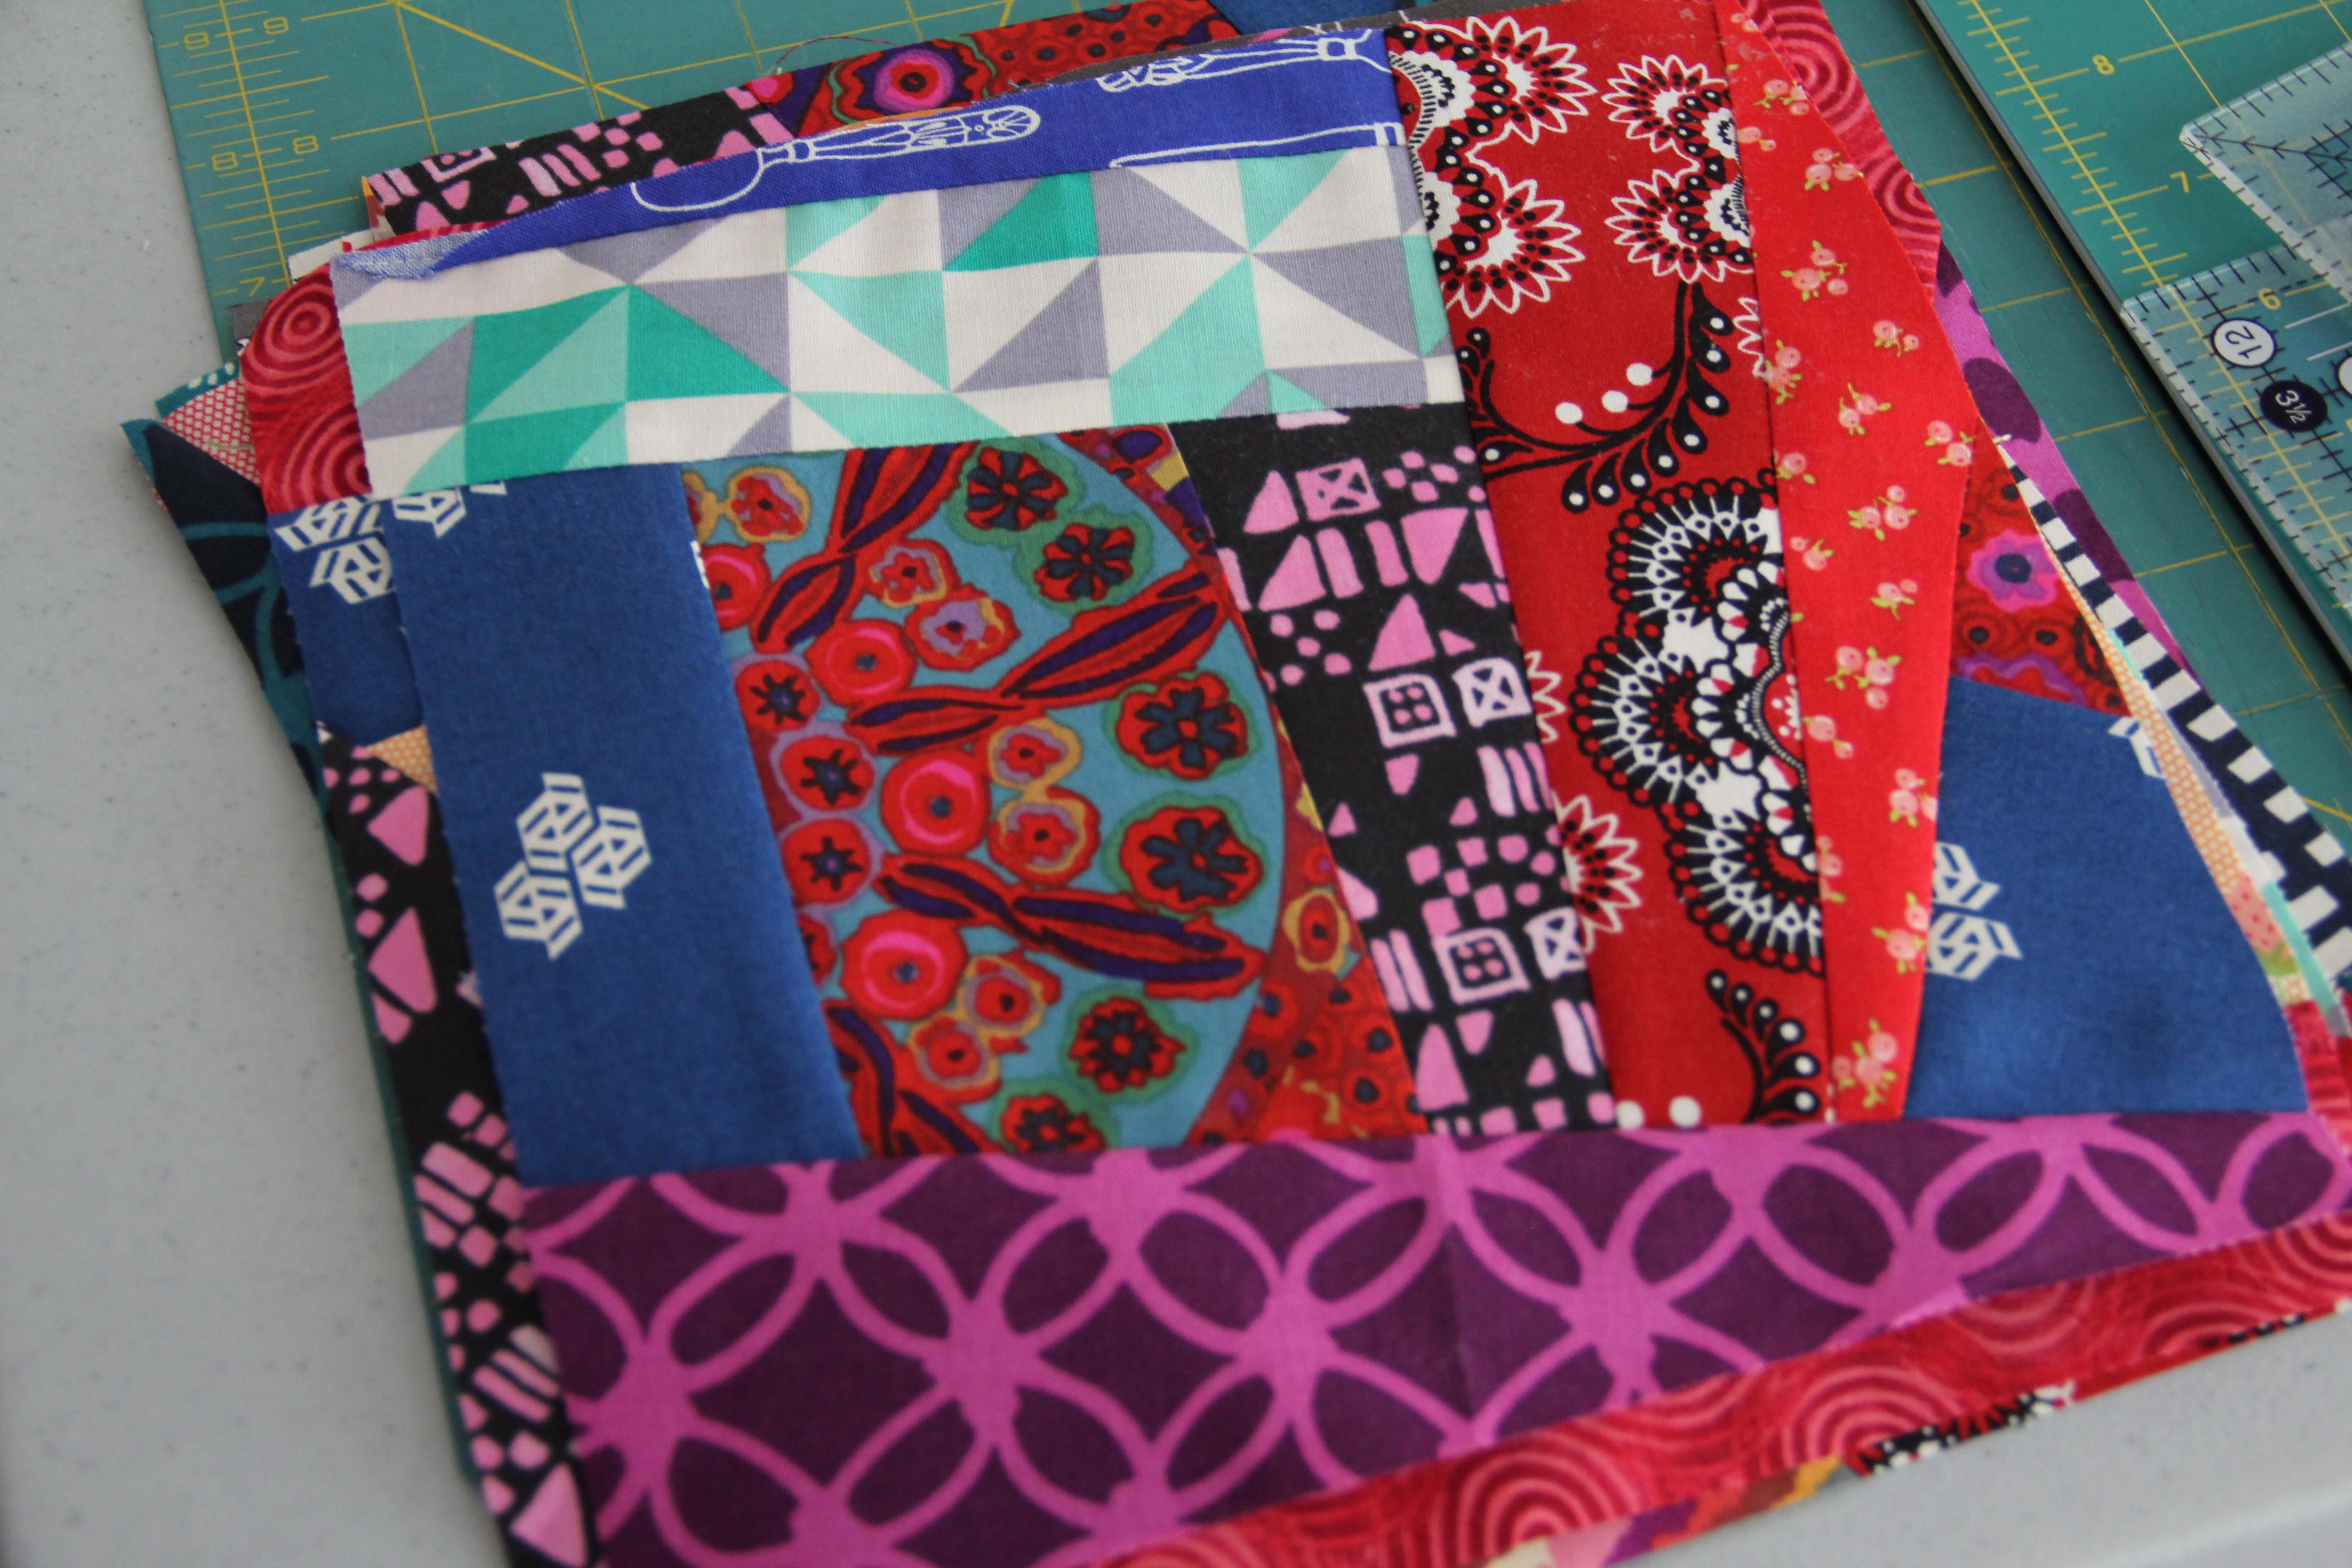
The valance is made of crazy quilt blocks, 8 1/2 inches unfinished. I grabbed all sorts of scraps I had lying around…some were from fatquarter bundles, some random, some leftovers from other projects and just began sewing.

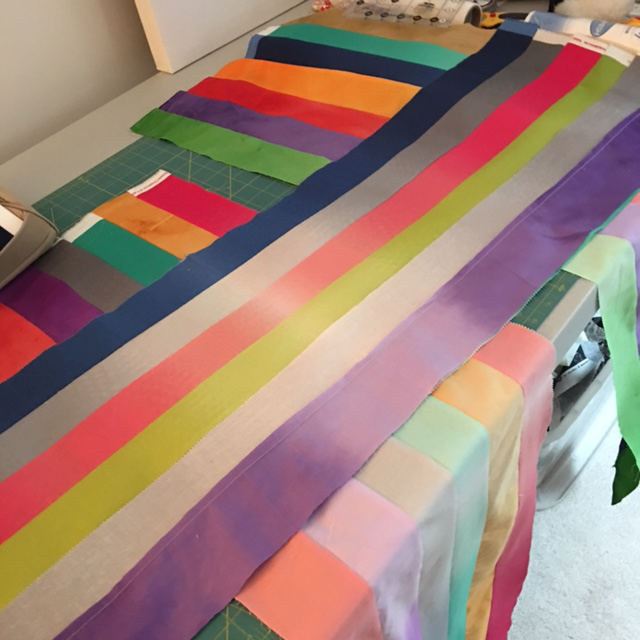
The beauty of this project is that it doesn’t take any real focus or concentration.  The 1/4 inch seam doesn’t have to be perfect.The colors can be anything you want…no matchy-matchy stuff. Just square it up to 8 1/2 inches, then sew them together.

crazyblocks1 
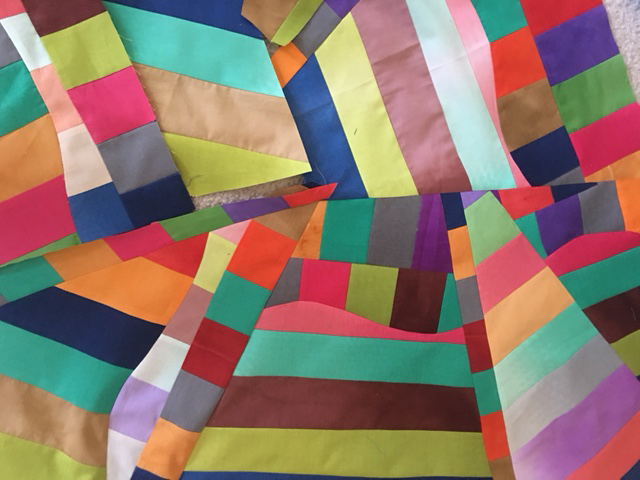
If you have never sewn this way (improvisational is what some call it) you will love it. Well, some people like me love it, and others find that they need more guidelines.  But, the freer you are with the blocks, the more fun it gets (if you can let go of the need for perfection.)

And the result is happy crazy.

window1
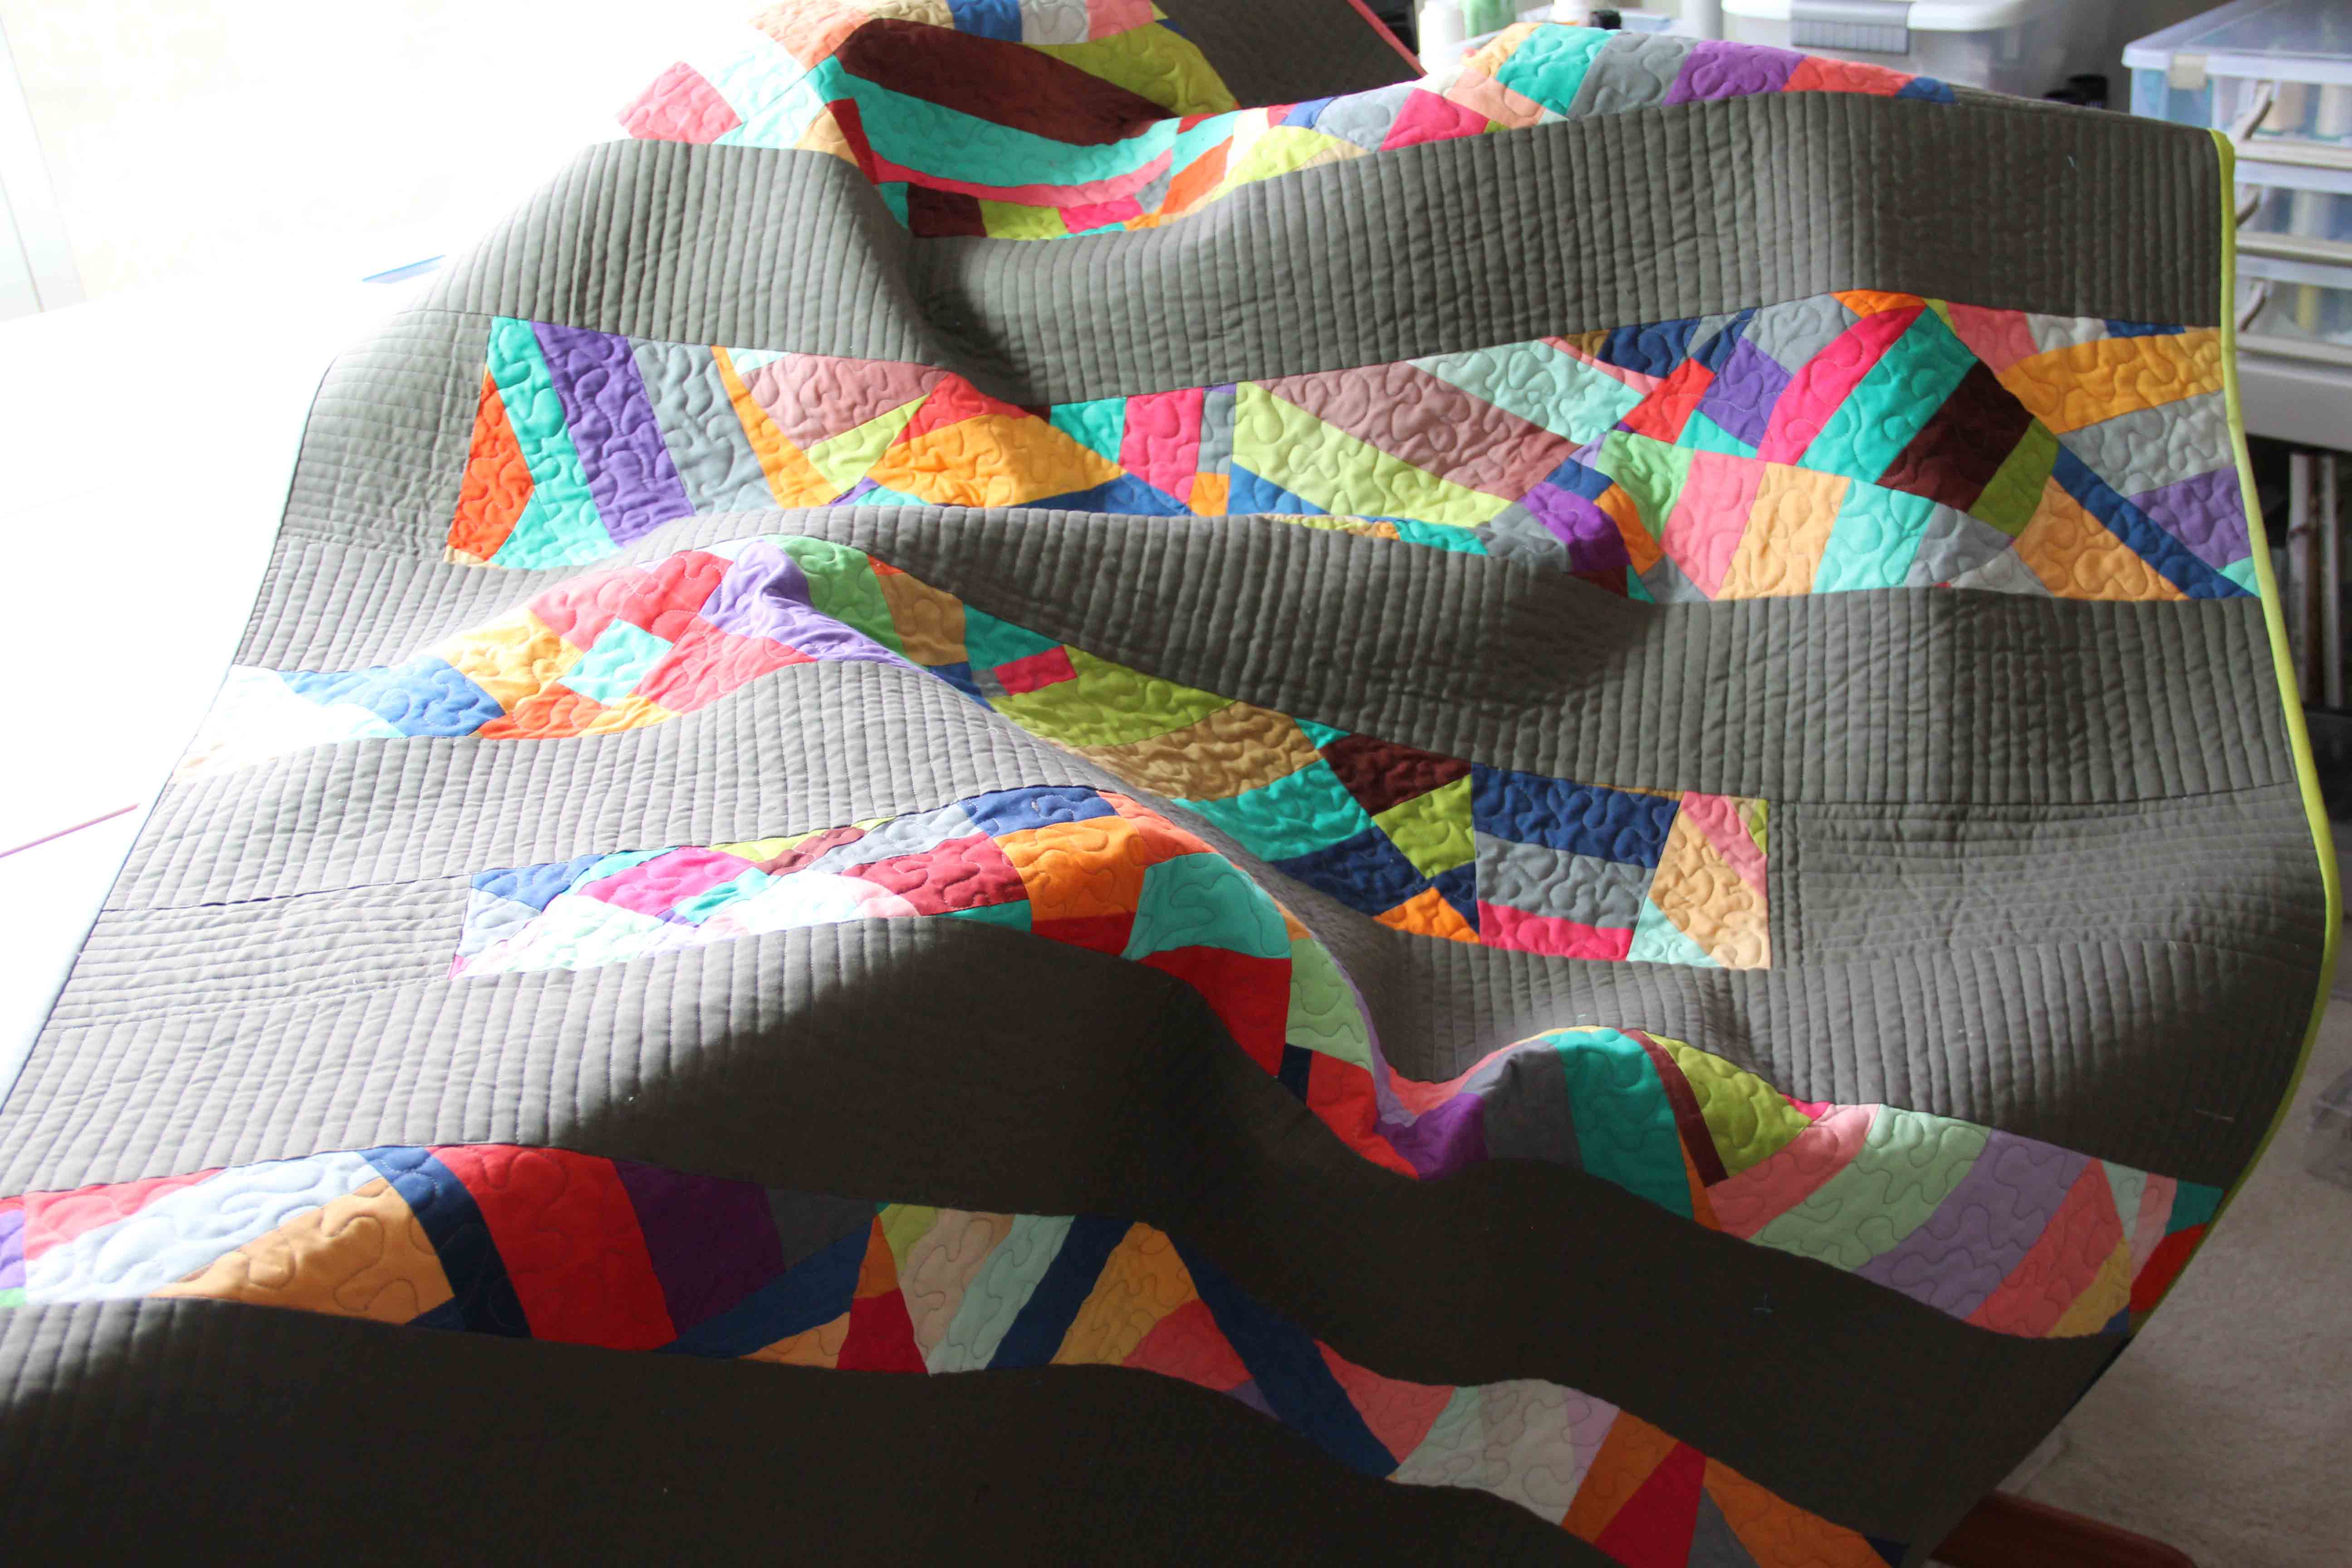
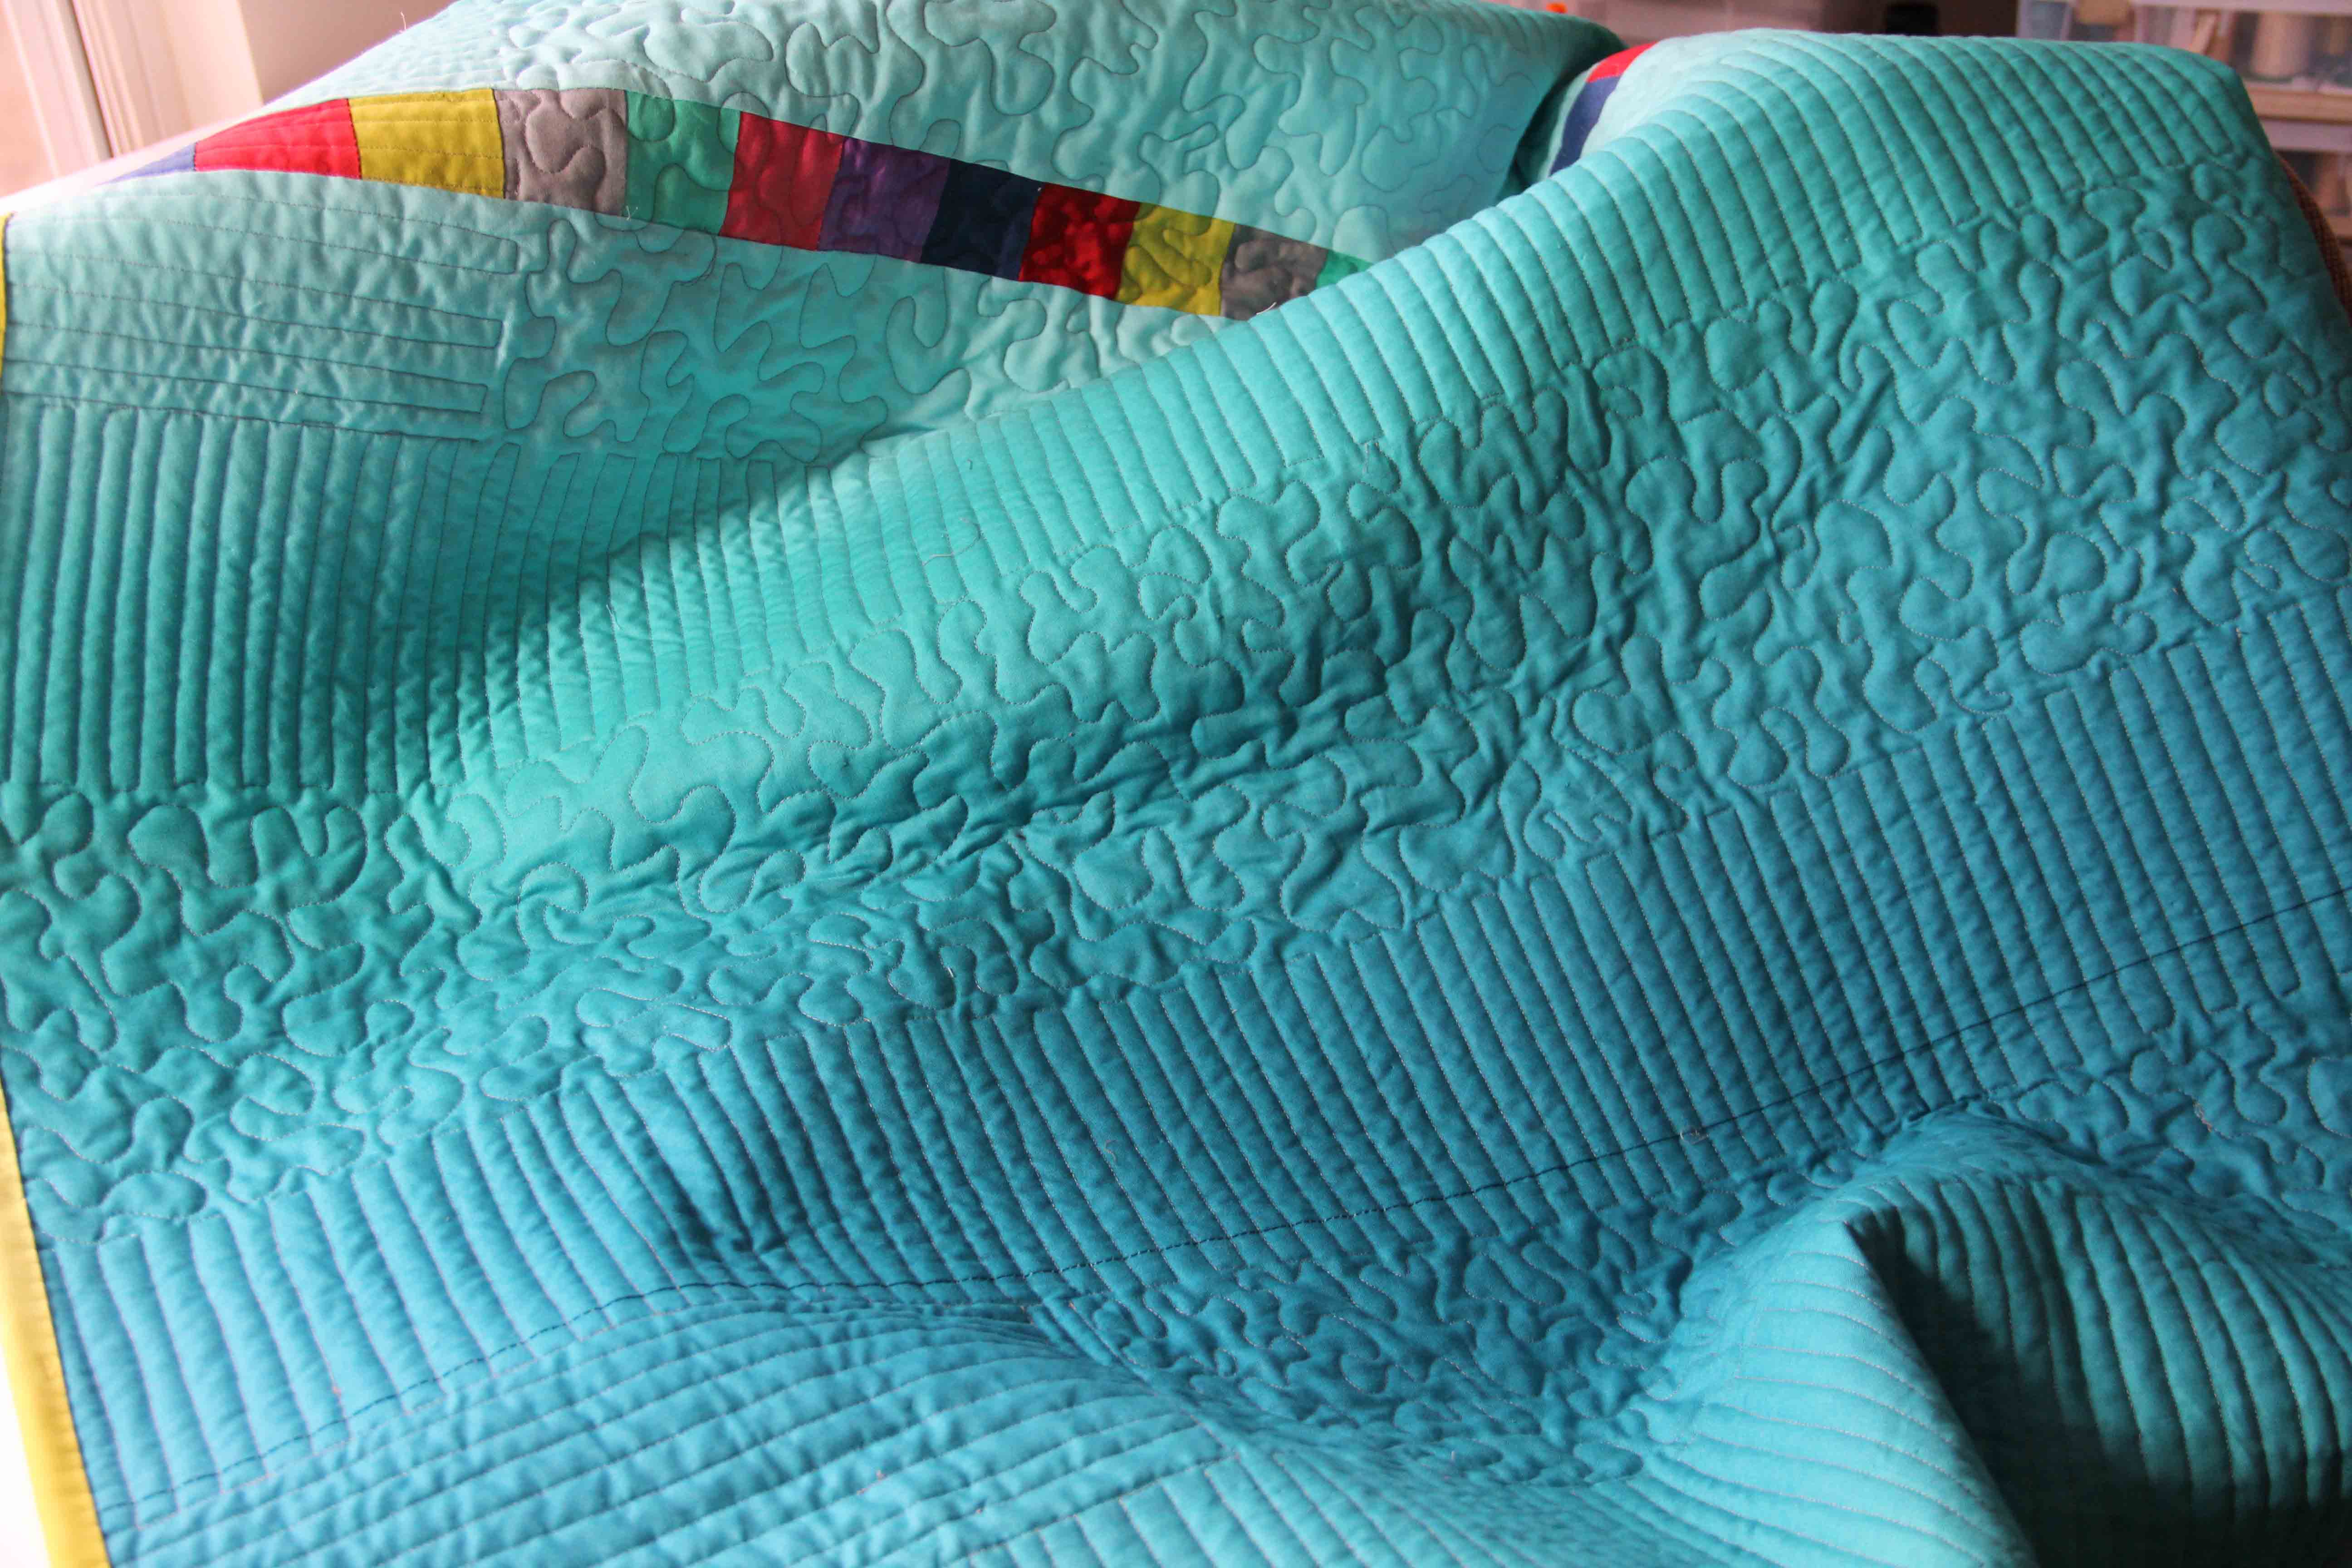
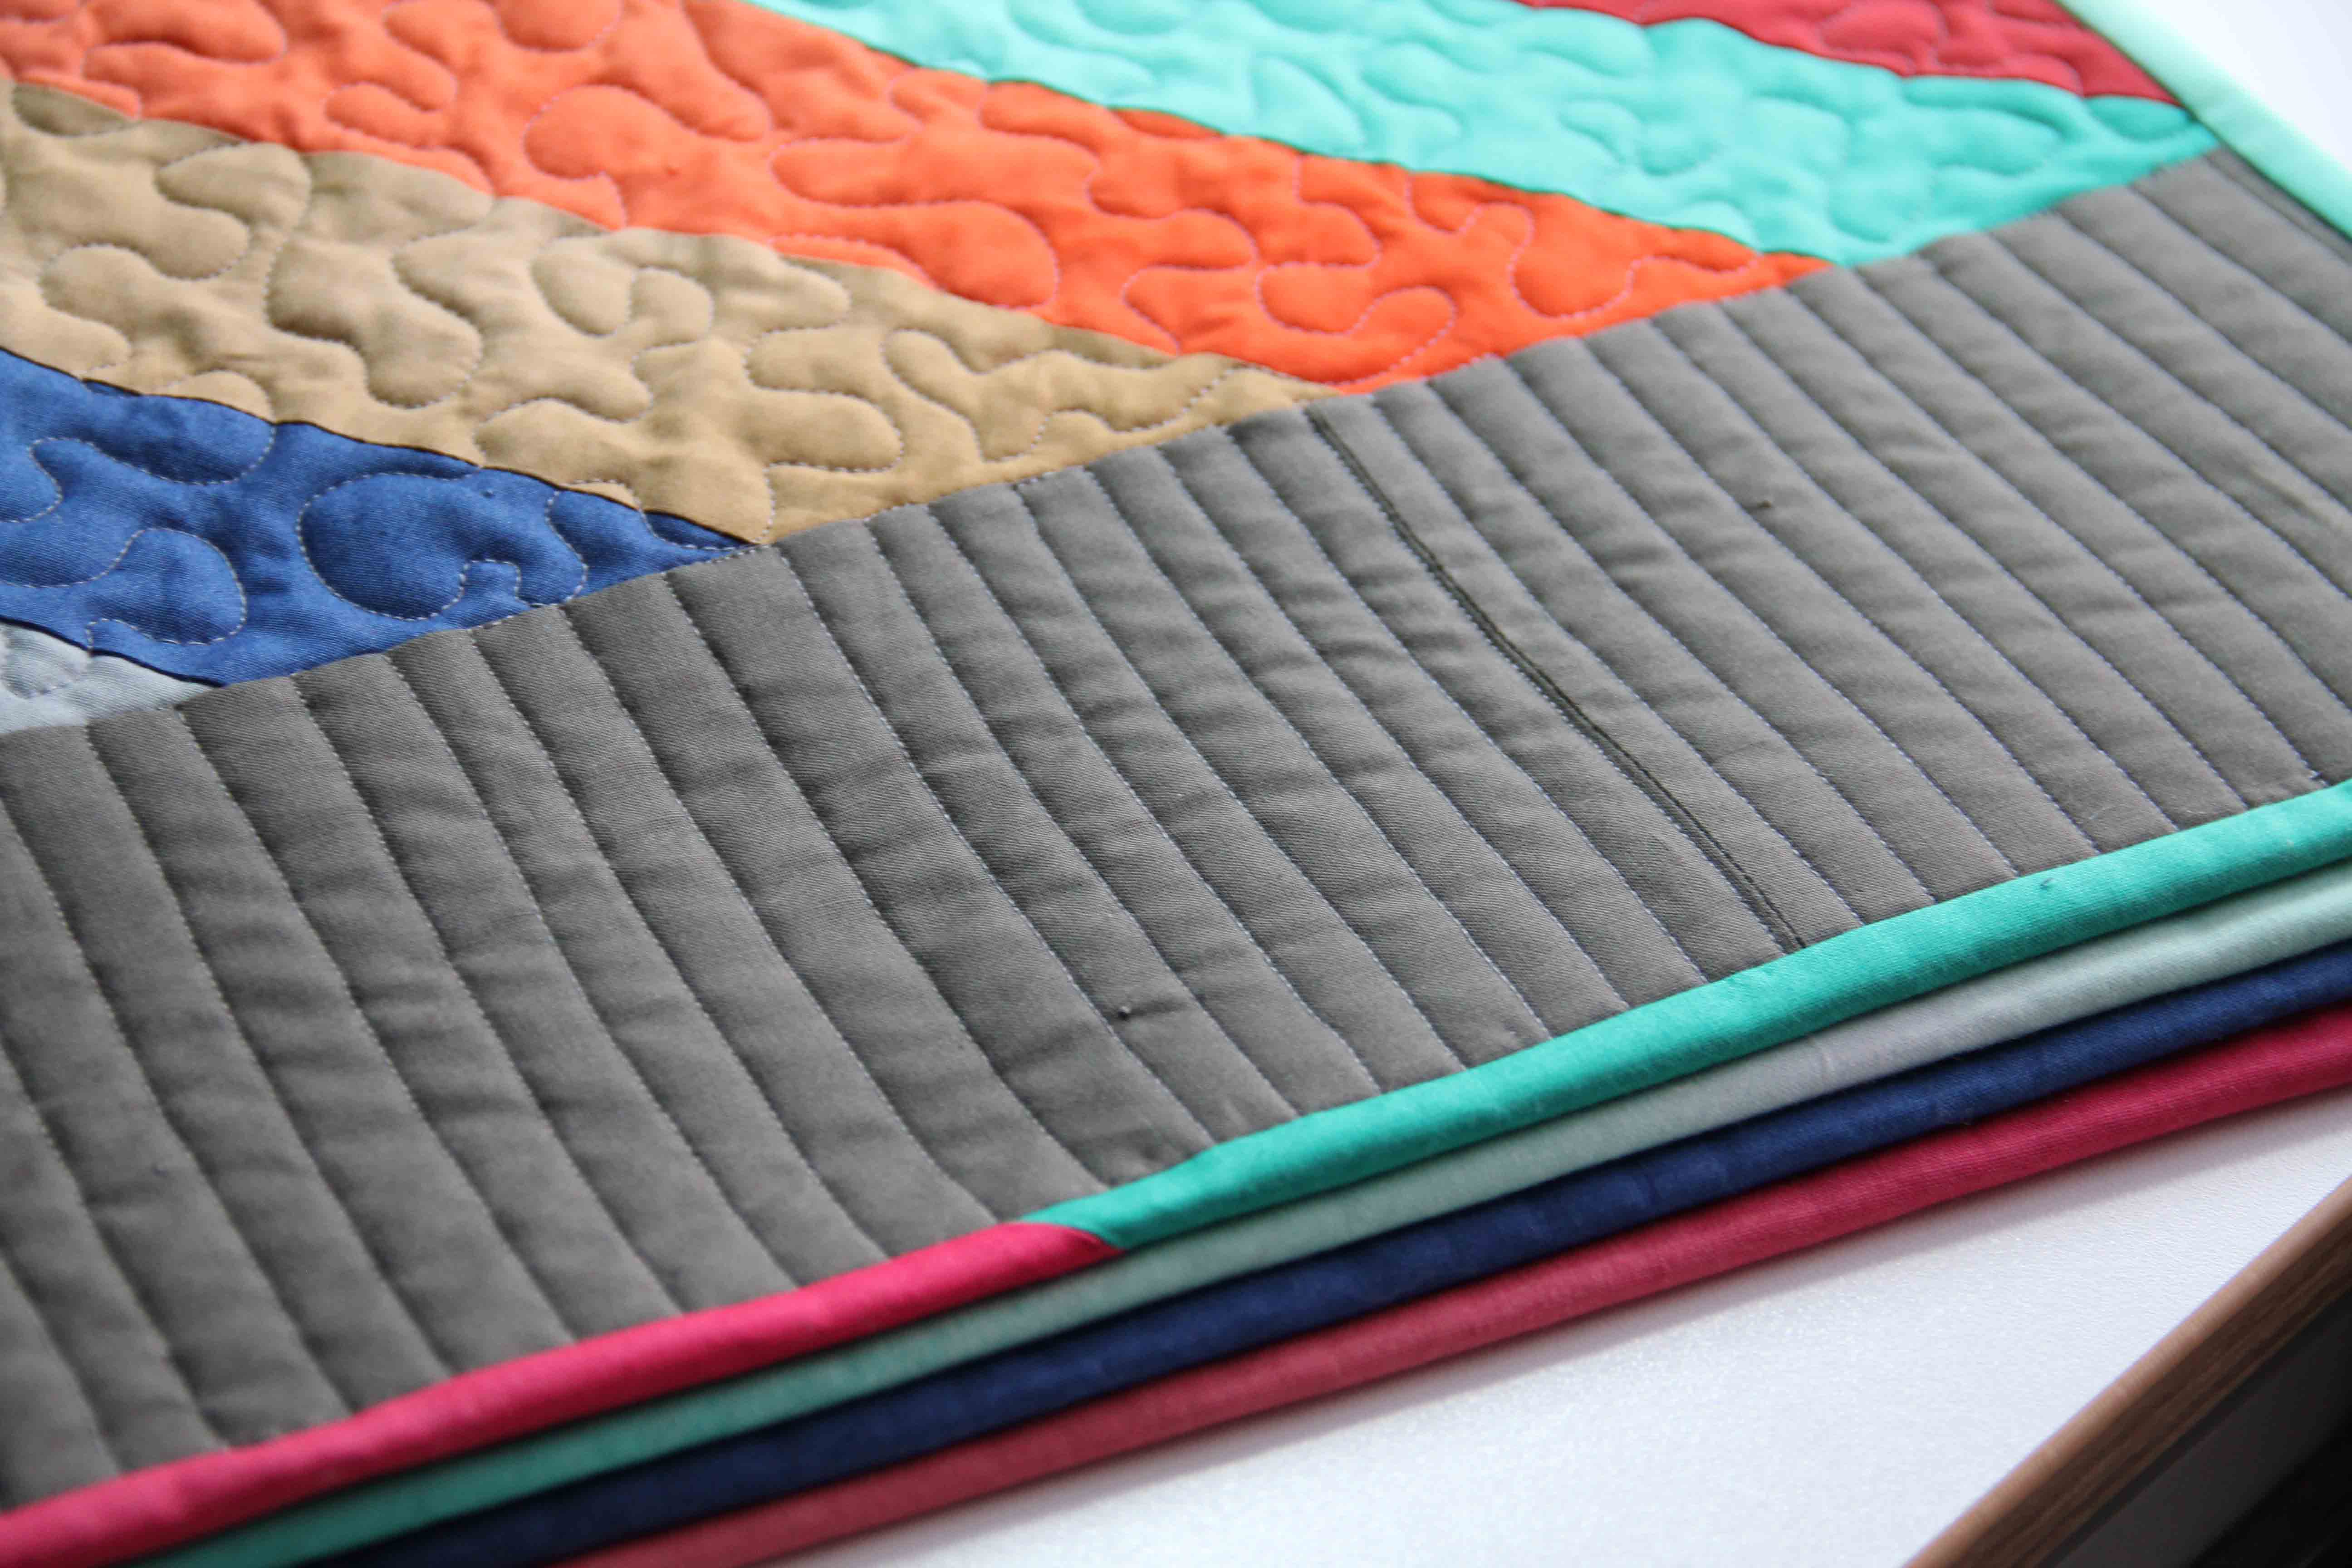
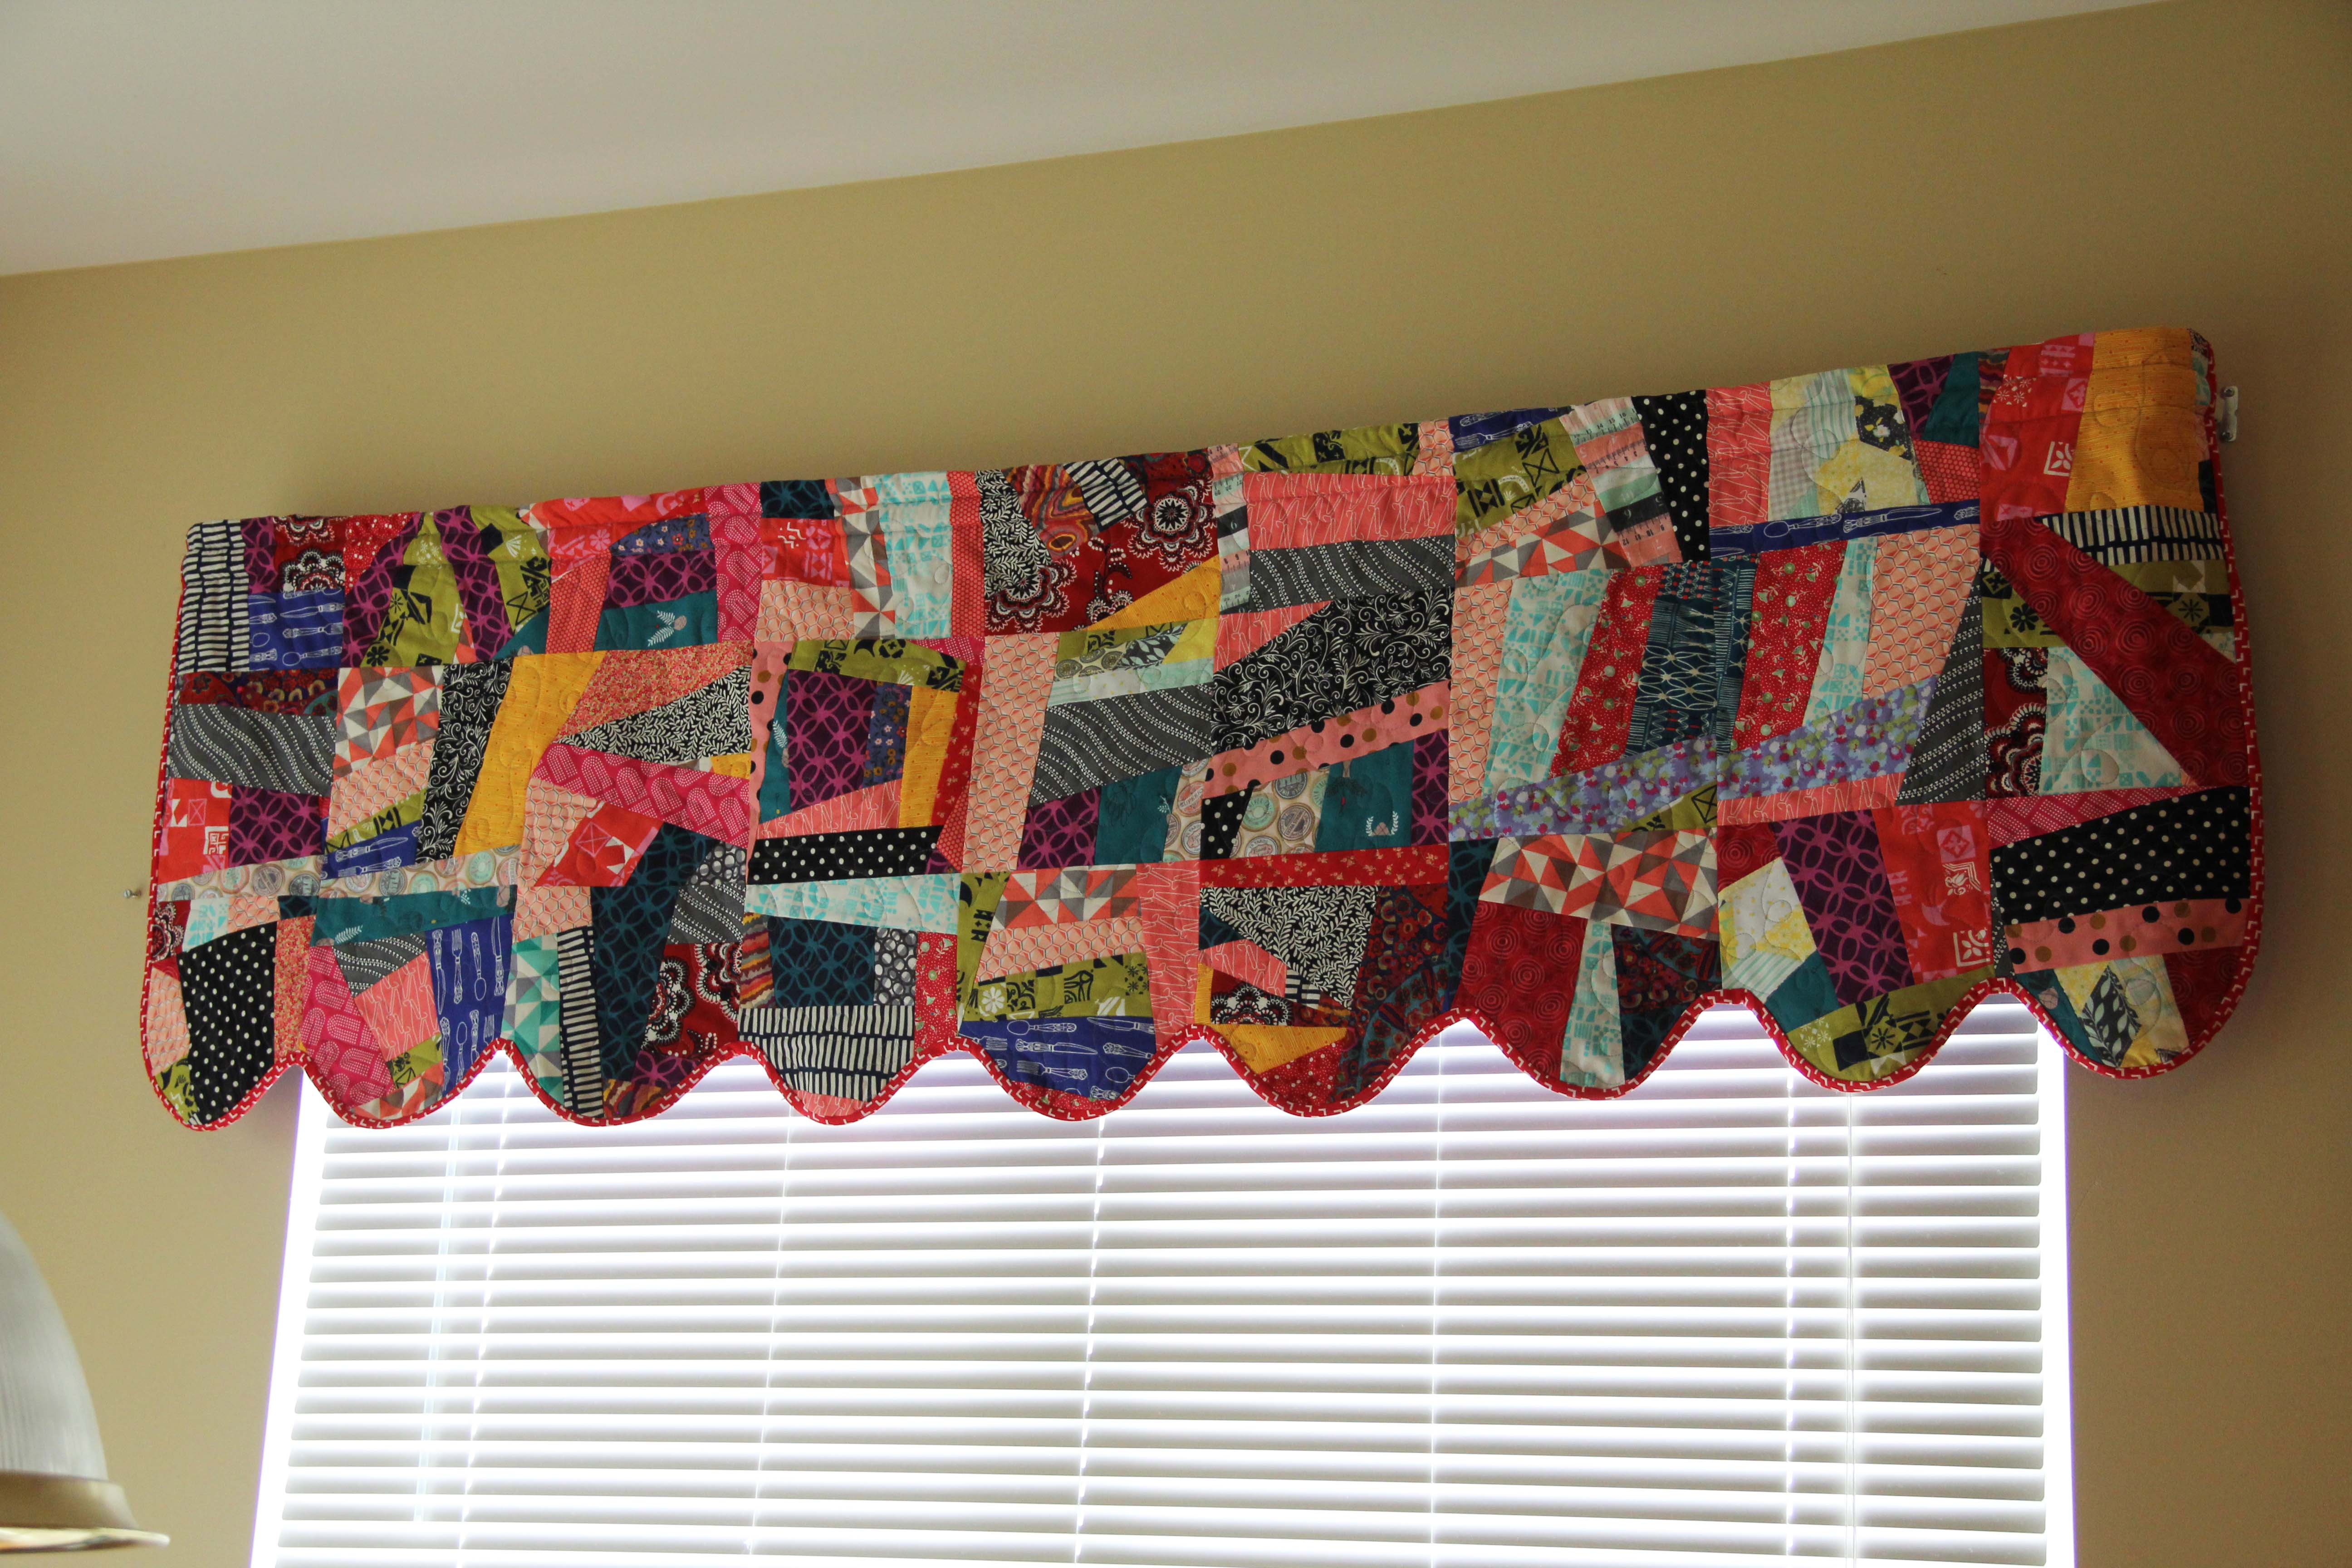
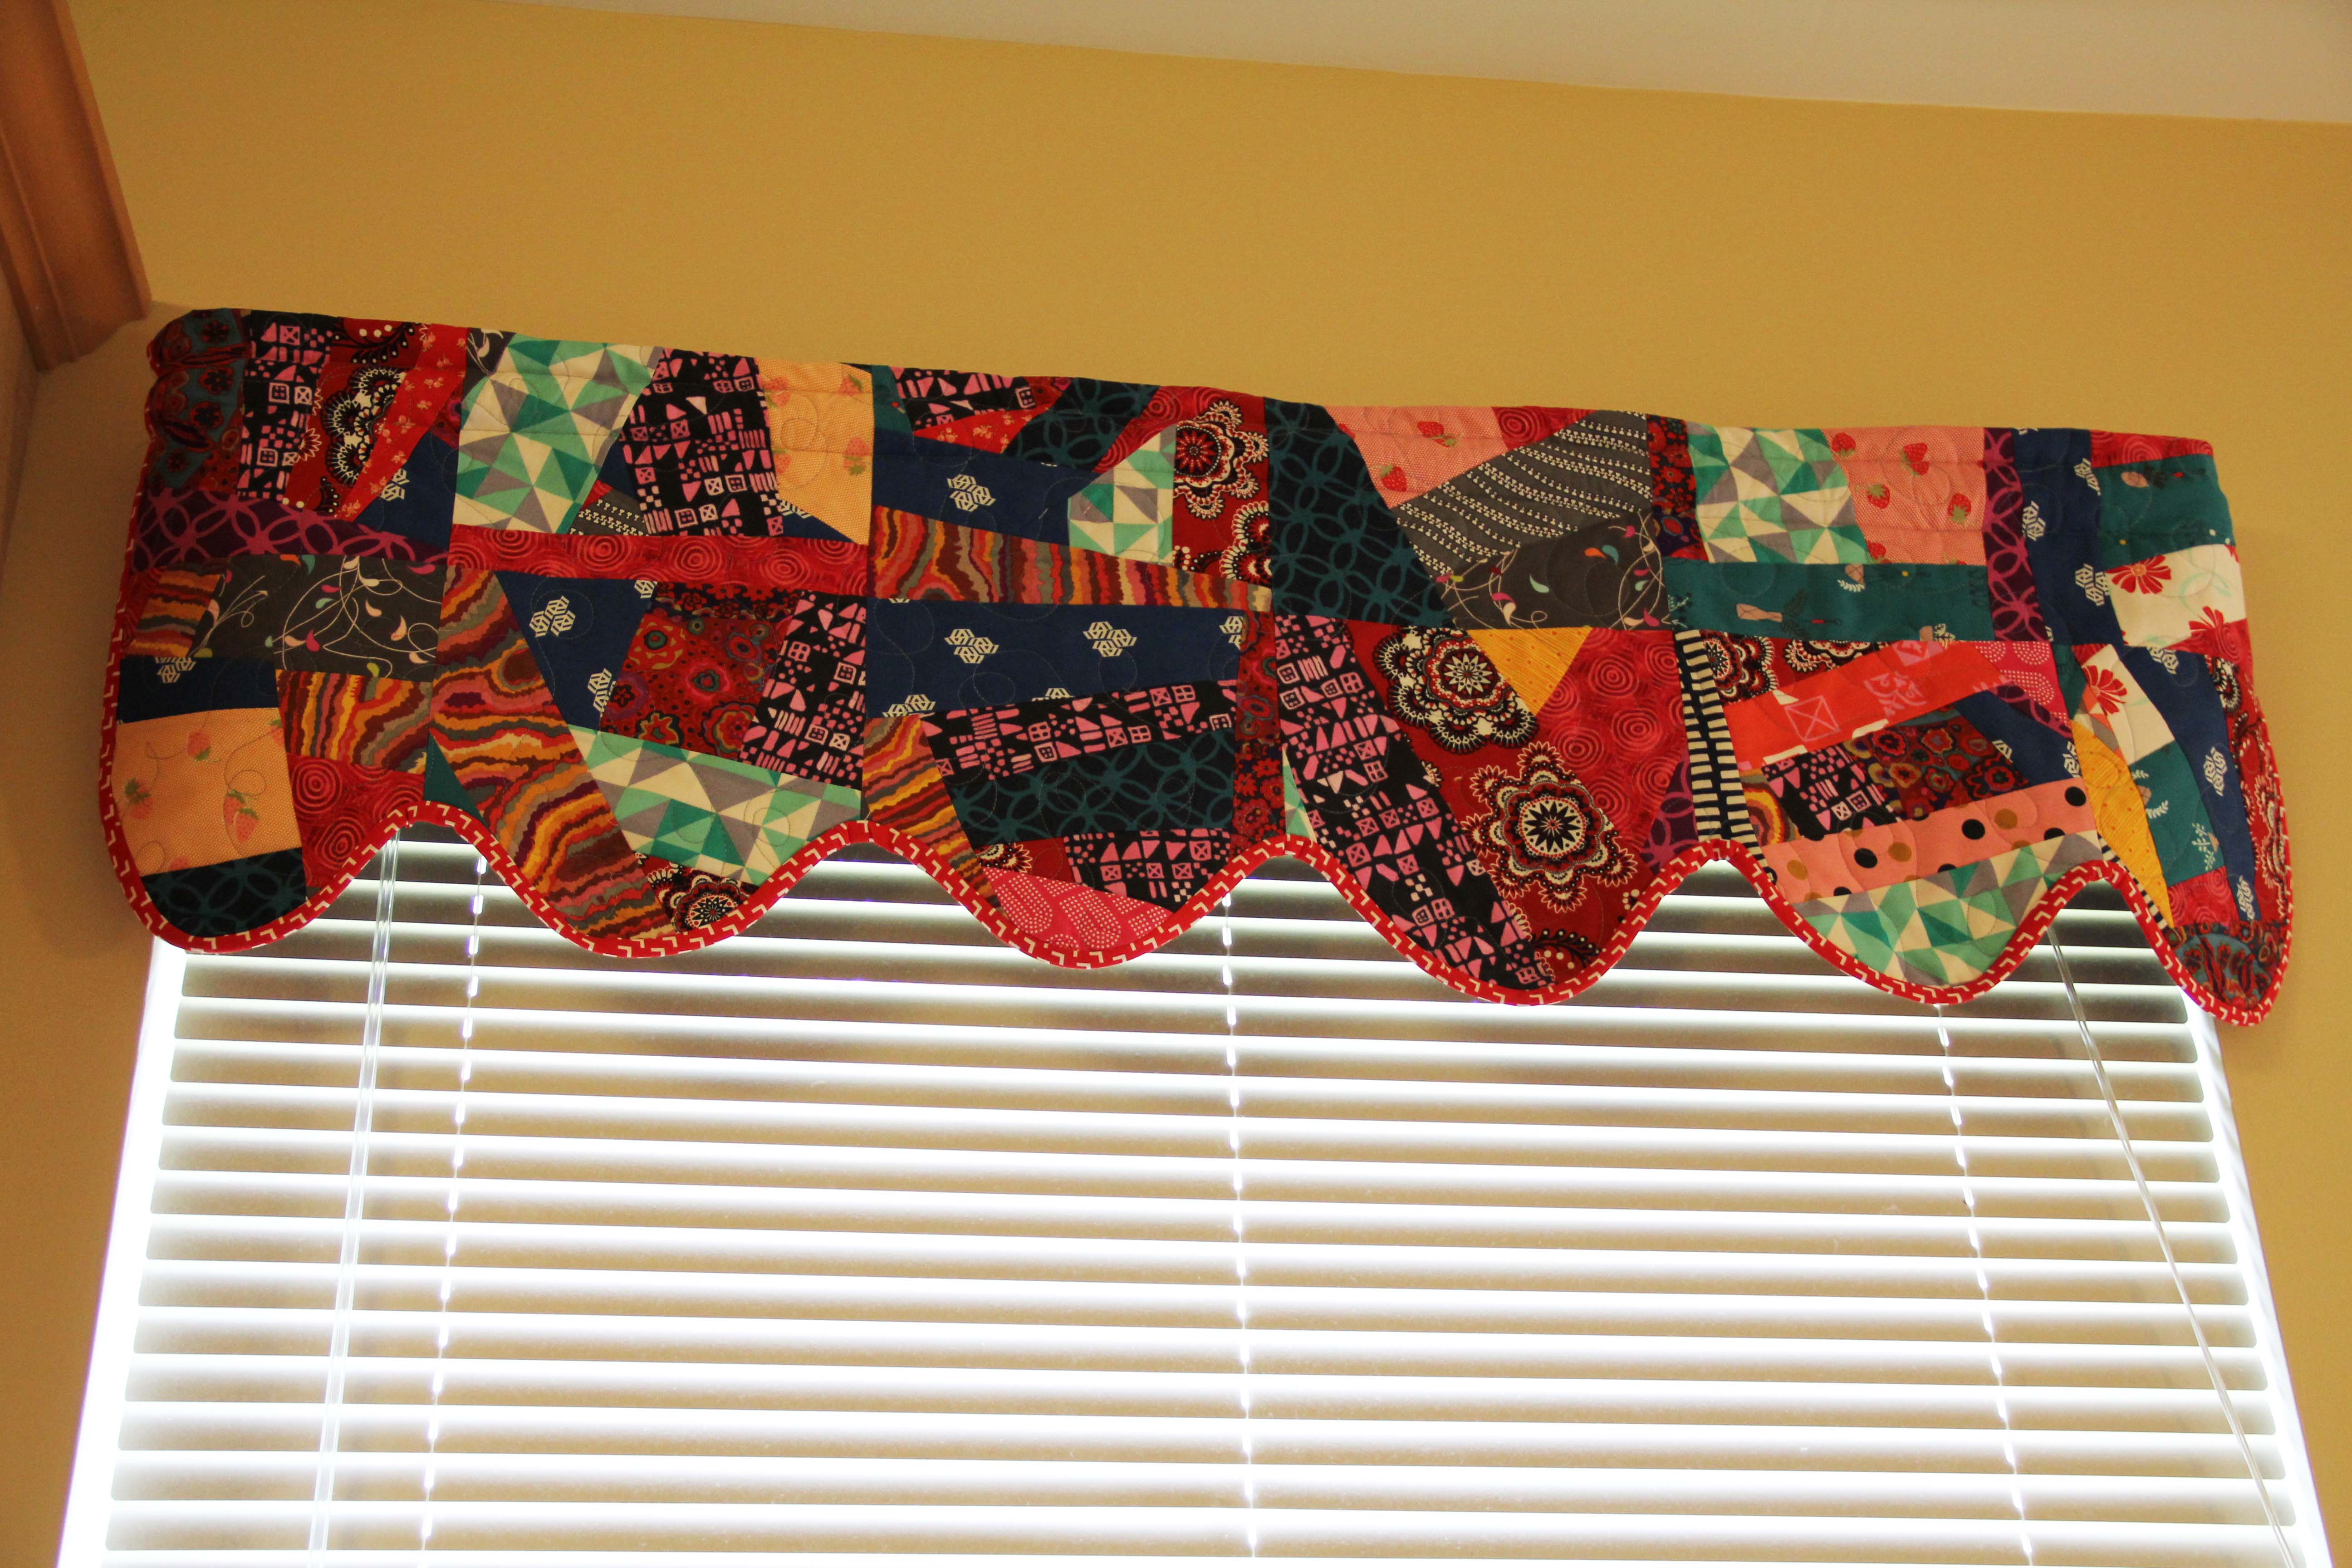
For this valance, I assembled 3 rows of blocks, measured the window and the rod, and created a quilt sandwich and quilted the whole thing.  Then I came back and added the scallops and bias binding.  From the top, I just folded it down enough to form a rod pocket and sewed it in place with a couple of straight seams.  The binding goes all the way around, it’s just turned down at the top so you don”t see it.

And because the quilt is heavier than plain fabric, even with a lining, it hangs nice and flat.

I love it.  It’s exactly what I wanted.

Then I turned to the chairs.

chair3
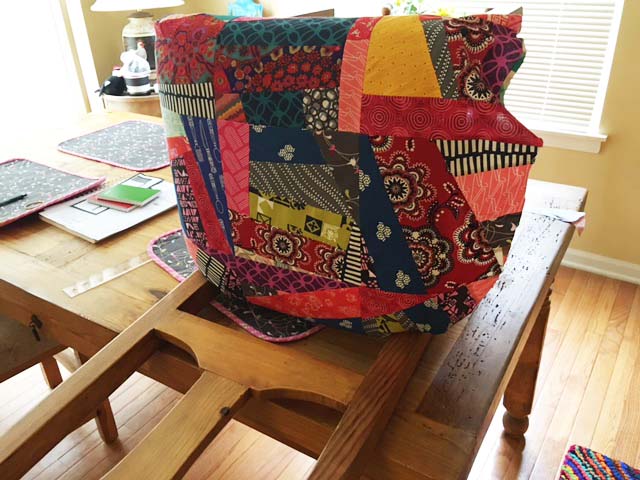
Each chair requires an additional 9 blocks.  I only finished one chair so far, but it goes fast. The blocks on the chairs are not quilted…just nine blocks sewn together.  I studied the chair to see how the cover was attached, and I could see that they started in the back. ( I am NOT an upholsterer, but would love to be…I don’t think it’s as easy as it looks when you get to armchairs and things like that!)

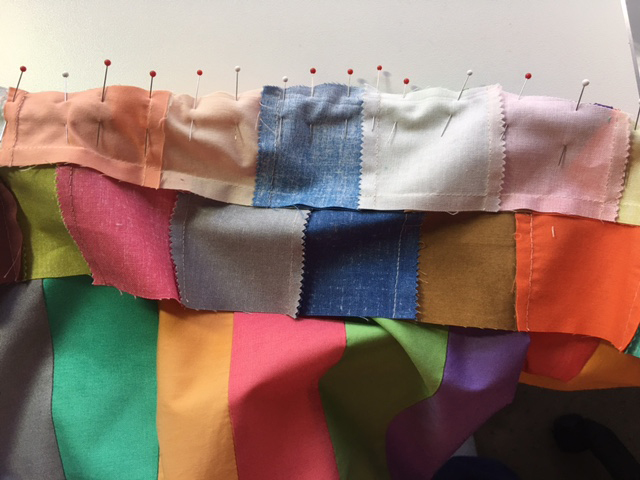
Anyway, I started in the back and pulled the fabric to the front, using a staple gun.  I did allow myself enough fabric to double the seam where it’s stapled…I didn’t want the fabric to fray and unravel.

chair2Just pull taut from the back  to the front and staple it down.  It doesn’t look very taut in this picture, because my hands were on the camera, but when you are working, you really need to pull tight, with one hand and staple with the other.

chair1You can do this.

I am loving how this turned out.  I know it won’t last forever, but now that I’ve changed the covers once, I can do it any time.

sinkwindow1
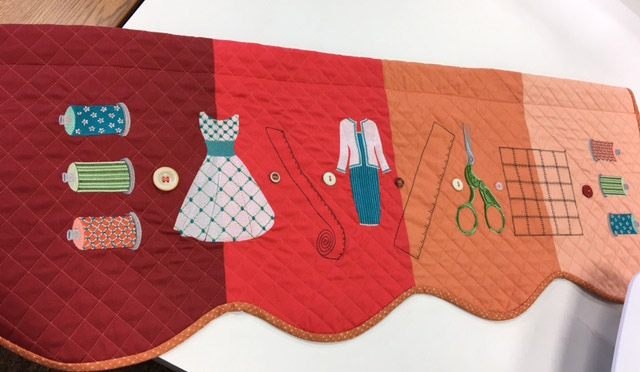
Finally, I made another little valance to go over the sink, which is a smaller window.  Same process, fewer blocks.

This was fun stuff.  If you can make a quilt, you can make these valances and chair covers.  It’s just taking the same principles and adjusting to different shapes.

Keepin’ It Together

So I finally got around to making one of these Sew Together bags.  Have you seen them?

sewbag5sewbag6

Here’s your convenient link to purchase the pattern. Or ask your local quilt store to get it in for you.  It’s from a designer named Sew Demented.  That should give you a hint.

One blogger noted that everyone wants to receive one as a gift….because no one wants to actually make one.

Here’s the thing.  It’s not a difficult bag to make.  It’s extremely functional.  It just takes a little time and patience and the more varieties of fabric the better.

And all the cool kids are making it.

Take a peek at Pinterest.

sewbag7I had never heard of this pattern until I made the sample for our Bernina Software Inspirations class.  Turns out the “software” part was the easiest thing to do. (And the embroidery software is optional…you can quilt or just leave the front of your bag plain).

sewbag1The idea behind this bag, is that you can carry all your sewing supplies in it and keep things organized.  You will see in the pictures that the bag has 3 zipper pouches with pockets in between.  If you have a fear of zippers, you will overcome it completely with this bag. In my humble opinion, the hardest part of any bag project is getting everything cut ahead of time.  And with this bag, you’ll want to use as many different types of fabric as possible.  The fun part is how scrappy and colorful and interesting each one can be.

Grab a fabric line you love and get a bunch of fatquarters from that line.  The brighter the better, and a fun binding doesn’t hurt either.

At this point, I highly recommend using this tutorial to assist in your assembly.  Read the directions in the pattern, then read this tutorial.  They are very helpful.

sewbag2The pattern calls for you to lay your fabrics in order and you install the zippers assembly-line style.

sewbag4After the zippers, you attach the sides, then the exterior of the bag is attached and binding added all the way around, including the zipper which holds the bag closed.  It’s pretty ingenious. Between the instructions and the tutorial, you should have no problems.

I started at 9:30 in the morning, and stopped to shop, get lunch, talk to my son after school, eat dinner….and I finished by 7 pm.  The next one would go even faster because I now understand the construction, and wouldn’t have to spend as much time reading.

So go ahead! Step out of your quilting comfort zone and try one of these fun bags.


My Love Affair (with wool!)

wool trees 5I’m not really used to working with wool.  It really doesn’t behave like cotton.  Yet, its rich textures have just been a delight.  I love the way thread sinks into it.  I love the way thread can sit on top of wool, as well.

It inspires me.

I’m also a fool for anything hand-dyed and much wool is currently hand-dyed. (And not cheap, I might add.)

wool trees1This project really has been one of texture.  I experimented with a number of different Aurifil threads, but kept falling back on a nice 30 weight in different shades of neutrals.  It has just enough substance to show up, but is not so thick that it starts to cause problems in the machine.

wool trees 2I wanted this to feel a lot like a walk in the woods near the house. Twisty, gnarly branches — barren, waiting for spring.

Here’s a peak at the back side of this project, for those of you who appreciate a look behind the scenes.  I think it’s every bit as interesting as the front, maybe even more so.

wool trees backI have done some projects with wool and roving before. This floral below was one of my favorites. Something about wool is much more free-form for me than rigid piecing in cotton.

You can read more about the roving project here.

If you find you are interested in experimenting in wool, there are plenty of places to start.

Wooly Lady has joyful patterns and plenty of hand-dyed wool.

Sue Spargo also has a lot of hand-dyed fabric and beautiful threads for hand embroidery.

Need to get the creative fires burning again? I recommend a quiet little rendezvous with a few different shades of wool…ooh la la.

Final piece.

My Practical Valentine

Sssssshhhhhhh. Don’t tell my husband.  He doesn’t read the blog, so he won’t find out what I made him for Valentine’s Day.

Months ago, he casually asked me if I could make him something to sit in the treadmill tray.  He said he didn’t like the remotes sliding around, banging against one another and getting confused between the channel remote, the DVD remote and, of course, the Netflix remote.

First world problems, no kidding.  I know it.

Nevertheless, I said I would make something and then promptly forgot about it. So many quilts and art projects to make, so many lovely fabrics, so little time for something as unglamorous as a treadmill caddie.

And it’s not like anyone has a pattern already created for our treadmill.  It’s not rocket science but I did have to think it through a little.

I started with a basic pattern for the bottom of the tray.

treadmill caddie1From there, it was easy enough to measure the sides and the depth.  Then I had to think about materials…what should I use as stabilizer?  Would batting be enough?  No, I decided, Soft and Stable would be ideal. 

If you’re not familiar with the product, it’s perfect for bags and wall hangings or anything where you want more body than batting.  Ask for it at your local quilt store…most of them already carry it.

After that, I had to devise a way to add compartments.  I didn’t really know what size the compartments should be, if he wanted the remotes to lay down or stand upright, or just tilt out of the way.  At any rate, I decide to make it flexible.  The partitions can be moved around so that the caddie can hold a drink or just the remotes or different sized things.

I scanned the sewing room for an idea.  Velcro!  That’s the ticket!

treadmill caddie 3I attached one side of velcro to the lining, and the other side to the little dividers for the inside.  Then I created a lining that was the same size as the outside and attached it.

treadmill caddie 2Strangely, free-standing it looks like a little canoe.

But once inserted into the treadmill tray, it fits and makes more sense.

treadmill caddie detailHere, you can see a detail of how the little partitions can be moved around to support different sizes.

treadmill caddie finishedAll set and ready to go.  As you can see, the remotes fit quite nicely in their little compartments and are easy to grab.  I can always add more partitions or move them around.

What would I change?  Well, I used batting on the bottom and Soft and Stable on the sides.  I think I would create the whole thing using the Soft and Stable if I were ever to create another.  The batting is very forgiving in terms of fitting, though.

I think he’ll be happy.  ssshhhh…he won’t get it til Valentine’s Day.  Better than chocolate, right?     hmmm…

Here’s a link to a previous Valentine’s Day post.


My Obsession with Trees

I didn’t realize it until I tried to describe some of my projects to someone, and all the ones that reflected my own art and not just a pattern designed by someone else, usually included trees.

And if not trees, then at least something that grows in the ground.  I can’t tell you what it means, except that I have a deep longing to connect to the earth.

I recently pre-ordered a book that has apparently been wildly popular in Europe:  “The Hidden Life of Trees — What They Feel, How They Communicate — Discoveries from a Secret World, ” by Peter Wohlleben.

An article from the NYTimes  profiles the German forest ranger’s book.

I’ve always known that the natural world — birds, animals, trees, gardens —  have more to teach us than we ever give them credit for.  In the woods, I learned to listen, and look…much more than I ever do in my daily busy-ness.

Art is a struggle.  We are reaching, reaching, always striving to capture the thing beyond ourselves.  I do believe that trees (as well as the rest of nature) try to teach us something. When I break through the barrrier and discover the lesson, I will let you know.

Until then, like most of us, I continue to be a student.

close upIMG_3294

Multi-hoop project is quilted, bound and finished.

Multi-hoop project is quilted, bound and finished.

IMG_0742IMG_0741photosnap-carol