Messin’ with Minky

I love minky.

I hate minky.

I have a love/hate relationship with minky.

It started with this little box of pre-cut minky fabric I bought in Shipshewana.

minky in a boxYummy, right?  Like a box of candy.  They came with a matching backing in a textured grey.

Now, just like everyone else, I had read a little about working with minky. It’s hard to describe.  You want to forgive all its faults and difficulties because it is so delightfully soft to touch.

But it behaves like a knit.  The gal at the store recommended a stretch needle.  I armed myself with a 90/14 stretch needle and some So Fine thread from Superior Threads.  I’m sure this seems like a mismatch because a 90/14 is a pretty big needle, and So Fine is, well, so fine.  Yet, when working with minky, you have some bulk to contend with, soft as it may be.  By the time I was adding the binding, I had 4-5 layers of minky with batting in between.

Assembling the strips was easy enough, and not too messy.  Apparently, the textured minkies are the ones that do most of the shedding.  It wasn’t until I cut the binding that I really started to see it begin to shed along the raw edge.

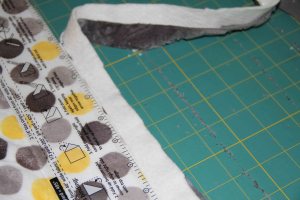
minky assembledminkymess3The trick to working with minky is to clean up as you go.

Even yourself.  Believe me, every time I turned around I had more minky on myself than there was near the sewing machine.

Two tools you won’t be able to do without:  a vacuum, and a lint roller.

I used them both basically every time I moved the quilt before the binding was finished.

minkymessminkymess2Another trick is to make sure the area you work in is already clean.  In other words, don’t have a stack of your favorite fabric underneath the sewing machine where you are working on minky.  In fact, move everything away from the area, so that you can see the fuzz and get at it.

I used the lint roller at least 20 times, each time taking off another layer of paper so that it would still work. I cleaned up after every cut so that I did not spread the little fuzz all over the place.

The whole process is not for the faint of heart, and I basically cleaned the entire sewing room afterward.

I used an older machine, just in case it dirtied my larger one too much.

minky cleanupLuckily, as you can see, my machine got dirty, but it’s not the machine that takes in the most fuzz.  It’s everything around you.

I used a walking foot for everything – stitching and quilting. Minky is slippery.  Many people suggest pinning everything, but in a strip quilt like the one I just did, the walking foot did the job completely.

minkysewI know all you Pfaff people and even Bernina 7 Series and 8 Series folks will think you can get away with just your IDT or dual feed.

I wouldn’t try it.  Minky likes a walking foot.

When I finished, I immediately marched out the back door and shook the quilt out over the back lawn.  Then went straight to the washing machine and washed and dried it. Once the raw edges are sewn in, no more fuzzies!

If you are good at cleaning up after yourself and taking care of your machine, you will do just fine. If I were going to do this again, I would likely only put minky on the back of a quilt, and I definitely would not use it for binding–even though it looks great when you’re done.

No matter how you feel about minky, this is the truth: it makes the snuggliest, cuddliest, most huggable quilts ever.

finished minky


Quilting Using Machine Embroidery

machine embroidery quilting4I have wanted to try this technique for a long time now.  And I’m going to teach a class on it in the fall.

If you have a sewing machine that is capable of embroidery, you can do it too.

Many people love the look of a quilt that has long-arm quilting.  It gives a very polished, professional look to a finished quilt.  Most of my quilts I use free-motion and do them at home.  As you know this is awkward with larger quilts, twin size and up. But using your embroidery module to quilt is really worth trying, especially if you are someone who is comfortable with embroidery (hooping and hooping over and over…and if you’re not familiar, what a great way to get good at it).

embroidery quilting 1For this particular technique, I followed along with this book from Amelie Scott, “Edge to Edge Quilting on Your Embroidery Machine.” 

She provides special quilting embroidery designs that have an easy start and end point.  All the work is in the positioning and the time invested in the stitch-outs and hooping.

machine embroidery quilting2As you can see on my quilt, you will still be hefting around a a lot of fabric.  And by far, the trickiest part is calculating the number of hoopings and working out the positioning.  But that’s just a little bit of math and little bit of decision-making.

machine embroidery quiltingYou use 2 different files…an “A” and a “B” file.  You alternate them in rows so that the design looks randomly spaced. This really does work and the finished quilting technique is lovely.  While I can free-motion some great spirals or stippling or loops or hearts, I know I would never be able to get the perfect consistent quality of these daisies.

This 60 x 60 in. quilt took 32 hoopings, and my time invested was somewhere around 7-8 hours at the machine.  I love the way the quilting looks  — whimsical, yet professional.

machine embroidery quilting5 Would I want to do this for every quilt?  Of course not.  I like to be able to customize some of my quilts.  Is this great for gift-giving and finishing some of those UFO’s?  A resounding yes!  And a terrific way to get more use out of your embroidery module.  Your local quilt shop should be able to get you the book.

What are you waiting for?  Let’s get those quilt tops quilted!


Shipshewana Dreamin’ – Part 3

Don’t worry, this is my last post about Shipshewana.  I’m not a travel brochure.  But it was a peaceful getaway not far at all from home and so I just wanted to share.

I had the opportunity to meet an Amish woman who sells hand-quilted Amish quilts from her basement  —  some of them she works on herself, some of them she contracts out from others, and some she sells on consignment.

(An aside: the stark contrast between an Amish basement and my own is embarrassing. Hers was empty, with a few things on shelves, not a dust bunny or piece of anything unnecessary in sight.  Mine is filled with boxes from outdated electronics, old toys, old furniture, old books, old pictures.  What a cluttered, junk-filled life we live. )

Here are a few of the quilts she showed me.  This is just a sampling as she had many more. Make sure you scroll to the bottom, because at the end is an absolute masterpiece.

While she gave me permission to take the pictures and put them on a blog, she did not want her name given.  “What if someone sees a quilt and cannot live without it?”  I asked, in my total blundering non-Amish way.

She smiled and gave me a card.

So if you cannot live without one, leave a comment and I will privately give you her info. The prices are very reasonable for the amount of work.

While I did purchase a piece from her smaller-sized collection, everyday I think about driving back out to get the whole cloth quilt.  And who knows?  Maybe she already sold it.

But we can all still appreciate it.

This is one she did herself.  She pieces by machine and quilts by hand.

This is one she did herself. She pieces by machine and quilts by hand.

SHe chose the colors for this, but asked others to do the piecing and quilting.  She said she's not good at curves.

She chose the colors for this, but asked other Amish women to do the piecing and quilting. She said she doesn’t like curves.

amish4

Hand appliqued and hand quilted.  A beauty.

Hand appliqued and hand quilted. A true beauty.

This one is a masterpiece.  She told me an Amish woman in Pennsylvania gave it to her to sell on consignment.  It is a whole-cloth quilt, and the hand quilting is so perfect it almost made me cry.

This one is a masterpiece. She told me an Amish woman in Pennsylvania gave it to her to sell on consignment. It is a whole-cloth quilt, and the hand quilting is so perfect it almost made me cry.

wholecloth4wholecloth3

THe whole quilt was for queen size but with overhang, so very large.  the entire edging was in scallops with these lovely feathers.

 The edging was in large scallops with these lovely feathers.


Shipshewana Dreamin’ – Part 2

My first stop of the the day was Yoder’s Department Store which opens at 8 am.  Honestly, they have a TON of fabric, and every book, (including modern quilting books) imaginable. I love this place.

yoders3 yoders4I had vowed to myself during this whole trip that I would only purchase items unique to the area.  I love Moda fabric, but I can get that at home.  So I began hunting for “local” goods.

First thing I ran into was this display of reproduction toweling.  I could purchase by the yard and got myself a vintage-looking design.  They had some very cute tablecloths in carriers that looked like handbags and I’d really like to use the toweling to make a handbag…add a little ricrac and I’m good to go!  Also in the display was a special edition “Yoder’s 70th Anniversary” hand towel.  While waiting in line to check out, another woman told me she was going to use hers to create a quilt around it.  What a great idea!

yoders2Of course, I purchased a little bit of anything that had some local charm.

yoders1Do you collect Row by Row?  Get your Shipshewana version at Yoder’s.

rowbyrowNext stop is the Davis Mercantile where you can find many stores, but I just had to see the famous Lolly’s Quilt Shop.

lollysLolly’s is another wonderful place with everything you could want or need — current fabric lines, reproductions, batiks galore, and plenty of solids, books, patterns. Found a wall of Kaffe Fassett florals, with an opposite wall of all his colorful stripes.  Really the largest selection of Kaffe I’ve ever seen.

Lolly’s has a “sister” store downstairs at the mercantile, called Cuddle Corner.

Don’t miss it.

I was amazed at the wonderful things being done with minky!

cuddlecornerFresh textures, colors and patterns…all in minky!  If you have a baby in your life, you need to stop here.  You won’t believe how soft and cuddly this stuff is.  If you’re like me, you’ll want one for your own home for winter snuggling.

Special tip from the gal at the counter: a stretch needle works best with minky.  We have this discussion at work from time to time…what needle for minky?  This gal says stretch is best and I believe her, but I will try for myself as soon as I sew up my quilt.

cuddlecorner2cuddlecorner3Around every corner in Shipshewana, you’ll find merchants that are selling hand-quilted quilts.  Having done a bit of this, I fully understand the time, effort and work that goes into these kinds of handmade masterpieces.

wallofquiltsIn the next post, I’ll share a few Amish handmade quilts I was shown when an Amish woman showed me the quilts she sells for herself and for other Amish women from her home.

Hint: absolutely breathtaking.

Shipshewana Dreamin’ – Part 1

I recently made a road trip to Shipshewana IN…someplace I had wanted to visit for a long time.  I was not disappointed.

My trip overlapped the annual Shipshewana Quilt Festival by one day, but to be honest, I avoided the festival.  I spend a lot of time with quilters at work.  I’ve been to expos and festivals.  What I really wanted to do was experience what was truly unique to Shipshewana.  (Don’t worry, of course I visited the quilt shops…more to come on that!)

rearviewmirrorIt’s Amish country as you may very well know.  I was careful not to take any pictures of them, but they do not mind a pic from a distance or shots of their homes or buggies. ( I asked.)  I took several carriage rides and asked many questions.  They use cell phones for business and rely on solar panels and wind turbines for electricity although many of them also have propane or natural gas at home.

Spending time in this pastoral setting really reinforced to me the hazards of modern living: speeding cars with impatient and intolerant drivers, over-reliance on technology, and the toll the lack of fresh air and exercise takes on our modern bodies. All Amish, at least those in Indiana, ride bikes or take the carriages.  Horses look healthy and are a way of life for them.  So many Amish live and work in the town, I really expected them to hide from tourists.  But frankly, they are friendly, willing to talk about their lifestyle and very open and gracious…but private where any person or family would be private.

The way they decide whether or not to tolerate a technology is whether it will reinforce or tear down the community.  Cars will always be out, because it is a way for anyone to escape community rather than build it.  Same with TV’s and computers and phones.  But they live in a real world where they have to make a living so cell phones for business or compressors to help milk the cows are tolerated.

I took a tour of an Amish house, sat and ate a home cooked meal with a family, saw them milk cows, toured the farm and was genuinely warmly welcomed.  I visited the Menno-Hof, a guided tour museum of the history of the Anabaptists.

This farmhouse actually looks a lot like my grandparents’ farmhouse in Wisconsin.

farmhouse1garden1Look at this garden!  Every farm had a beautifully tended garden like this…not a weed in sight. Ever.

shipshewana1The town of Shipshewana is charming by any standards, with local restaurants and shops. I’ll give a rundown of some of the quilt shops in the next post.

In this photo, the carriages were parked at a house funeral for a well-known elderly gentleman.  What a lovely site.  And life goes on.

funeral1funeral2pies1

Quilting vs. Gardening: It Must Be June

I’ve been busy.  Too busy to write a blog.

And not only too busy, but too boring.  And while I don’t mind writing a boring blog, I’m not sure you want to read one.  All of that aside, I have also reached the point in the year where all good quilters/gardeners have to make some decisions.  Inside or outside.  Quilt or garden. Flowers and vegetables or blocks and table runners.

And while I may be able to hold it all in my mind simultaneously, I certainly can’t work on it all simultaneously.  So although I have some very ambitious sewing plans and classes lined up, as my farmer grandfather used to say (and do), “Make hay while the sun is shining.”  Of course, he made hay in August, but you get the idea.

In the hopes of providing a little temporary entertainment, here’s a gallery of recent flowers from the garden.  Most are done blooming, so I’ll be back in the sewing room shortly.  In the meantime…it’s summer…let’s all go for a walk!

Improv and More

I have started working on an improvisational quilt.

Basically , it means I start sewing before I have any idea what I’m creating. For anyone who knows me, this way of doing things is right up my alley.  I just purchased this book, “An Improv Handbook for Modern Quilters” by Sheri Lynn Wood.

improv2

Naturally, I flipped through the book and then started without so much as reading a paragraph.  I promise I will go back and read. The book looks great.  I just was inspired by the word “improv” and began immediately.

improv1


Here’s a sneak peak and to be honest , I don’t know how I will complete it. Just know that it’s a gift, so I don’t want to divulge the whole quilt til it’s been given away.  At that point, it’s done and there can be no regrets or turning back.  For now, it’s simply a work in progress.

In machine embroidery, I am preparing to teach a Software Inspirations class based on a tutorial from Sylvain Bergeron, Bernina educator.  In it, we learn to create textile fabric using embroidery…like argyle.

argyle1This is done completely in software, then stitched out as machine embroidery.  It can now be cut up and used as a handbag piece, or in a quilt, or basically used as any other fabric.  Would be fun to do a small series of these in different shades and then put them together as a quilt or table runner.  Although I’m sure this image looks black and white, the thread used in the squares is actually a mauve with white lines, on Moda’s black grunge fabric.

That being said, like many sewists, I spend a lot of time in the garden in the spring, head back into the sewing room when it rains or as the weather gets too warm and buggy to be hanging around outside.  I leave you with a few lovely pics from around the area this past couple of weeks.  The earth is stunning.

peonies2

Peony tree

Wild  phlox

Wild phlox

Crabapple tree

Crabapple tree

Quilt Market Mash-Up

quilt market springQuilt Market 2015 is in full swing in Minneapolis this year.  If you’re not familiar with Quilt Market, it’s the place where all the fabric designers and fabric makers and product developers present their new products to potential buyers (shop owners).

It is a twice-yearly event, spring and fall.  I am hoping to attend the one in the fall, but we’ll see as things get closer!

For this year, I am content to live vicariously through social media.

If you want to follow along with all the chatter and visuals and news, here are a few ideas for getting the scoop.

On twitter, instagram and facebook, follow the hashtags:

#quiltmarket  #fqsquiltmarket #showmethemoda #modagoestomarket

Fat Quarter Shop’s blog site will be live tweeting, updating, creating youtube videos and much more.

Art Gallery Fabrics is streaming live at certain times during the show.  Find out more here.

Want a visual overview?  Head over to #quiltmarket’s Instagram stream.

That’s enough social media to hold me for awhile — especially since I’ll be working into the weekend.  Have fun and enjoy all the new and exciting stuff out there!


Adventures in Transfer Artist Paper

I love transfer artist paper.  I’ve used it a number of times with differing effects.

transfer artist paperYou can purchase this online or at craft stores, possibly your local quilt shop.

It works only with an ink jet printer, and your results will come easier to you if you have a little bit of experience in photo software, like Photoshop or Corel.

You print the image onto the paper and then iron the image onto your fabric.  The BIG difference between TAP and printing directly onto fabric paper is that the transfer actually becomes a part of your fabric…any fabric.  It never washes out.  It’s permanent.

botanical transferYou can see on this image that this botanical transfer prints right over the fabric and the underlying pattern shows through.  This particular print worked beautifully because it ended up looking like dew on the plant.  The instructions say you can print on wood, glass, stone, basically anything, as long as you can iron on it.  It takes a little practice but here are a few tips:

–Always use a hot DRY iron —  no steam.

–Remove the transfer while it’s still hot.

–Illustrations tend to look more interesting than photos, but worth trying both.

–Reverse anything with lettering before you print it on TAP or it will read backward.

–Cut as close to the image as possible before you iron it on your fabric.

–Try ripping the edges of your paper before ironing.  It gives a torn, aged effect.

–Experiment, experiment, experiment!  If you are a photography junkie like me, this is a great way to play with your images.

Here’s an example from the upcoming Software Inspirations program I’ll be teaching next week:

transfer artist paper 3I also added some embroidery to this project, which is actually a travel pillow.

cameraThe final image is from a Messenger Bag, the project I created from a previous Software Sampler lesson — a good text example of using Transfer Artist Paper to convey an emotion, a worn timelessness.

I’ll leave you with my all-time favorite quote from Macbeth:

Tomorrow and tomorrow and tomorrow,
Creeps in this petty pace from day to day,
To the last syllable of recorded time;
And all our yesterdays have lighted fools
The way to dusty death. Out, out, brief candle!
Life’s but a walking shadow, a poor player,
That struts and frets his hour upon the stage,
And then is heard no more. It is a tale
Told by an idiot, full of sound and fury,
Signifying nothing.

transfer artisp paper3