Polka Dot Finale

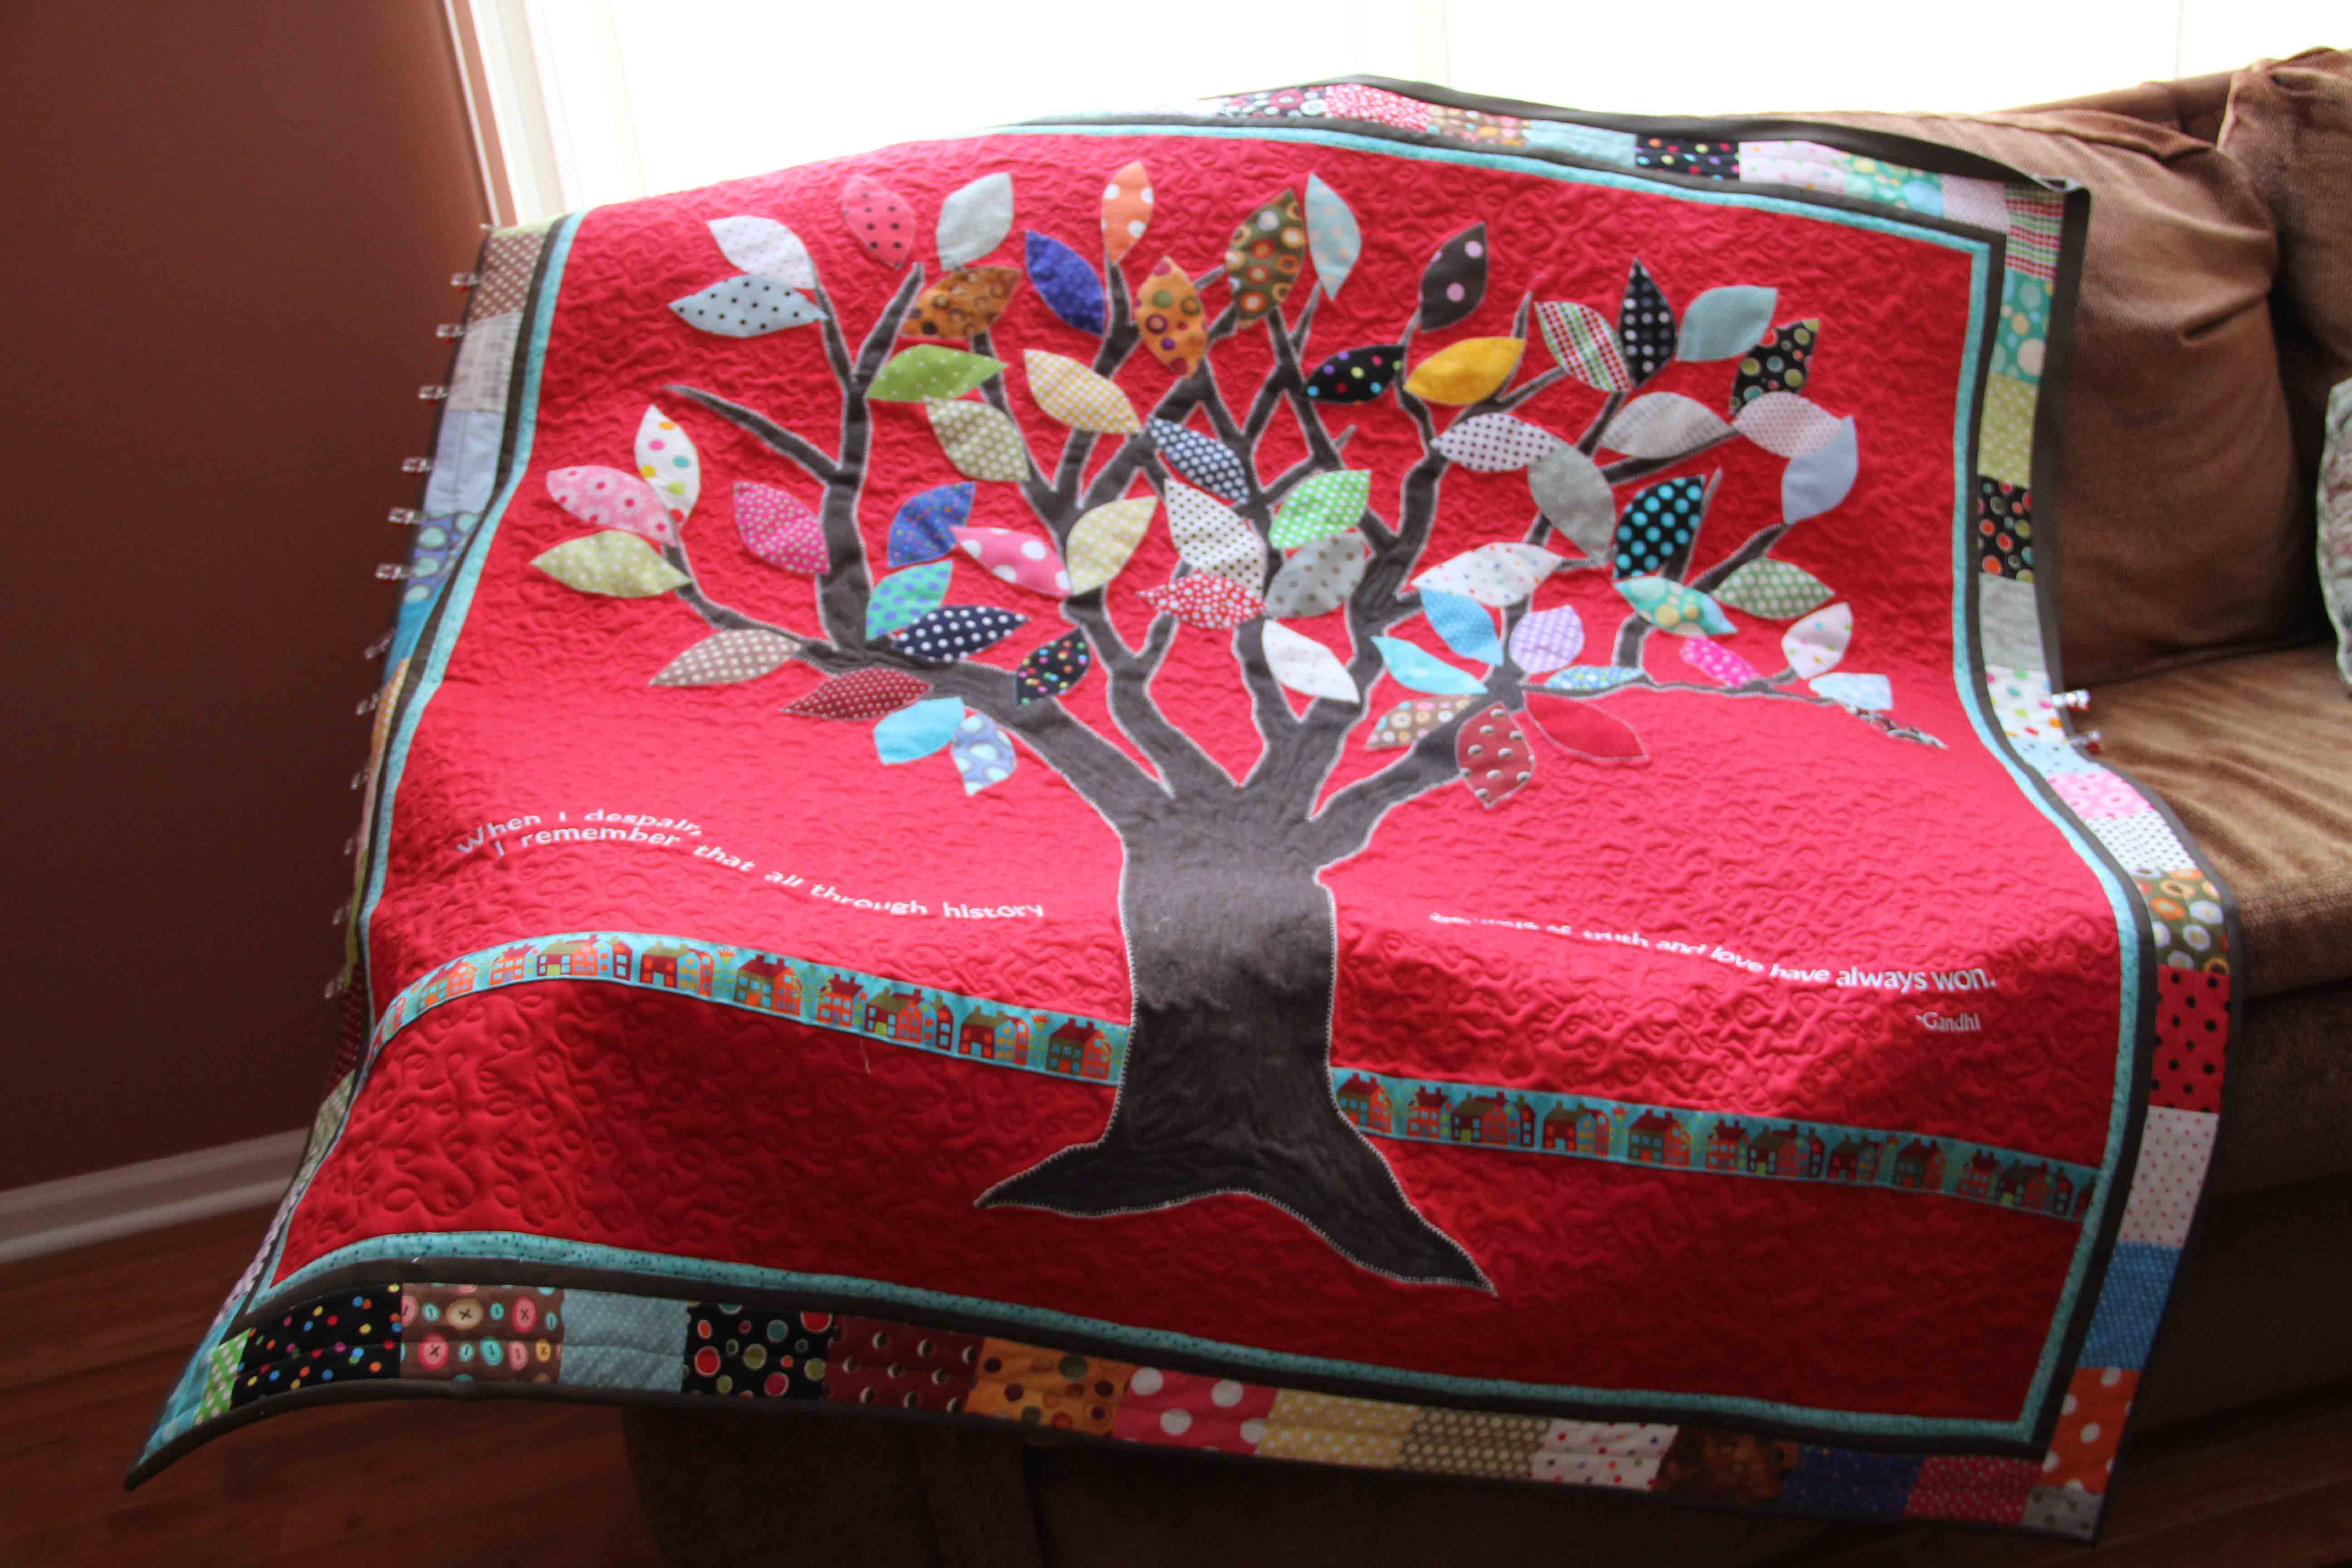
I am crossing the finish line.

Still sewing the binding, but the quilt label is done, the sleeve for hanging is complete and all I have left is the last bit of hand stitching to pull it all together.

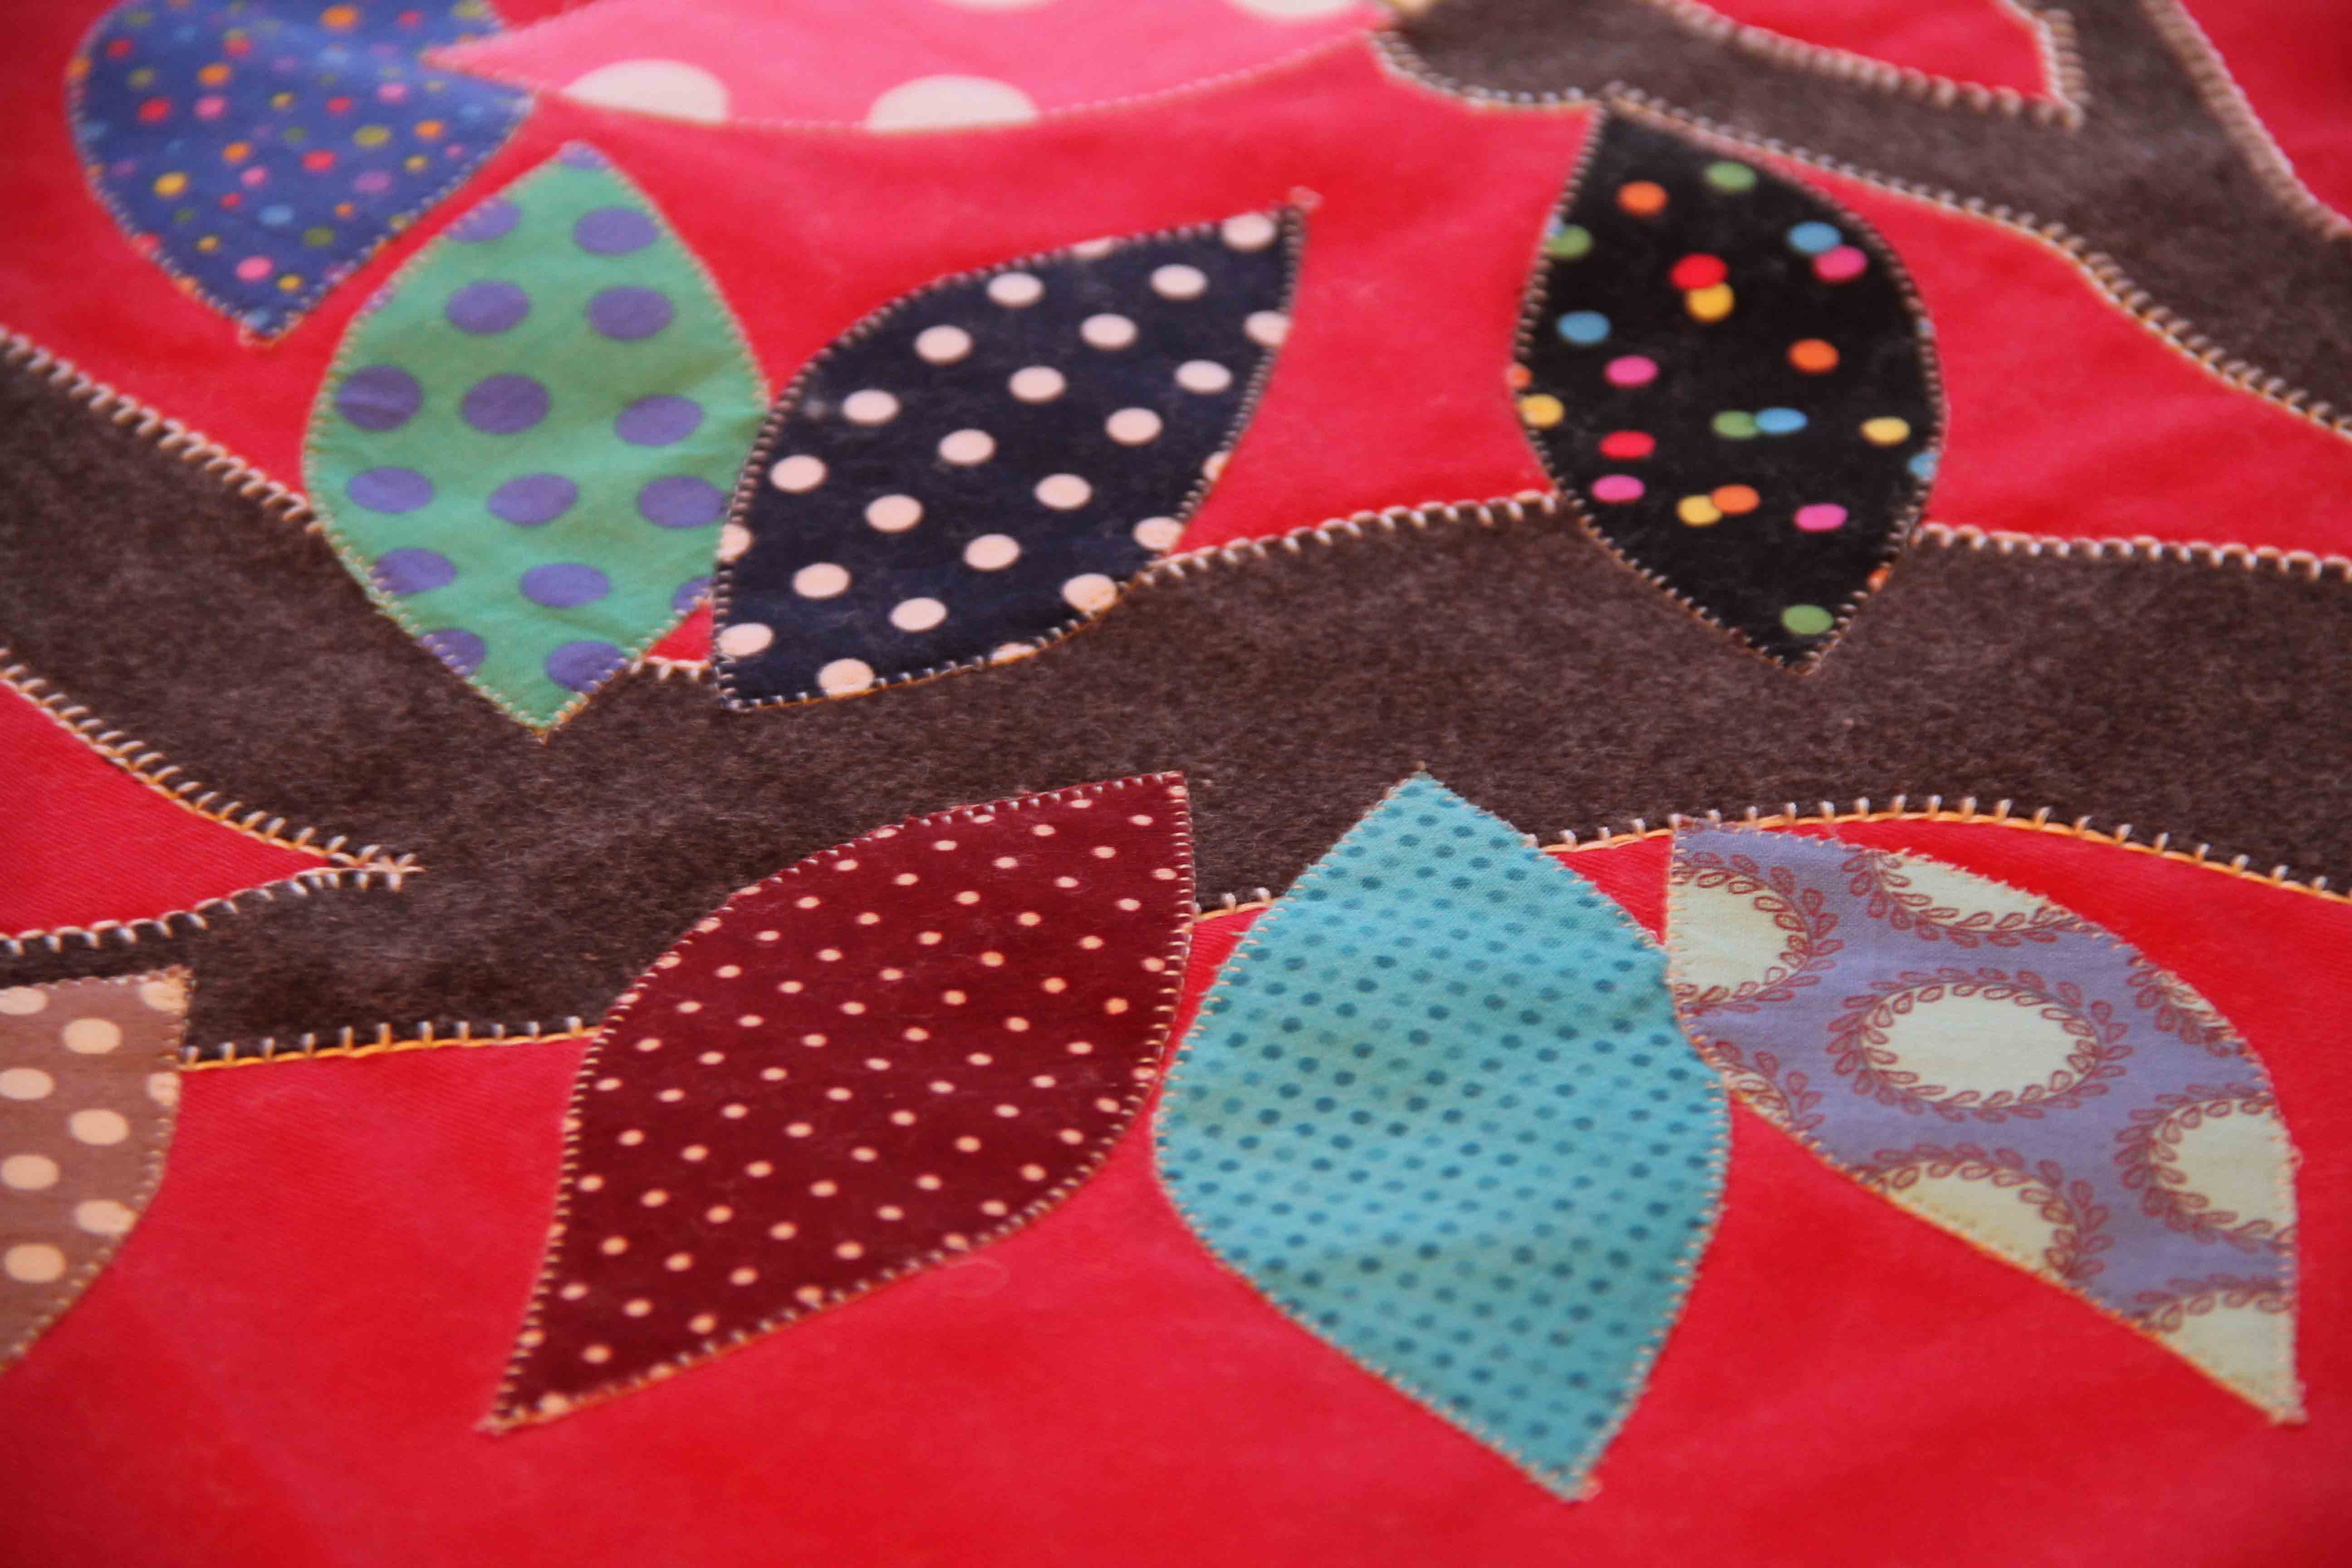
The red background is twill, the tree is wool and the rest is cotton, with a wide variety of thread weights for applique.

For everyone who participated in the Polka Dot Fabric Exchange, I THANK YOU!  Your fabric is lovely, especially when it’s pieced together with everyone else’s!

I really enjoyed challenging myself with this project, as it was a meaningful way of bringing together quilters from around the world.

For fun, I thought you might like to see the creative journey, step by step in images.  Dedicated to quilters everywhere…we’re all on the same family tree!

sketchPolka dot Exchange

Notes from the Exchangeperlefinaltreedrawingtree1polkadot tree1polkadot tree1IMG_3294IMG_3293Scribbling a thought at the breakfast table.


The fabric begins to come in from all across the US and the world.


I am moved by the notes attached to every fabric square, so I saved them.


Testing for applique.


Getting an idea of how the tree will look.


Transferring the drawing of the tree.


Cut out and fused down.


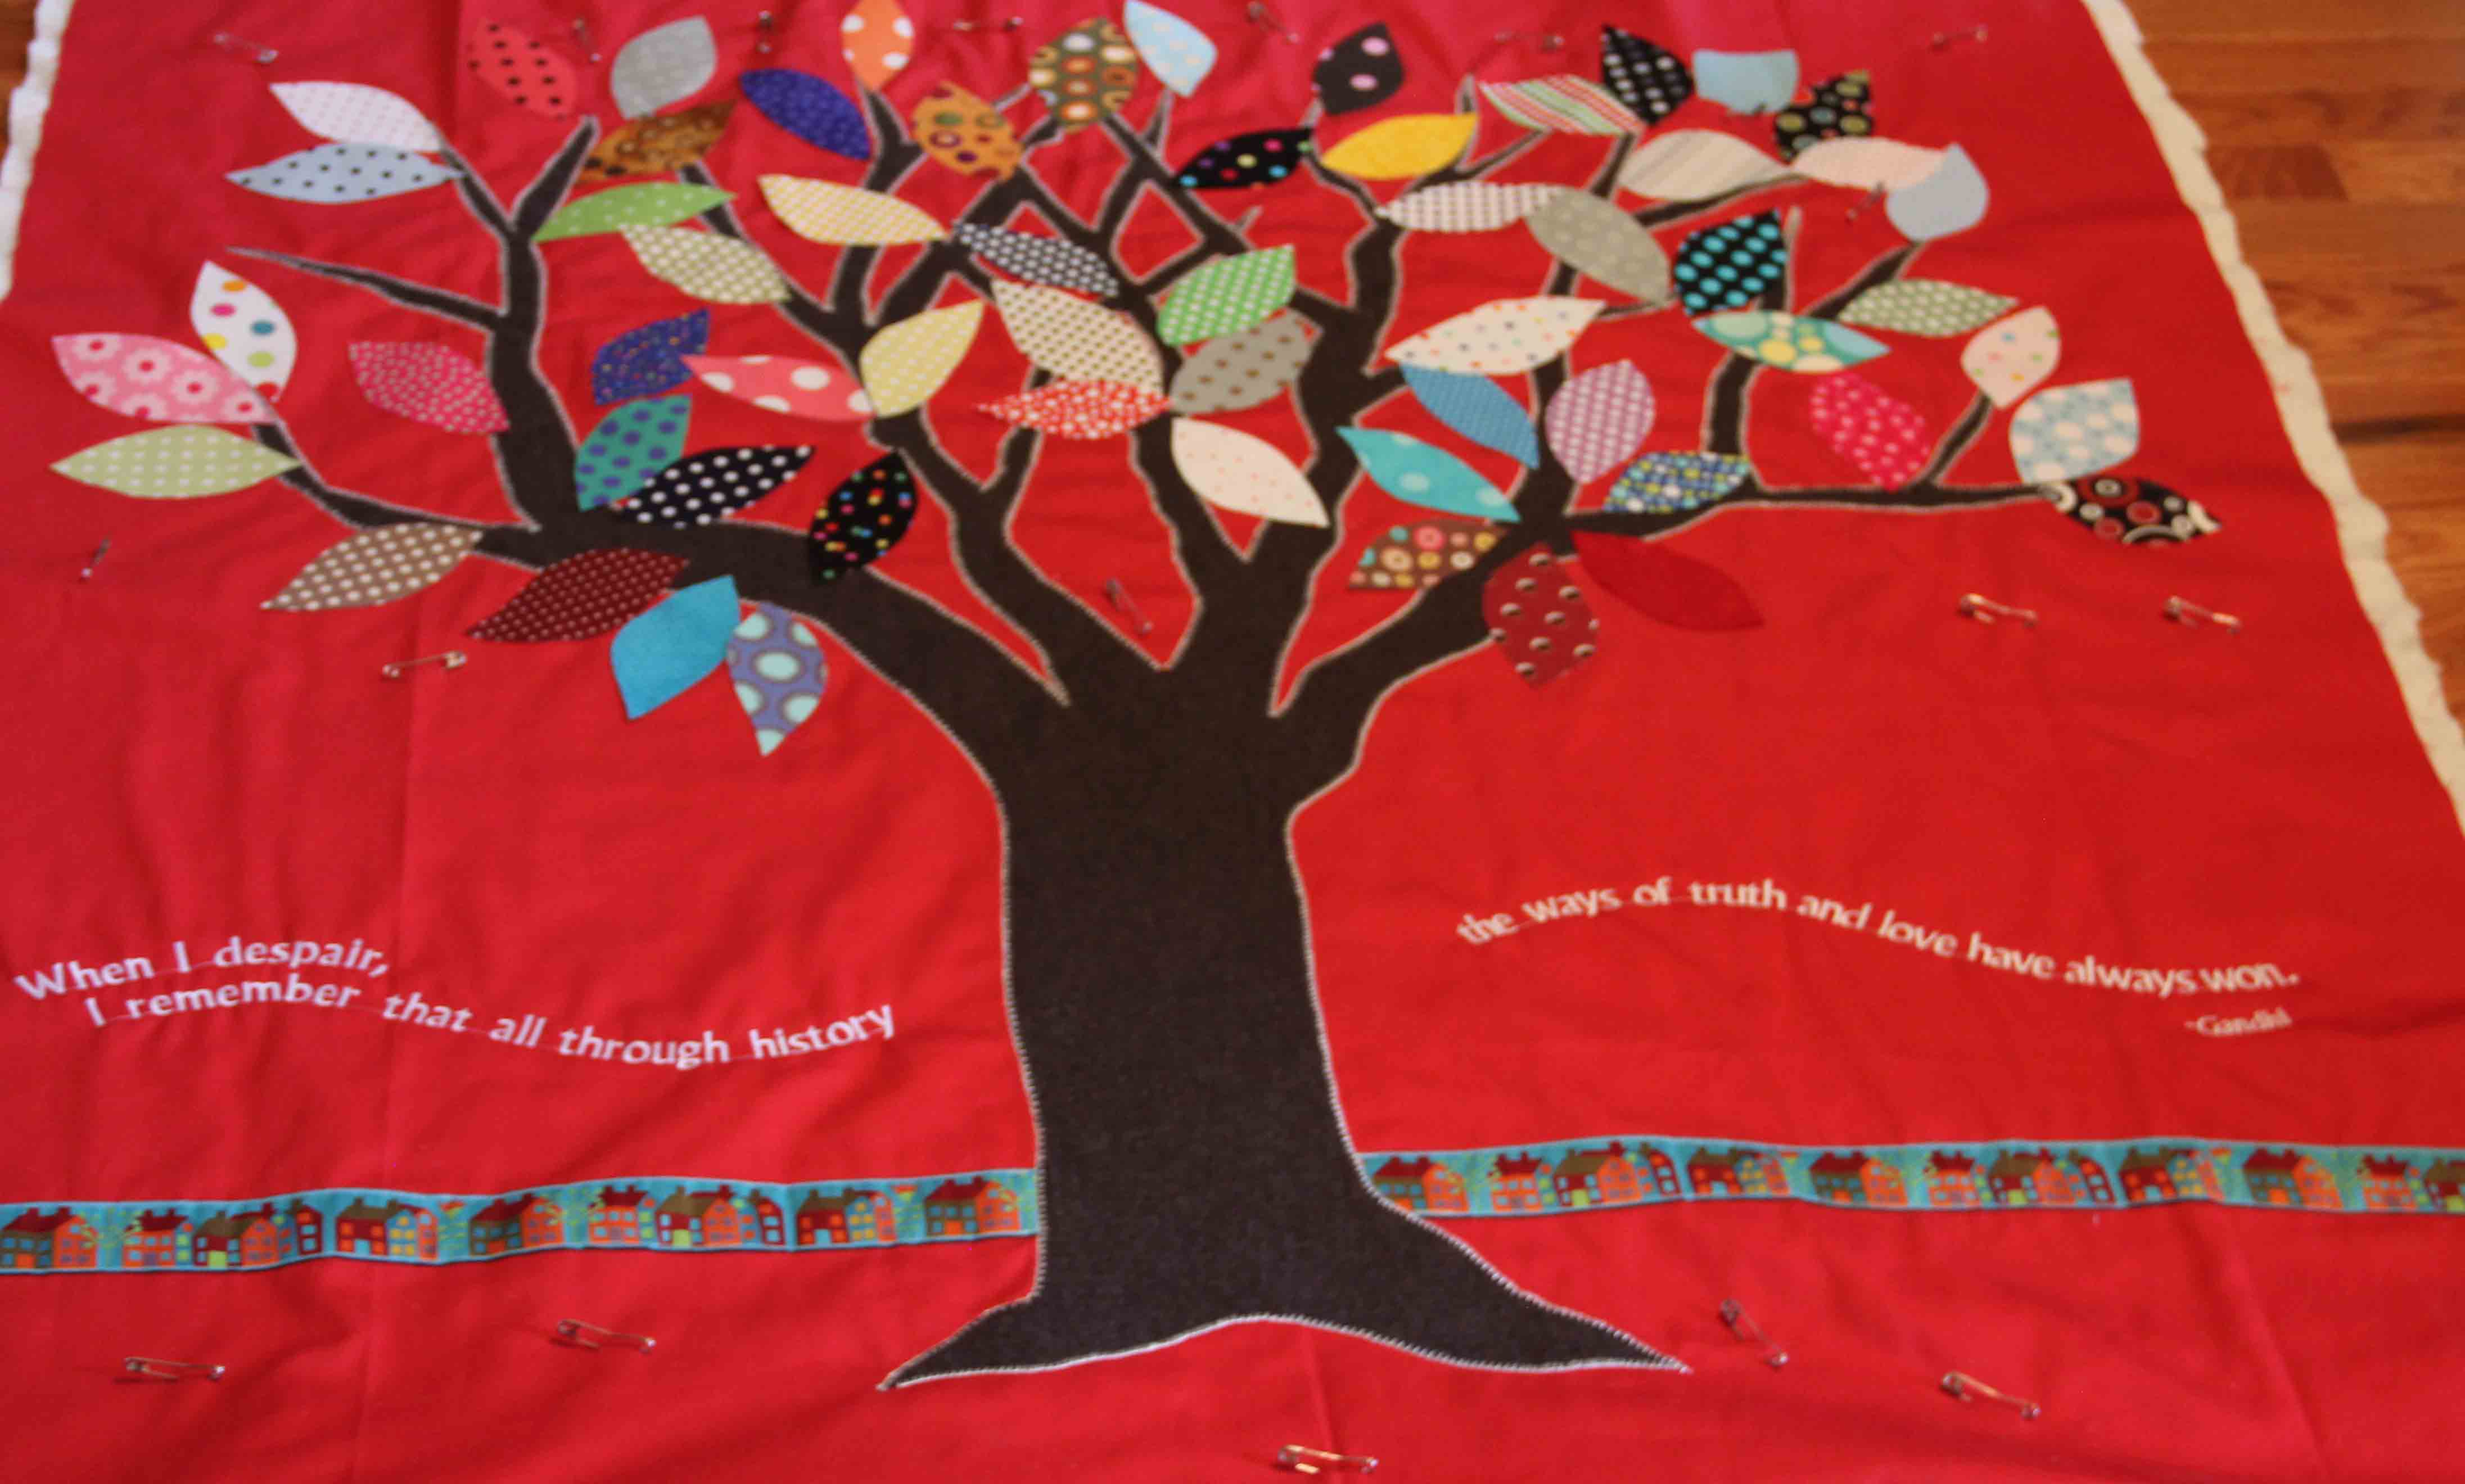
Leaves have been cut out and placed for position.


All appliqued, embroidered, quilted, just about done.

Hugs to my polka dot friends!

When Your Quilt Needs a Time-Out

If you have followed this blog for any length of time, you know I participated in a polka dot fabric exchange last year.  I received 60 – 10 x 10 in. squares of polka dot fabric from all around the world.

I resolved to include them all in a quilt somehow, and managed to cobble together a tree with the fabric as leaves.

But then I had to put the quilt in a “time-out”, as a friend of mine likes to say.  Quilts need it, you know.  They become unruly, arrogant, resistant.  Or sometimes they just become passive or apathetic.  Either way, when a quilt reaches that stage of behavior, it’s time to put it in time-out.  It makes absolutely no sense to argue or to fight your way through.  The quilt needs time to find its way.

So I put it in the guest bedroom where it could have some time alone to ponder its future.

I checked on it  occasionally, offering ideas and solutions, a way out.  But the quilt obstinately refused.  “OK for you,” I would think.  And walk away again, to work on another, more cooperative project.

For months it sat, sulking, pouting, depressed even.

Then one day, shortly before Christmas, when I walked in to check on it, the quilt looked eager. Just a hint of it, you understand, but there it was:  a small little whisper of earnestness.  It had formed an idea about its future.

So I listened.

And I let the ideas float around for awhile with no pressure or desire for any of them to be successful.  Tentatively, we tried something.  And then another thing, after that.

And now, the polka dot quilt and I are moving forward together, both listening, both asserting, both with renewed vigor.

I’ll let you know how it all works out.

Truth and LoveGandhi

Slow But Steady…Maybe Just Slow

Finally, between all the end-of-summer commotion and back to school and bus rides and new schedules and coordination, I found a few moments to sew.

I wanted to get back to the Polka Dot Tree project, which has been sitting on my machine for, I don’t know, months now.

I continued outlining the branches, using the triple blanket stitch. This is such a common stitch but is a little trickier to use than a simple blanket stitch.  However, for my purposes, it stands out on the tree and branches so much better and has the look of hand stitching.

bernina triple blanket stitchThroughout the project, I had the dual feed engaged and used a number 20 foot so that I could see exactly where I was going.

polkadot tree2With the branches done, it looks a little more like a Halloween project than I was hoping.

However, after positioning some of the leaves, I got a better feel for the direction this project is headed. I guess that’s the beauty of designing and creating my own projects.

I have no idea how something is going to turn out til after it’s done.

polkadot tree1With the polka dot leaves laid out, I am liking the patchwork/scrappy thing that’s happening.  I am planning (at least at this point) to do some hand embroidery and hand stitching on the leaves, adding in some wools for dimension.  You can just get a hint of some of the fabulous wools in the upper left-hand corner of the shot.

I won’t be able to start quilting til after all of that is complete.

Since the fabric on this quilt came from 60 different people around the world in a polka dot fabric exchange, the idea of being united is important to me. I am toying with the concept of adding a machine embroidery quote along the bottom. We’ll see. Ideas are easy. Implementation takes a little time.

Slow But Steady

I am making some progress on the Polka Dot tree.  Getting the basics right is always slow going…and the truth is, I am making this up as I go along so we’ll see how it turns out.

The shape of the tree was first drawn on freezer paper.

treedrawingAs you can see, I had to tape several rows of freezer paper together.  Freezer paper is cheap.  Large format drawing paper is not.  I can work with almost anything.

Next I took the garment wool, which was half-price at the local shop, and I attached Wonder Under 805 to the back.  Any double sided adhesive paper would work, especially Steam-a-Seam Lite.  However, my experience is that once I attach the wool and iron it into position, the Wonder Under causes fewer problems with the sewing needle getting loaded with glue gunk.  Every project is slightly different so we’ll see how this goes.

Next, I laid out the wool with the fusible on the back right side up over my cutting mat, and placed the freezer paper drawing on top.  Then I simply trace the drawing with a rotary cutter.

tree1Next comes the tricky part, as the tree then is just a squiggly bunch of fabric that has to be switched over and laid out on the red twill.  Once it is moved into position, then I carefully remove the backing which allows me to fuse the tree to the background.

This is where you have to get creative.  I happen to own a small flat ironing pad which I literally move around under the flat tree, and iron/fuse a little at a time until the tree is attached to the twill.  It doesn’t have to be perfectly fused, as I will be stitching down all the branches and the trunk.  The fusing just has to be enough to hold everything in place while I am moving it around under the machine to stitch it on.

Next I spread it out over a layer of quilt batting to act as stabilizer.

This is NOT the quilt sandwich!

I will eventually trim off the edge of the quilt batting and attach more fabric to the sides of the quilt (I think…if all goes as planned). But I will be fusing polka dot leaves on top of all the branches – 60 of them, one for every fabric I received in the exchange.  Then I plan to do some embellishing and then once all is finished on the top of the quilt, I will add ANOTHER layer of quilt batting and the backing and then quilt the whole project.

Whew!  I’m exhausted just thinking about it.  But everything follows one step at a time.

Keep putting one foot in front of the other and eventually you make progress.  Just like life.

tree2


Baby Steps Toward a Project

I’m getting ready to start working on the polka dot project.  I have an idea about creating a tree with the different polka dots as the leaves.  I am starting as a base fabric some absolutely lovely twill which I ran across on rosie.com, which had an advertising link to Honey Be Good. Honey Be Good sells premium organic cotton.  I’ve only purchased this red twill there so far, but wow, the twill is yummy.  I need some clothes made out of this stuff.

I’ll be adding wool as the trunk of the tree, and I wanted to outline it in white.  I’m never sure how it will all turn out, but that’s the thought right now.

So I experimented on the machine using white perle cotton, size 8, as the blanket stitch thread.

perleAs you can see, the perle has a lot of dimension, jumps off the fabric and generally adds a lot of pop. But size 8 is just too large to go through the tension disks properly.


backside  I used a 90/14 needle and reduced the tension somewhat.  But you can see that the back side was looking like it might get knotted and nested at any moment.  Considering the size of this project, I just don’t want to be worrying so much about the  thread.


aurifil 28


I switched to Aurifil, size 28, and used the triple blanket stitch.  I made the blanket stitch a little wider for visibility, since the thread is so much finer.  Aside from having a more “machine-stitched” look, it does the job with the same “eyeball impact”.


finalSo here’s where I’m eventually headed.  I will be using much larger pieces of wool on the twill, with the white blanket stitch around it.  Eventually the whole project will be machine quilted, but not until I get all the details that I want.

I urge you to really experiment with your machine and some of the thicker threads.  You can get a hand-stitched look, and even when it does not look quite as hand-stitched, you can certainly add texture, dimension and detail to your project.

Be bold.  Nobody is writing the rules.