Can you have too much Elvis in Graceland? Too many lights in Vegas? Too many labrador puppies?
I think not.
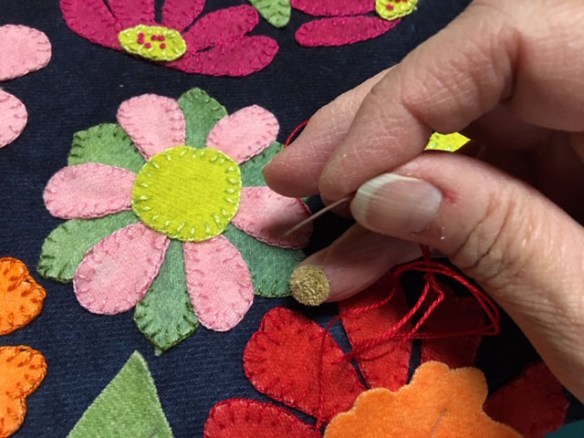
And you can’t have too much cute in Kimberbell. If you are going to do these designs, then you might as well go all the way. Get the dingle balls, the glitter paper, the froufrous and the doodads. Go all in.
I purchased the ornament designs recently to make for a group of quilty friends.
After one attempt, I realized that if I wanted them to be perfect, I needed to find not only the proper shade of gingerbread felt to highlight the features, I also needed the hoops, the accessories, glitter paper, a hot glue gun, and some patience.
Kimberbell is an exercise in excess and if you can’t do it at Christmas, you can’t do it at all. I am understanding the addictiveness of the Kimberbell phenomenon, but I don’t think it’s my permanent state. I love it at the moment and for special occasions. I’m not sure it’s my style forever and always.The same with Elvis and Vegas and labrador puppies.
Maybe you can have enough.
But for now, I’m on cuteness overload.
Have yourself a Merry Little Holiday.
Used a glue gun in 2019. Check. On to 2020.
P.S. After all the elaborate accessorizing of Kimberbell, I went back to simplicity for my holiday wrapping. I’m a realist. This stuff needs to be reduced, reused and recycled. Simple brown paper with scraps of fabric. The fabric can be saved and made into a quilt at some point, and the paper can just be folded and reused or recycled. I think we, as sewists, can balance adorable with sustainable. At least I’m going to try.
Have you ever spent hours on Pinterest? Wandered through quaint little shops in a seaside village or a charming midwestern town?
I’ve spent some time in local shops and in large home decor stores. I’ve browsed online and been to craft shows and art shows.
And I’m discouraged.
I am missing originality and I am as much a consumer as everyone else. Where are all the original thinkers? Where are the creatives out there doing what’s never been done? Am I just missing it? How can I go from an exurb of Chicago to a small town in Wisconsin, and find basically the exact same products?
I loved the inspirational script messages at one time, but to be honest, aren’t they getting old? If one more piece of wood or vinyl sticky for my wall tells me to “choose joy” I’m going to scream. (What does that mean anyway? Choose joy. Instead of eating chocolate? Instead of crying? Instead of reading the newspaper? Instead of choosing to make a change? Instead of choosing to work out?)
I even have a little houseplant pot that bears the message “grow.” The plant is suffering. And I think it’s because the pressure is too great and the obvious command on its outer shell is intimidating and off-putting.
I might also be watering it too much.
Nevertheless, it serves as a reminder that these constant, script-y, positive messages are numbing us to the reality around us.
If you are INSPIRED to paint the face of a cow in purples, oranges and teals, bless your heart and the artwork will be beautiful. But if you are purchasing the same one that’s shown in a chain of stores across the country, because…umm…”farmhouse”, well, what’s the point?
But anyone who thinks that farmhouse style begins and ends with anything but manure and straw and hay is kidding themselves. And the farmhouse I knew was cramped. We didn’t have a whole lot of decorative items. Most of them were practical. You needed a broom nearby to chase the bats that flew in at night. You needed a vacuum cleaner to get at the flies that swarmed the window sills in the summertime. You needed plenty of logs in the basement to keep the house heated all winter. You needed hooks and pegs for jackets and boots and fishing poles. When I was out in the barn no one ever had to tell me to “choose joy.”
Joy showed up uninvited. So did laughter and tears and hugs.
This week, let’s all go out and find something original to do. Something one-of-a-kind.
That’s the beauty of sewing. We can make things that no one else has made, and make memories that no one else has experienced.
Let’s be more authentic. And let’s ditch the mass market.
Not sure if it’s my age, or my season of life, or the times we live in, but these days, I’ve been thinking a lot more about SLOWING DOWN.
I used to see how many quilts or projects I could finish in a year. How many blog posts? How many pictures taken? How many trips? How much fabric? What’s next? And next after that? And after that?
I’m not that old.
OK, I’m a little old. Old enough to realize that maybe we’re not meant to live our lives in such a constant hurry.
Richard Rohr, a Franciscan priest, has me thinking these days about what he calls the first half of life vs. the second half. The first half of life is pretty frantic…working, working, working to establish oneself, to acquire, to achieve and to “become.”
The second half of life (if we do it right, according to Fr. Richard) is when we’re better at giving it all back. Re-packaging, adding wisdom, paying it forward. Now, I’m certainly in the second half of life (even farther than that, unless I plan to live well into my hundred and teens), so I am feeling the need to do just that — down-size, slow down, appreciate more, waste less and generally live a bit closer to nature, to my origins. To leave a smaller footprint. To listen to what the world needs and not just the raging, never-filled loudness of my own concerns.
I think those of us approaching “elderhood” owe it to the next generation to be examples and thoughtful guides.
So with that in mind, I’m going to spend more time appreciating what is, and thinking about what needs doing vs. what I want to do.
Of course I will keep sewing and quilting. I have a room full of fabric that would be criminal to waste.
But what else needs doing?
That takes time, listening and contemplation.
I’m not an expert at this second half of life thing. Quilting friends will understand. I’m a UFO.
This time, I decided to try a little acrylic paint on it and see how it holds up in weather. The previous sign that I did has been out in rainstorms, thunder, wind and more, and looks just as nice as it did the day I put it out there.
To be honest, I’m a little shocked that it held up so well.
So this time, I pulled out my acrylics and painted up a patriotic floral for the Fourth of July. I have not added any finishing, like Mod Podge or varnish of any kind.
For the record, I asked Kraft-Tex for more information about their product. It is recyclable, and therefore biodegradable, but doesn’t fall apart in the rain. It is OEKO-TEX certified, which is standard in the textile industry in that the end product is certified to be non-toxic. It also holds an FSC accreditation (Forest Stewardship Council) Essentially, this means that the product is regulated to be using forestry resources responsibly as defined by the highest industry standards.
I’ll be getting back to my wool and quilting momentarily. But for now, I’m having a great time with outdoor decorating and garden crafts…using my sewing machine.
I’m guilty of spending a teensy bit less time in the sewing studio, and a bit more time out in the yard these days…like most of you, I’m guessing.
It will be raining off and on this weekend, so between trips to the store and out in the garden, I might get in a bit of organizing/sewing.
But for now, here’s a tribute to those of us who cannot resist the flowers. They cheer us, bloom under almost any circumstances, and lead the way into a new season.
If you’ve followed this blog at all, you know that I have a lot of fun with Kraft-Tex, a paper/fabric that can be washed, doesn’t fray, and needs no finishing.
This time, since I am into garden season, I thought I’d try something slightly different by adding a garden flag made from Kraft-Tex. Now, I know that it has been a truly rainy season in my area, so I though it would be interesting to find out how the flag holds up during rain. I know it can be washed and dried without any issues, and I already tested the ribbon I’m using for color-fastness. So I’m not really worried about the rain.
I promise to show you what it looks like after a few weeks. We’ll all find out!
The embroidery showed up really well on white, and then I placed it on the grey or charcoal color. I find that Kraft-Tex holds up well with lots of embroidery…upwards of 20,000 stitches..as long as I use the right stabilizers. I find it best to use a medium weight cutaway, with a layer of Stabilstick cutaway on top of that — 2 layers of cutaway in total.
Then I cut out the pieces and used a bit of scrapbook tape to hold them in position while I stitched them down onto a larger piece of Kraft-Tex.
After assembling the flag, I added some velcro to the top, along with a fold so that it hangs nicely on the iron bar. A bone folder works great to give a nice solid crease. And the velcro makes it easy on-off. I’m thinking that I could make a number or these through the seasons…Fourth of July next.
Finally, I’m playing around with placement outside. I don’t have my annuals set up out there yet, so it’s a bit early. In the meantime, this is easy and gratifying stitching to get done for any season.
Not just the ones who had children at a very young age, but also now those who had them at a normal or not-so-very-young age.
I first started quilting in my twenties when all my friends had babies. I made dozens and dozens of flannel baby quilts, most of them hand-tied and filled with the fluffiest polyester money could buy. The parents and kids loved them.
I moved on to more traditional quilting, took classes, and eventually started teaching. But I never forgot how I got started.
Babies.
These days, I’m doing a lot on diapers and onesies. It took some experimenting, but I have found the best methodology.
Keep it simple.
Onesies absolutely do not support a whole lot of stitches. Even some fonts are iffy, depending on the number and size of the satin stitches.
Use two layers of polymesh stabilizer.
I use OESD cutaway polymesh. I experimented with one layer and just didn’t think it was enough. Depending on your design, you may even want three layers. A traditional cutaway adds way too much bulk and stiffness, so go with a polymesh. I also tried fusible, but that distorted the look of the onesie. I’m not a fan of 505 spray so I don’t use it when hooping.
Use a ball point needle.
If you’re familiar with embroidering on knits, you already know this. But if you usually embroider on quilt cotton, it’s easy to forget to change out the needle. Onesies are very stretchy and the fabric really separates when you use a ball point or “jersey” needle. It makes a difference in the longevity of the embroidery, because a ball point separates the threads of the fabric instead of cutting right through them.
Washing Instructions.
I use rayon thread (Isacord) which is bleachable and holds up well when washed. I throw onesies right into the washer and dryer…even in hot water and high settings.
The fabric, 100% cotton, always shrinks a bit. And the embroidery may curl because of that. The best way to fix this is to lay a towel on your ironing board, and lay the onesie face down against the towel — with the embroidery against the towel. Iron the back of the onesie without steam until everything is laying flat again. No problem.
I sew on a Bernina and you can see that with their free arm, it’s really easy to stitch on a onesie without a lot of pinning, clipping and gyrations to keep the back out of the way.
Finally, use a 9 month size or larger.
Maybe it’s possible, but I never attempt to embroider a newborn or 3 month size. I just don’t see how I can stretch it enough around the hoop. I’d have to switch to the very smallest hoop which has a tiny field of embroidery. Most of the onesies I’ve done are size 12 month. They still look relatively small, and get smaller after washing. But they are large enough to work on comfortably.
Sending love and blessings to all my friends and co-workers and friends of friends and co-workers who are keeping the earth populated. There’s really nothing quite like participating in the ritual of welcoming the very newest generation.
In fairness, I have a tendency to put a project away for a couple of years, and then come back to it with gusto. This is one of those projects. I am determined to finish it before the end of the summer. I love hand work, and find it very relaxing. And it’s time for this one to move along. I’ve made progress, just not enough.
I do have a couple more tips for you, if you are working with wool.
Remember I said to use a longarm stapler to hold your pieces in place? ( I did.) Well, I’d like to add to that. Use it GENEROUSLY.
See all those staples? They really do help keep things from wandering while you stitch. They leave no mark, they are easy, convenient and not a big deal to pull out. I love it.
2. Try these little leather patches.
I have a weird way of using my ring finger to push the needle. Thimbles are so cumbersome, even the leather thimbles. But these little patches can actually be used and reused so that a single pack of them can last a long time. I can use one patch for weeks. I just peel it off and stick it back into it’s packaging or on the plastic covering, and peel it off again to reuse it the next time. They are perfect when hand sewing quilt bindings, or doing any kind of handwork. Most of us have one finger we use consistently to push the needle. This leaves your finger mostly free except for the exact spot that gets the pressure.
3. Try using a wool pattern in a different color way. Along the way to finishing the project above, I did a whole other project where I added some wool to a cotton wall hanging.
The aquas, golds and greens in this pattern were a fun interpretation of the same floral design. Valdani cotton is my preferred thread for hand work. I have purchased directly from them, but you can find local shops who carry it. If your quilt shop doesn’t, be sure to ask them to start carrying it. You are likely not the only one who would like to see it.
I have lots of other projects up my sleeve coming soon, but this wool project is one I’d like to see completed.
Wish me luck and perseverance. May you find time for all your long term projects too. They teach us that life is short, and we need to keep stitching.
I’ve been in a flurry of personal sewing gifts for milestone birthdays, so I have not taken the time to update the blog til now. I thought I would just include a gallery of projects.
The quilt that I just raced through was a pattern from Modern Quilt Studio. If you haven’t figured it out by now, they are one of my favorites, as Weeks Ringle and Bill Kerr are both artists with graphic backgrounds and an instinct for color and design. I have great respect for them both. I recognize the talent that feeds into what comes across as simplicity.
This takes work and artistry and they have both. If you have the chance to see either of them in person, you won’t regret it and I promise you will come away smarter and more confident in your craft.
I hope you are “springing ahead” with your sewing, as I am with mine. While I have some fabric already available for my next quilt, I also want to try something completely different.
That’s the fun of it all, isn’t it? We get to try new things all the time. Stay warm and keep stitching!
I know I’m getting ahead of the game, thinking about Easter. But I felt like I needed a bit of Easter cheer early on, so these are what I found.
Do you have an embroidery unit you haven’t taken out of the box? (You know who you are, my friends.) This is about as simple a project as you can imagine.
Go to embroideryonline.com and search for “in the hoop”.Just download them onto a USB stick.
Prepare some fabric…you only really need scraps. And find some scrap batting. You know, the stuff you cut off around the edges of your last quilt.
Tip: After cutting small amounts of batting on your cutting mat, use a lint remover to clean up the batting.
Here’s the trickiest part. You need a nylon zipper. At least 7 inches. These are unbelievably common in the sewing world. Anything over 7 inches will work.
I used 14 in. zippers because that’s what I had on hand. Here’s a source that your local quilt shop may have even used: atkinsondesigns.com
And here’s a bonus. If you purchase her zipper pulls, you can easily change the color of the pull. Here’s instructions on how to do that. Your life will never be the same.
Back to the Easter egg pouches. I’m sure they come with instructions but I never read them. (Surprise, surprise.) Take some scraps of batting, approx, 6 inches x 6 inches, along with some scraps of fabric, about 6 inches x 12 inches. You’ll need 2 of the smaller size for the top and bottom half of your egg, a larger quilt sandwich for the backing/lining.
Wrap the smaller size fabric around the batting, so you have a straight edge to lay against the fold.
As you can see here, I didn’t even cut my scraps with any precision, as they will be completely trimmed away. You are just making sure that the batting is covered front and back. The fabric shown is Modern Quilt Studio’s Dot Crazy. I love this because it has fabric with a line of larger dots through the center…no piecing necessary.
Hoop your large oval or any 5 x 7 or larger hoop with sticky back tearaway stabilizer. I used OESD Stabilstick tearaway.
The design will walk you through all the steps on your machine. The first stitch out will be the placement line for the zip, which stitches directly onto the stabilizer.
Then stitch down lines on the zipper, then you lay down the top part of the egg with the fold right up to the zipper. The design will then stitch across the top fabric on the zipper. The goal is to make sure you have enough fabric wrapped around the batting to cover both sides of the egg.
Next, it will stitch the top half of the egg down.
Then lay your bottom fabric with the fold up against the zipper, as you did with the top. The next stitch will secure the bottom fabric to the zipper, and the stitch after that will secure the bottom half of the egg.
Move your zipper pull to the middle of the design!
This will allow you to turn the pouch inside out once it has been stitched. Now, you can also add a ribbon or handle at the top before the backing/lining is stitched down. (As I did). Add a quilt sandwich with the backing and lining down on top.
The final stitch is a zigzag to secure the seams.
This entire stitch out is a total of 6 minutes–almost as long as it take to read this blog post. These are easy and really quick, using fabric and scraps you likely have lying around.
When you take it out of the hoop, trim close to the stitching. Remove the stabilizer from around the zipper, and then open the zipper as far as you can. This will help when you turn the bag inside out. Remove as much of the stabilizer on the rest of the bag as possible. You should only see a bit of stabilizer around the outside seam, and a tiny bit where the zipper is attached. Everything else can be removed. Turn your little egg inside out and press.
Use your egg pockets as decorations or gifts–a great gift card holder or candy pouch!