Multi-hooping Challenge, Part 2

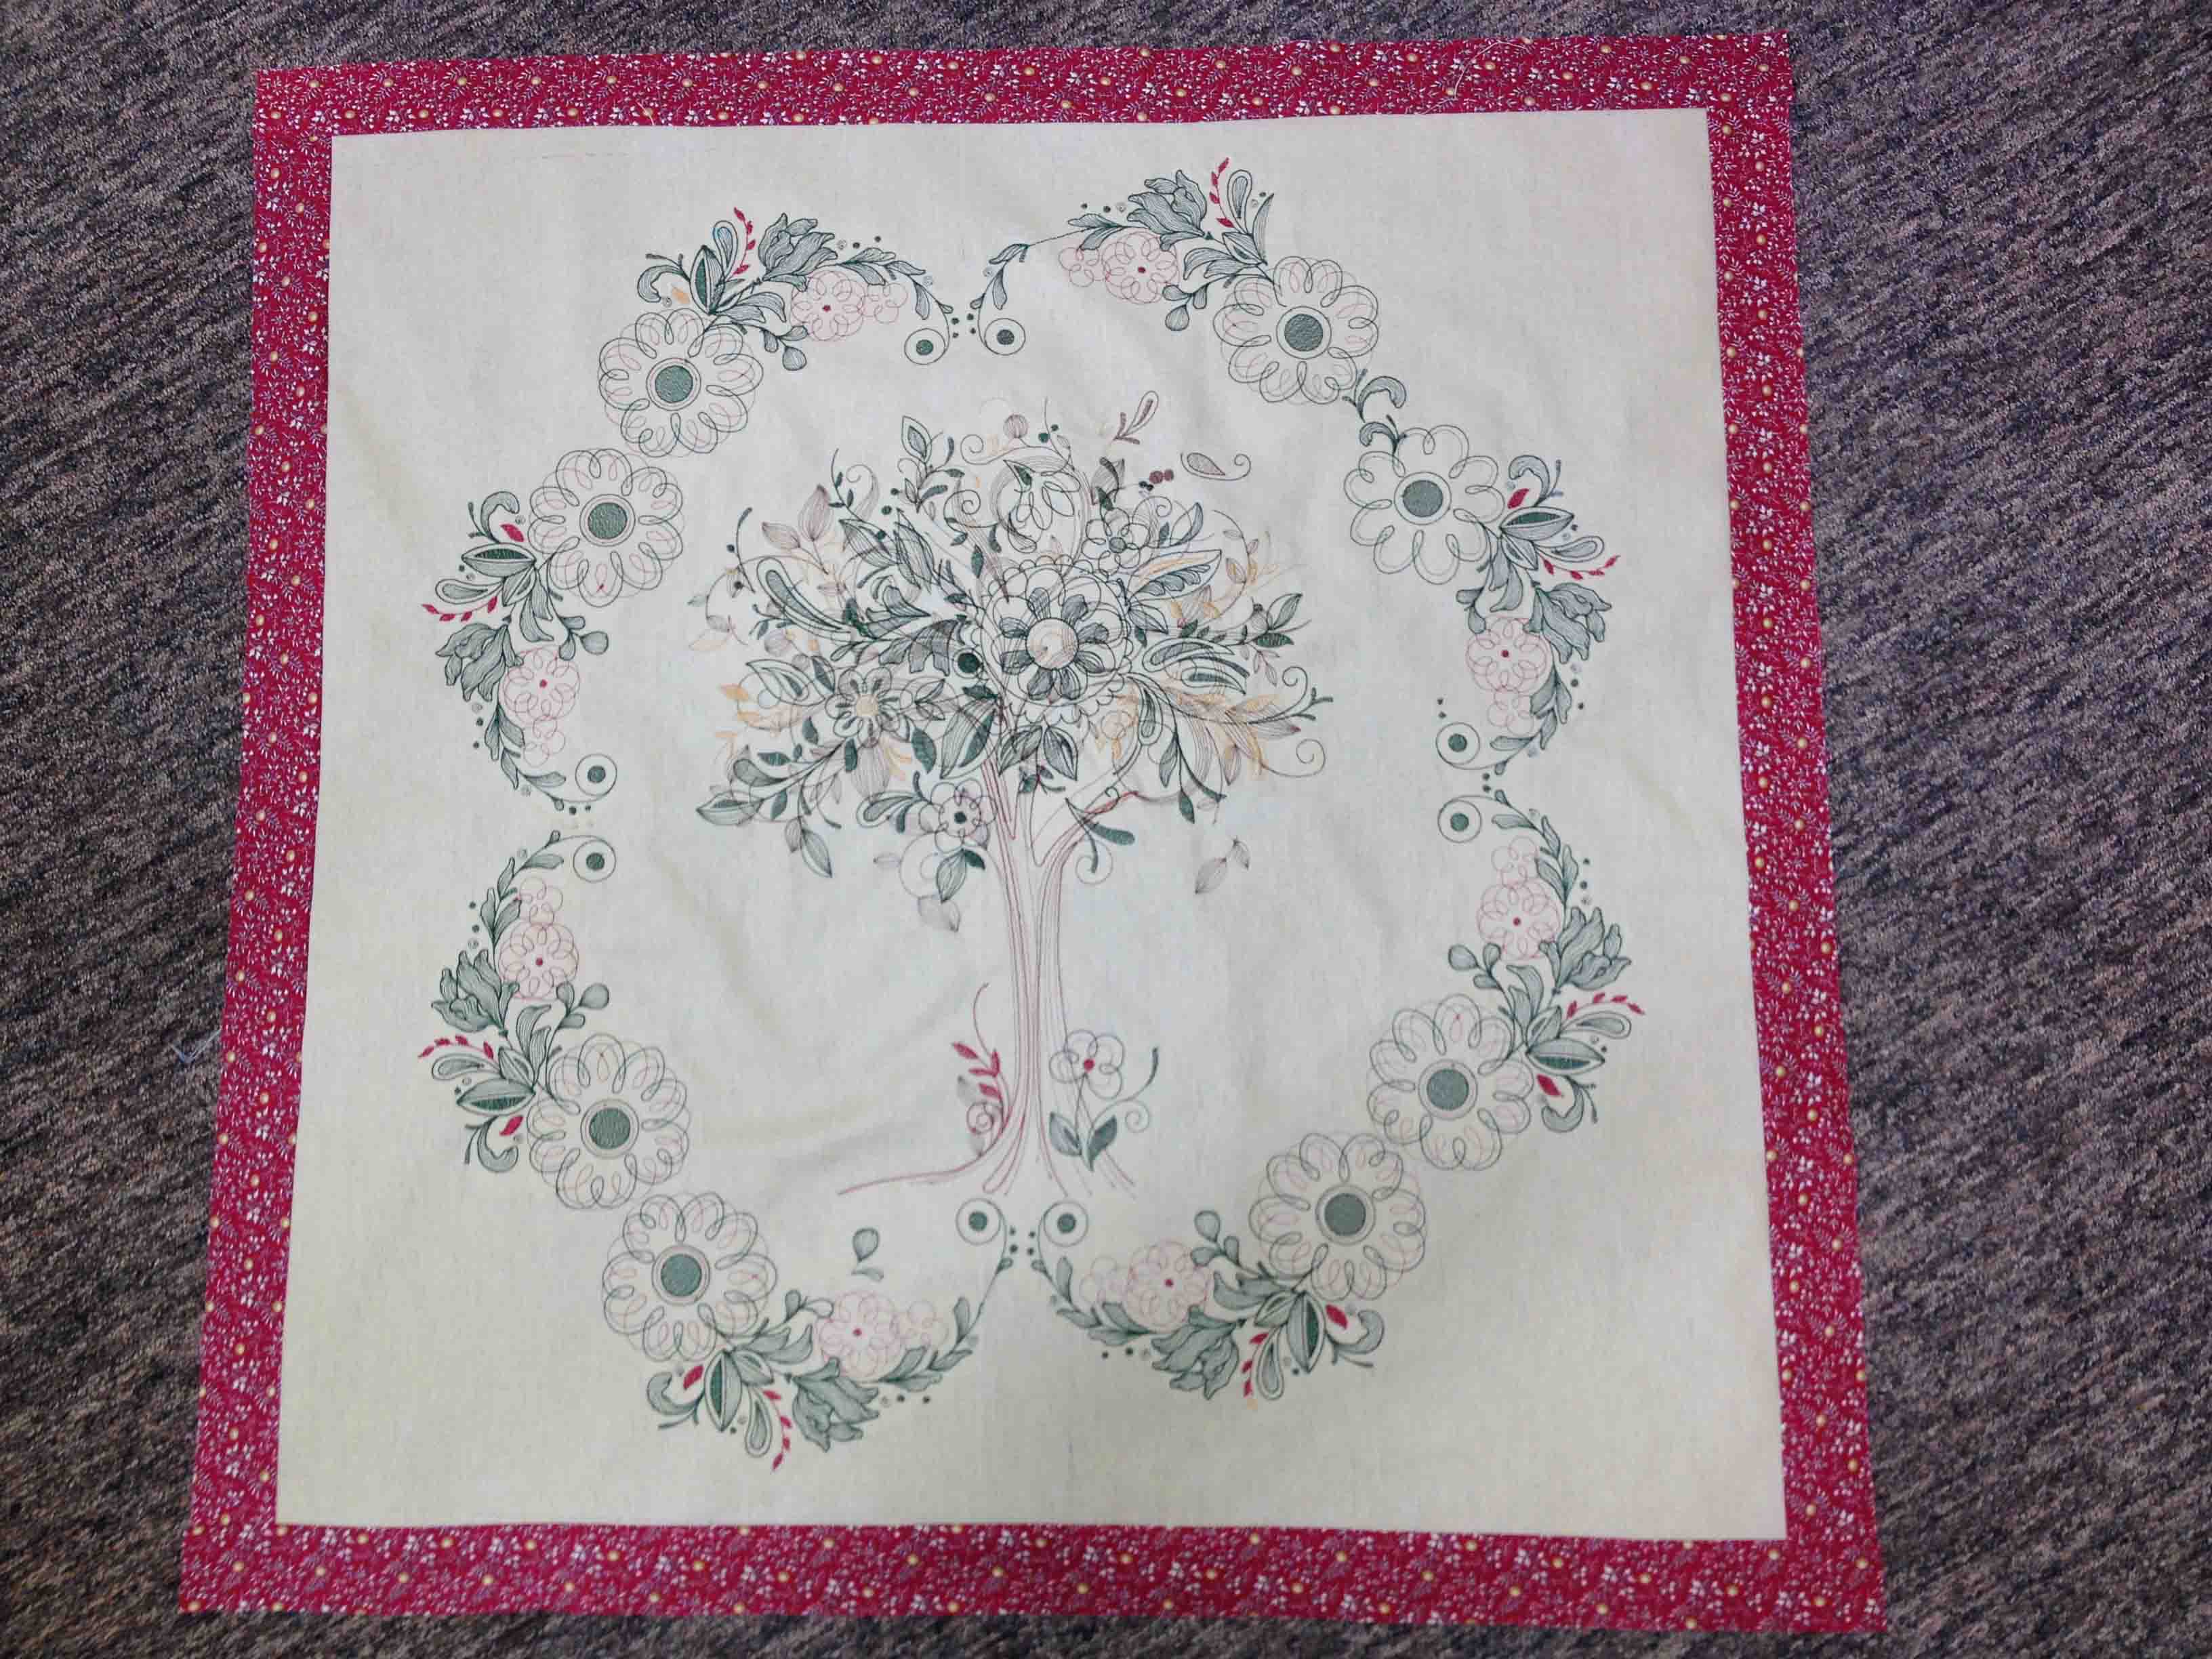
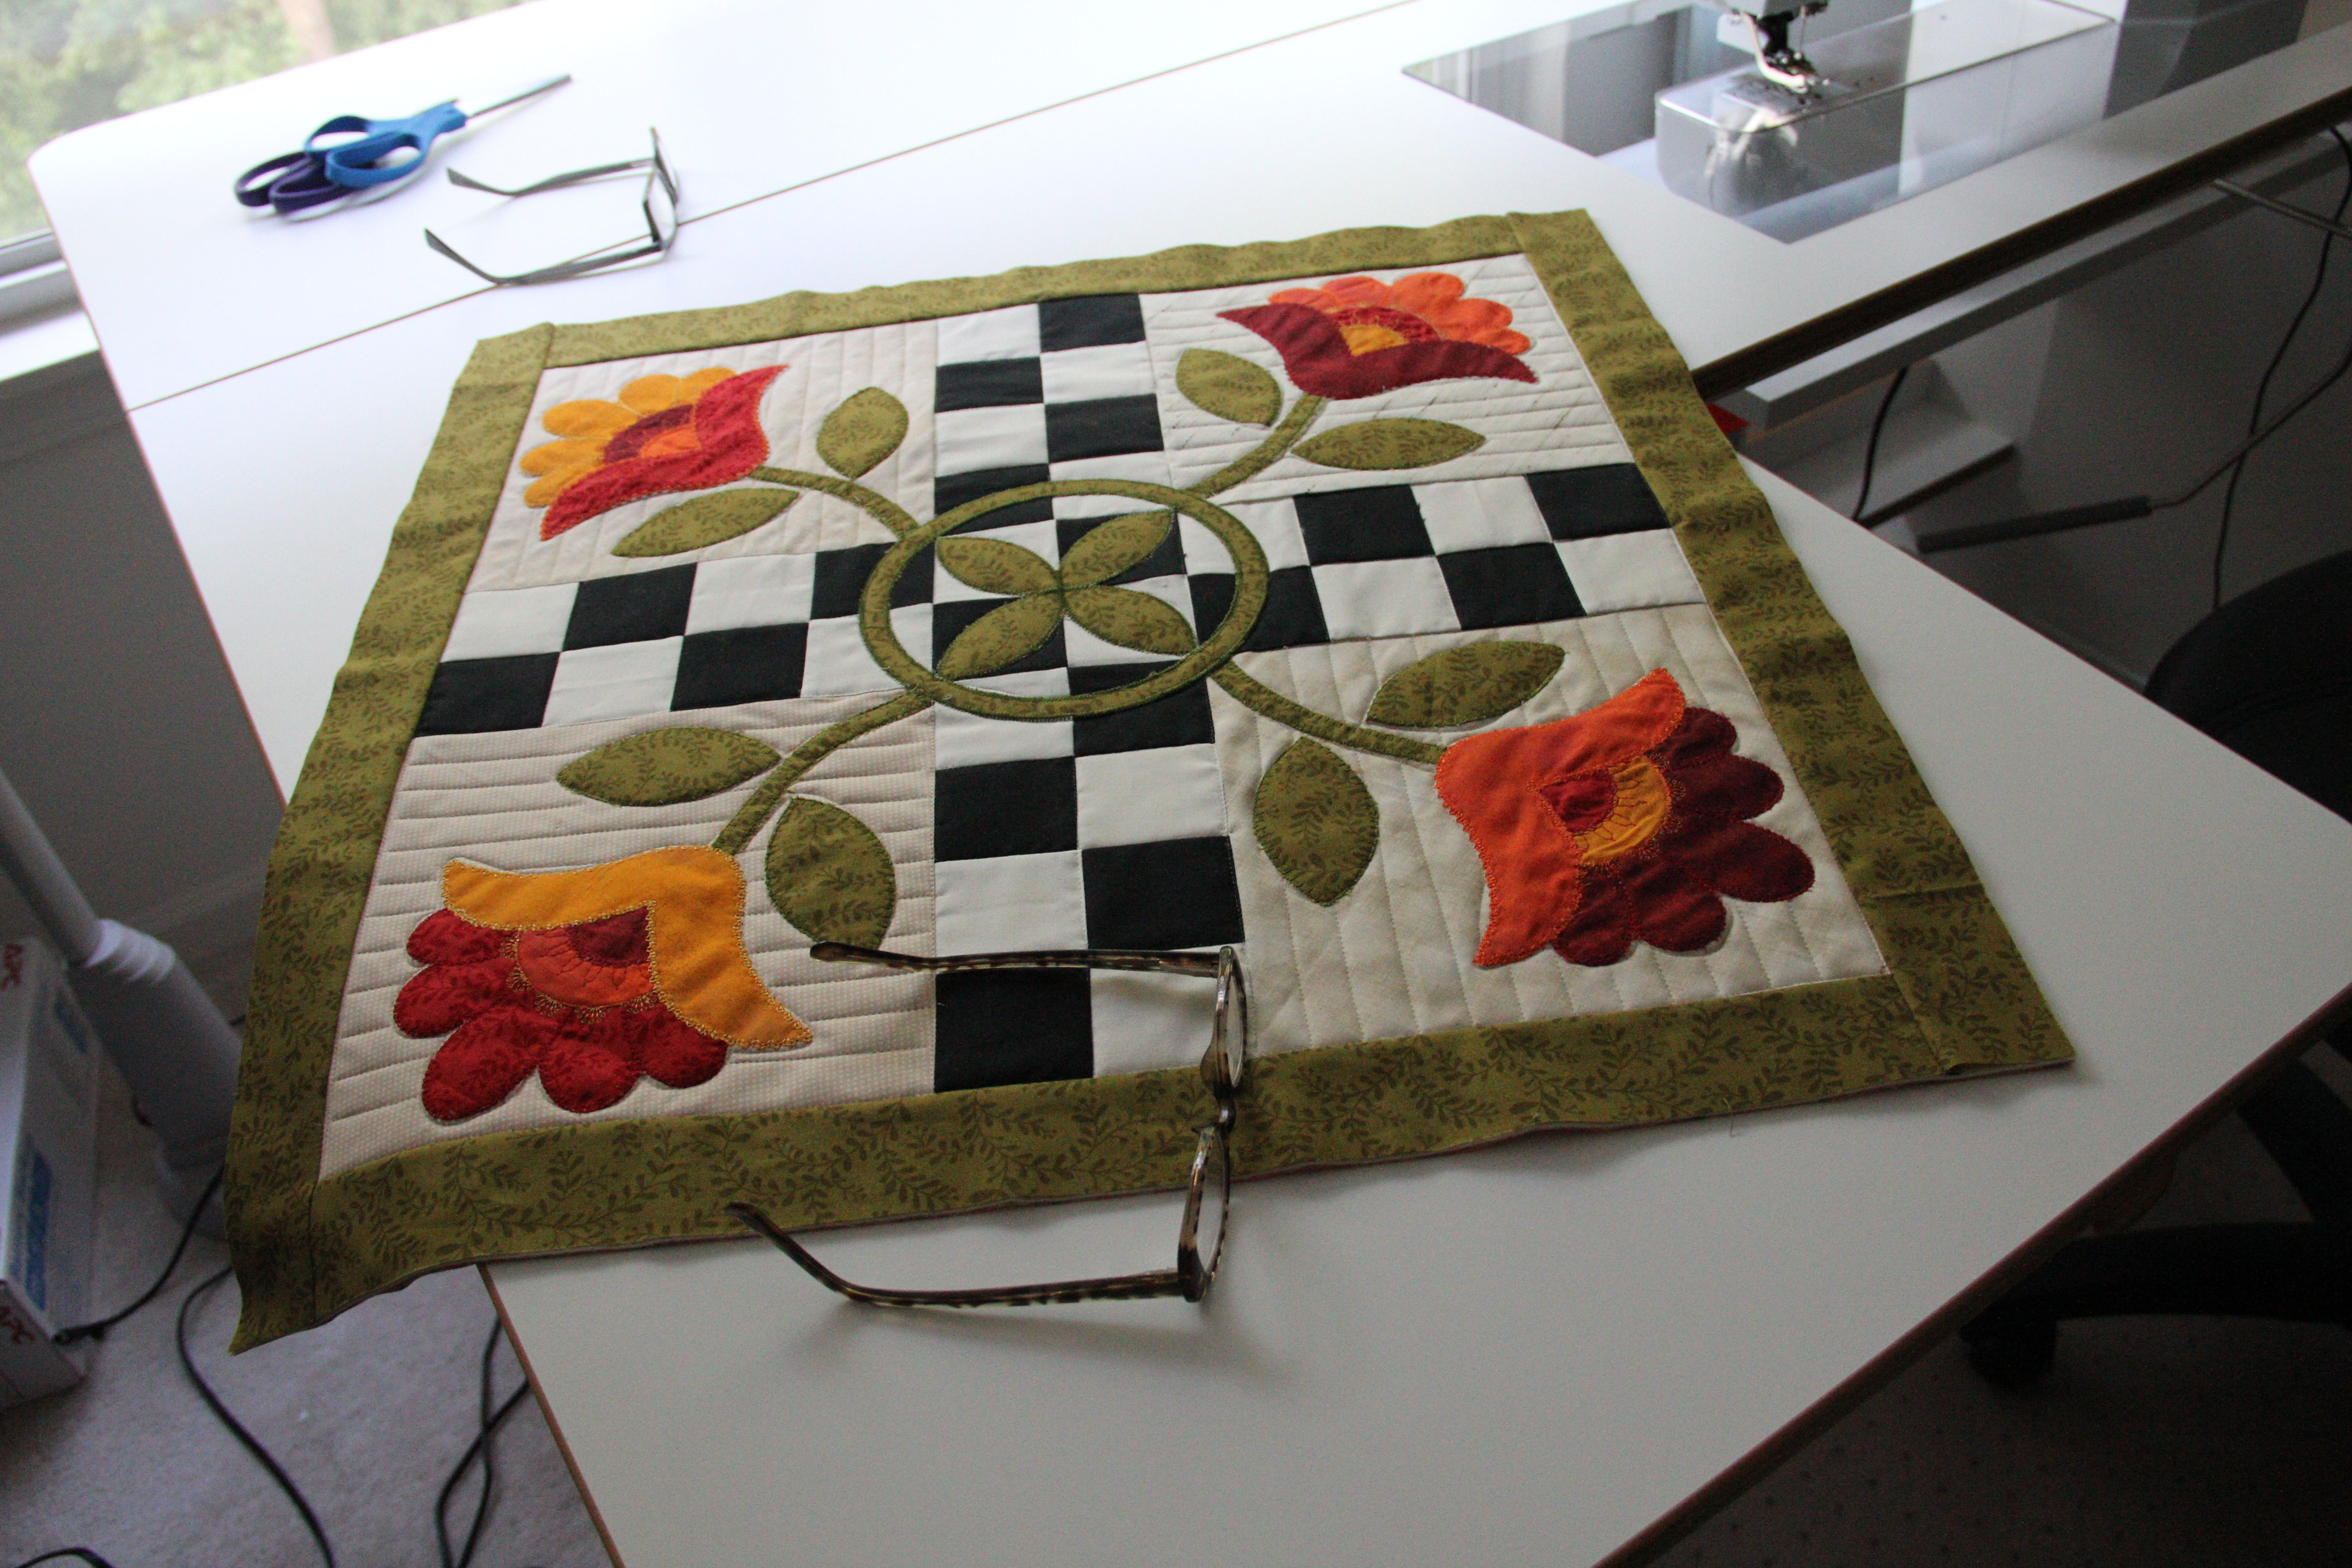
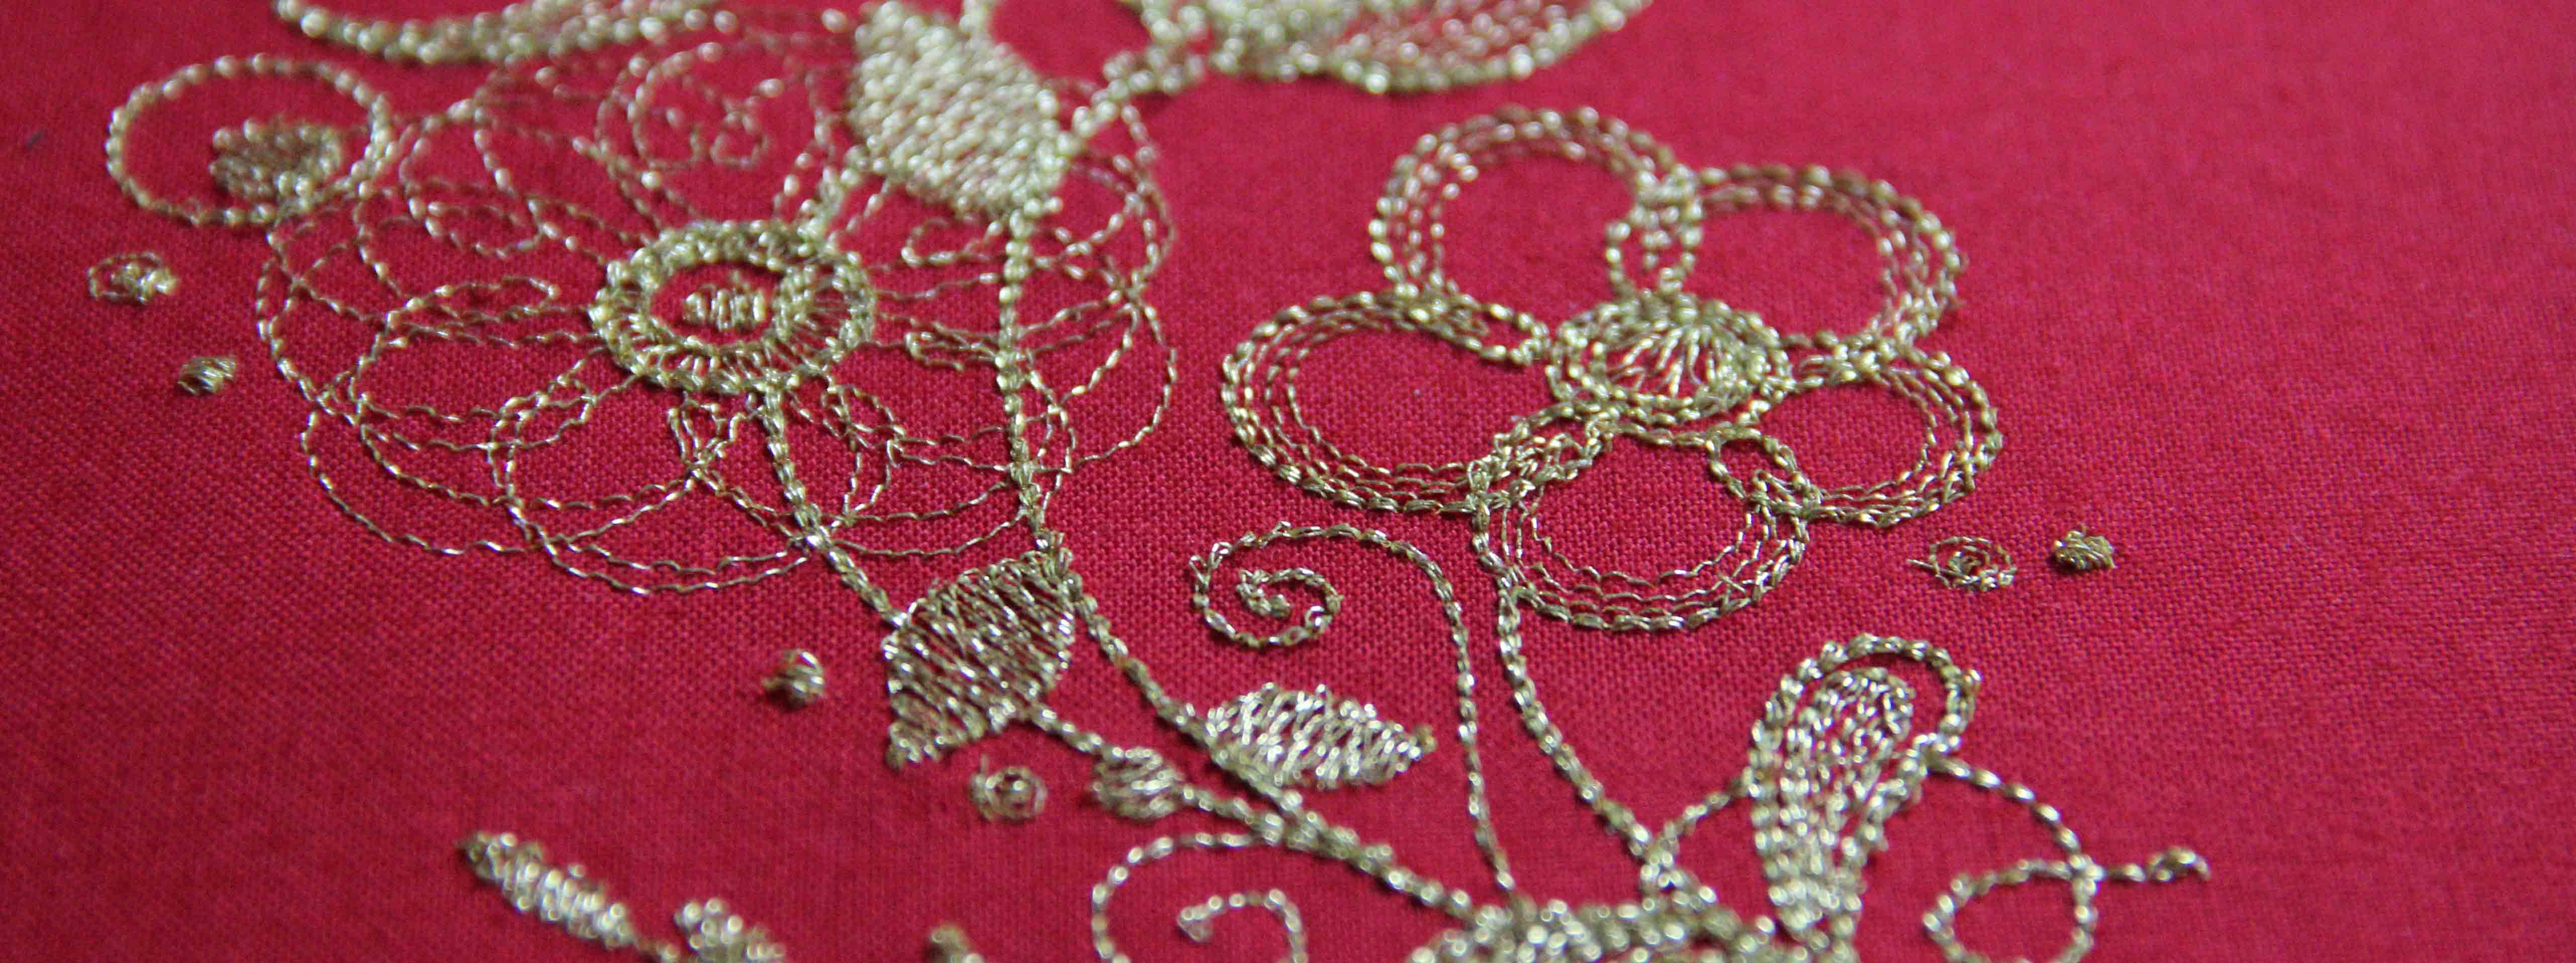
The hardest part is done.

It’s not perfect, I realize that.  I would do many things differently if I were to do this project over again.

I still want to add a couple more borders and then quilt it.  I want it to be ready by the time I teach a multi-hooping class Aug 23.

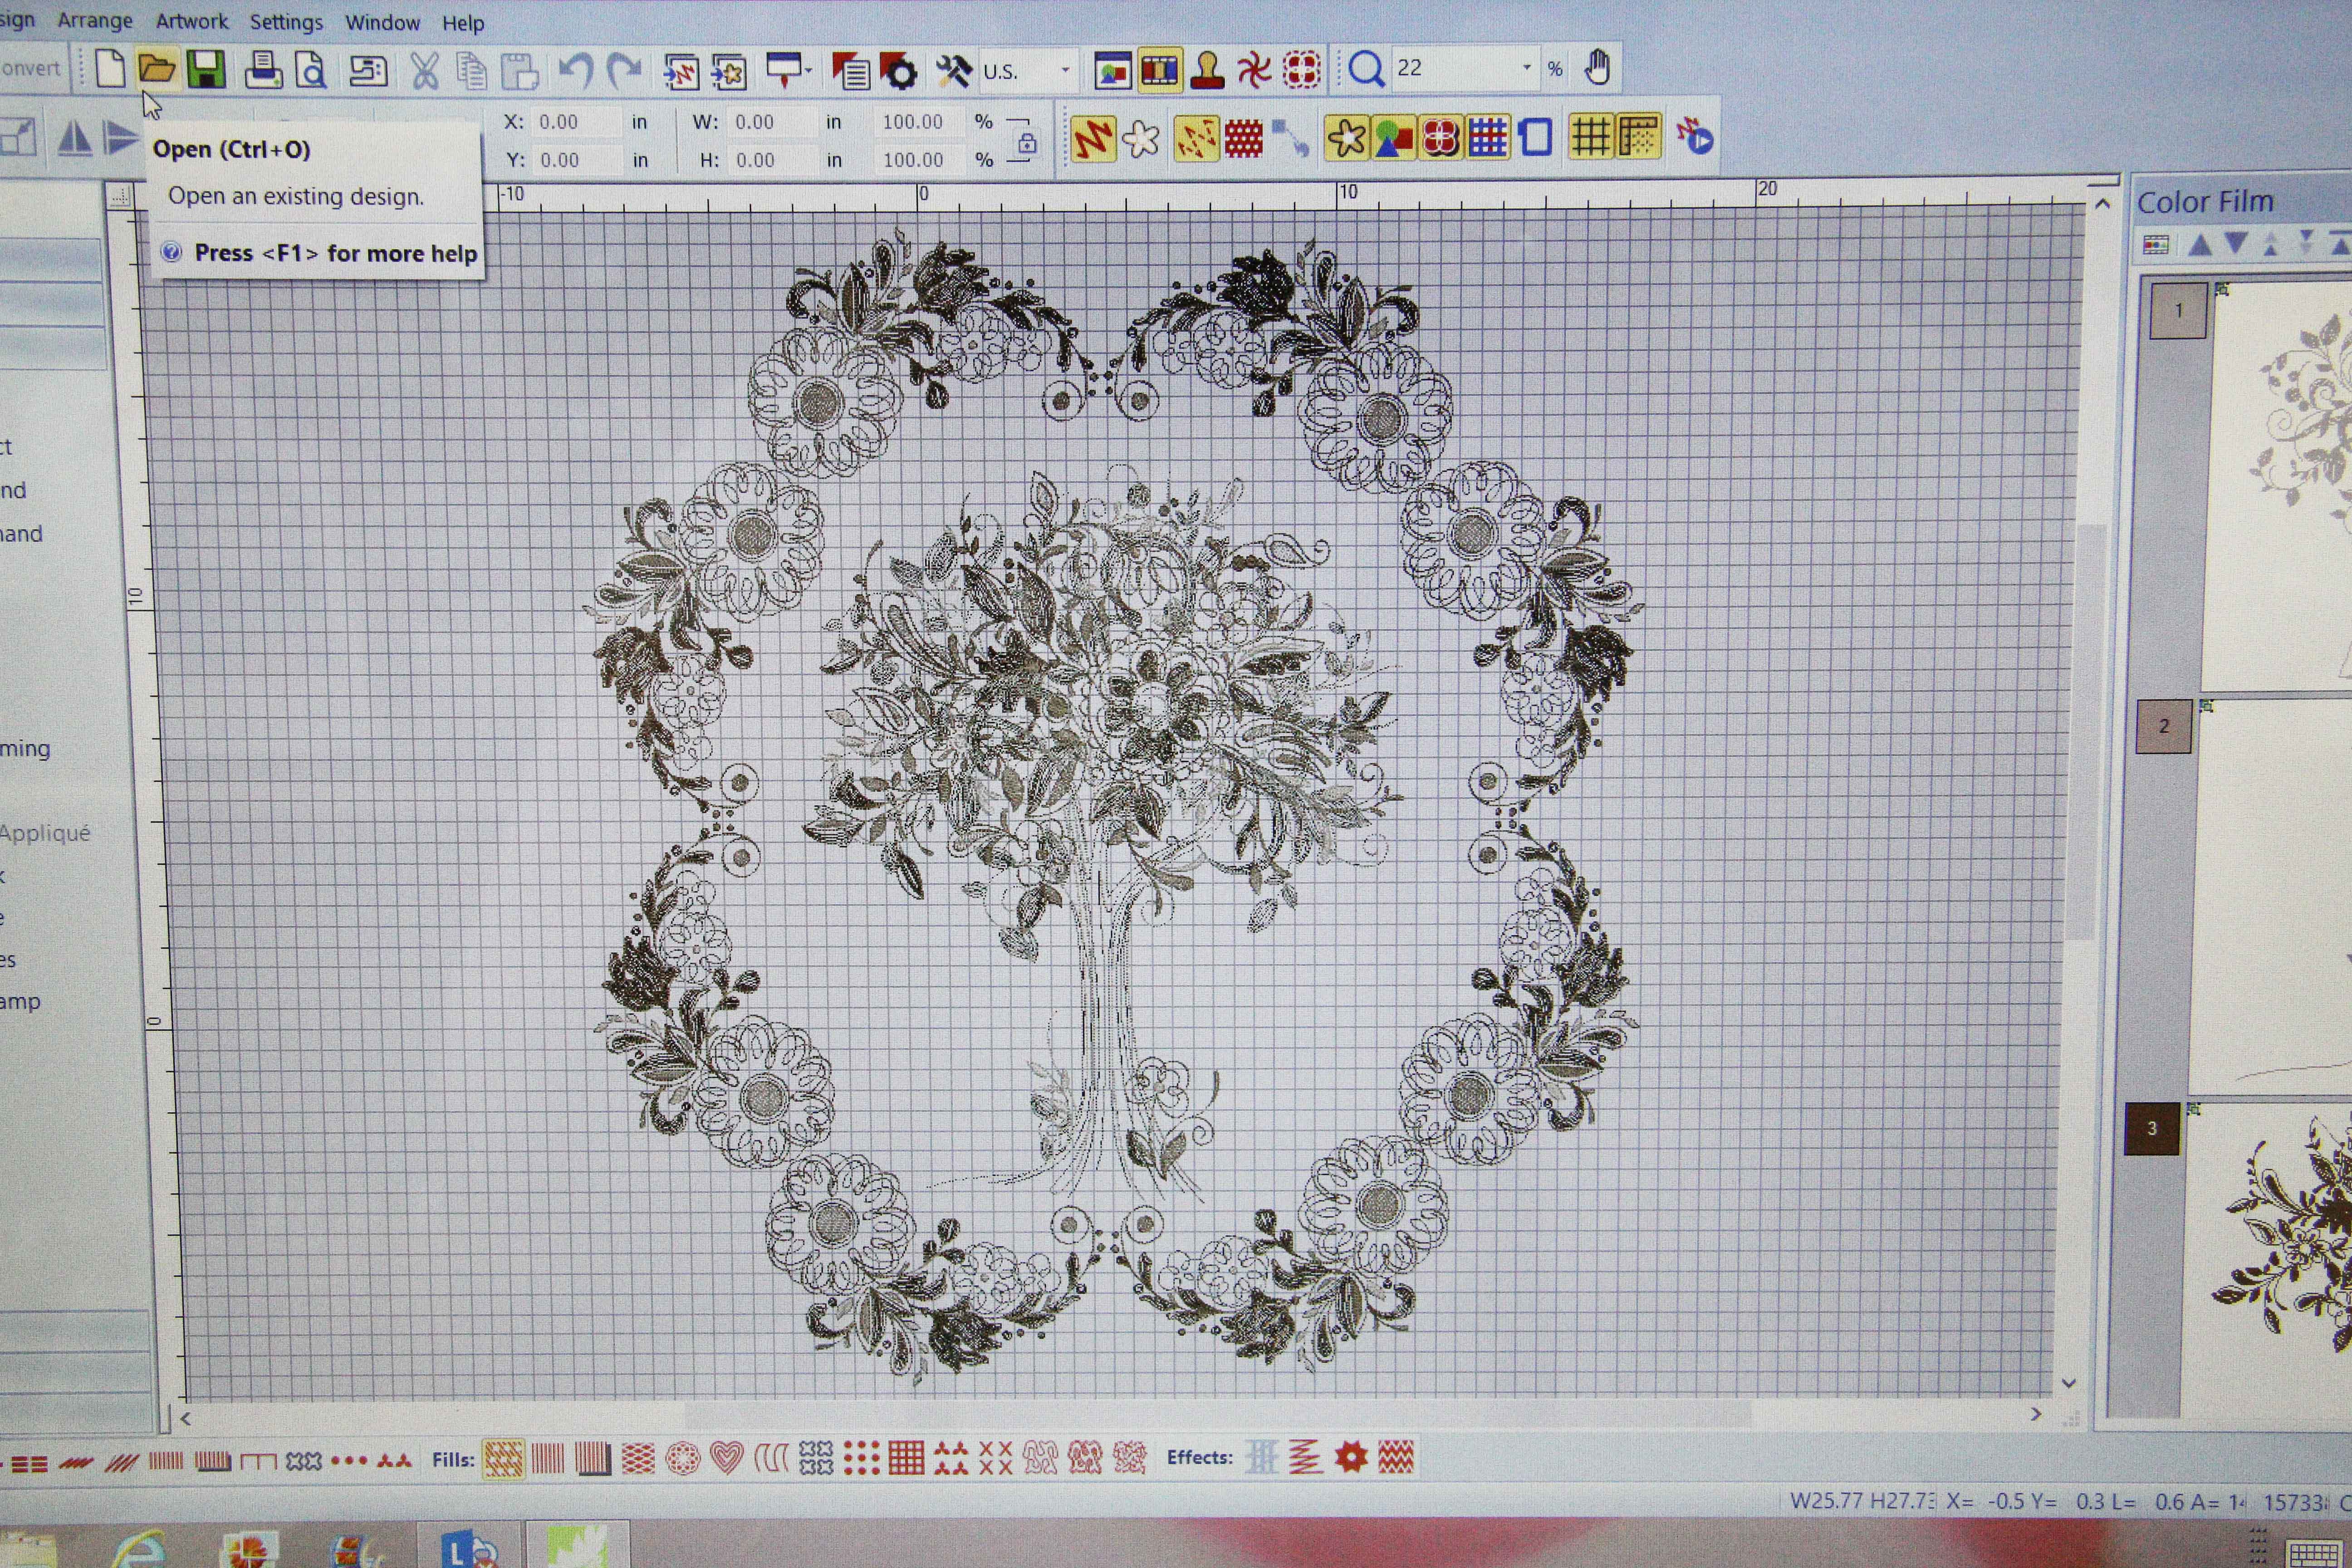
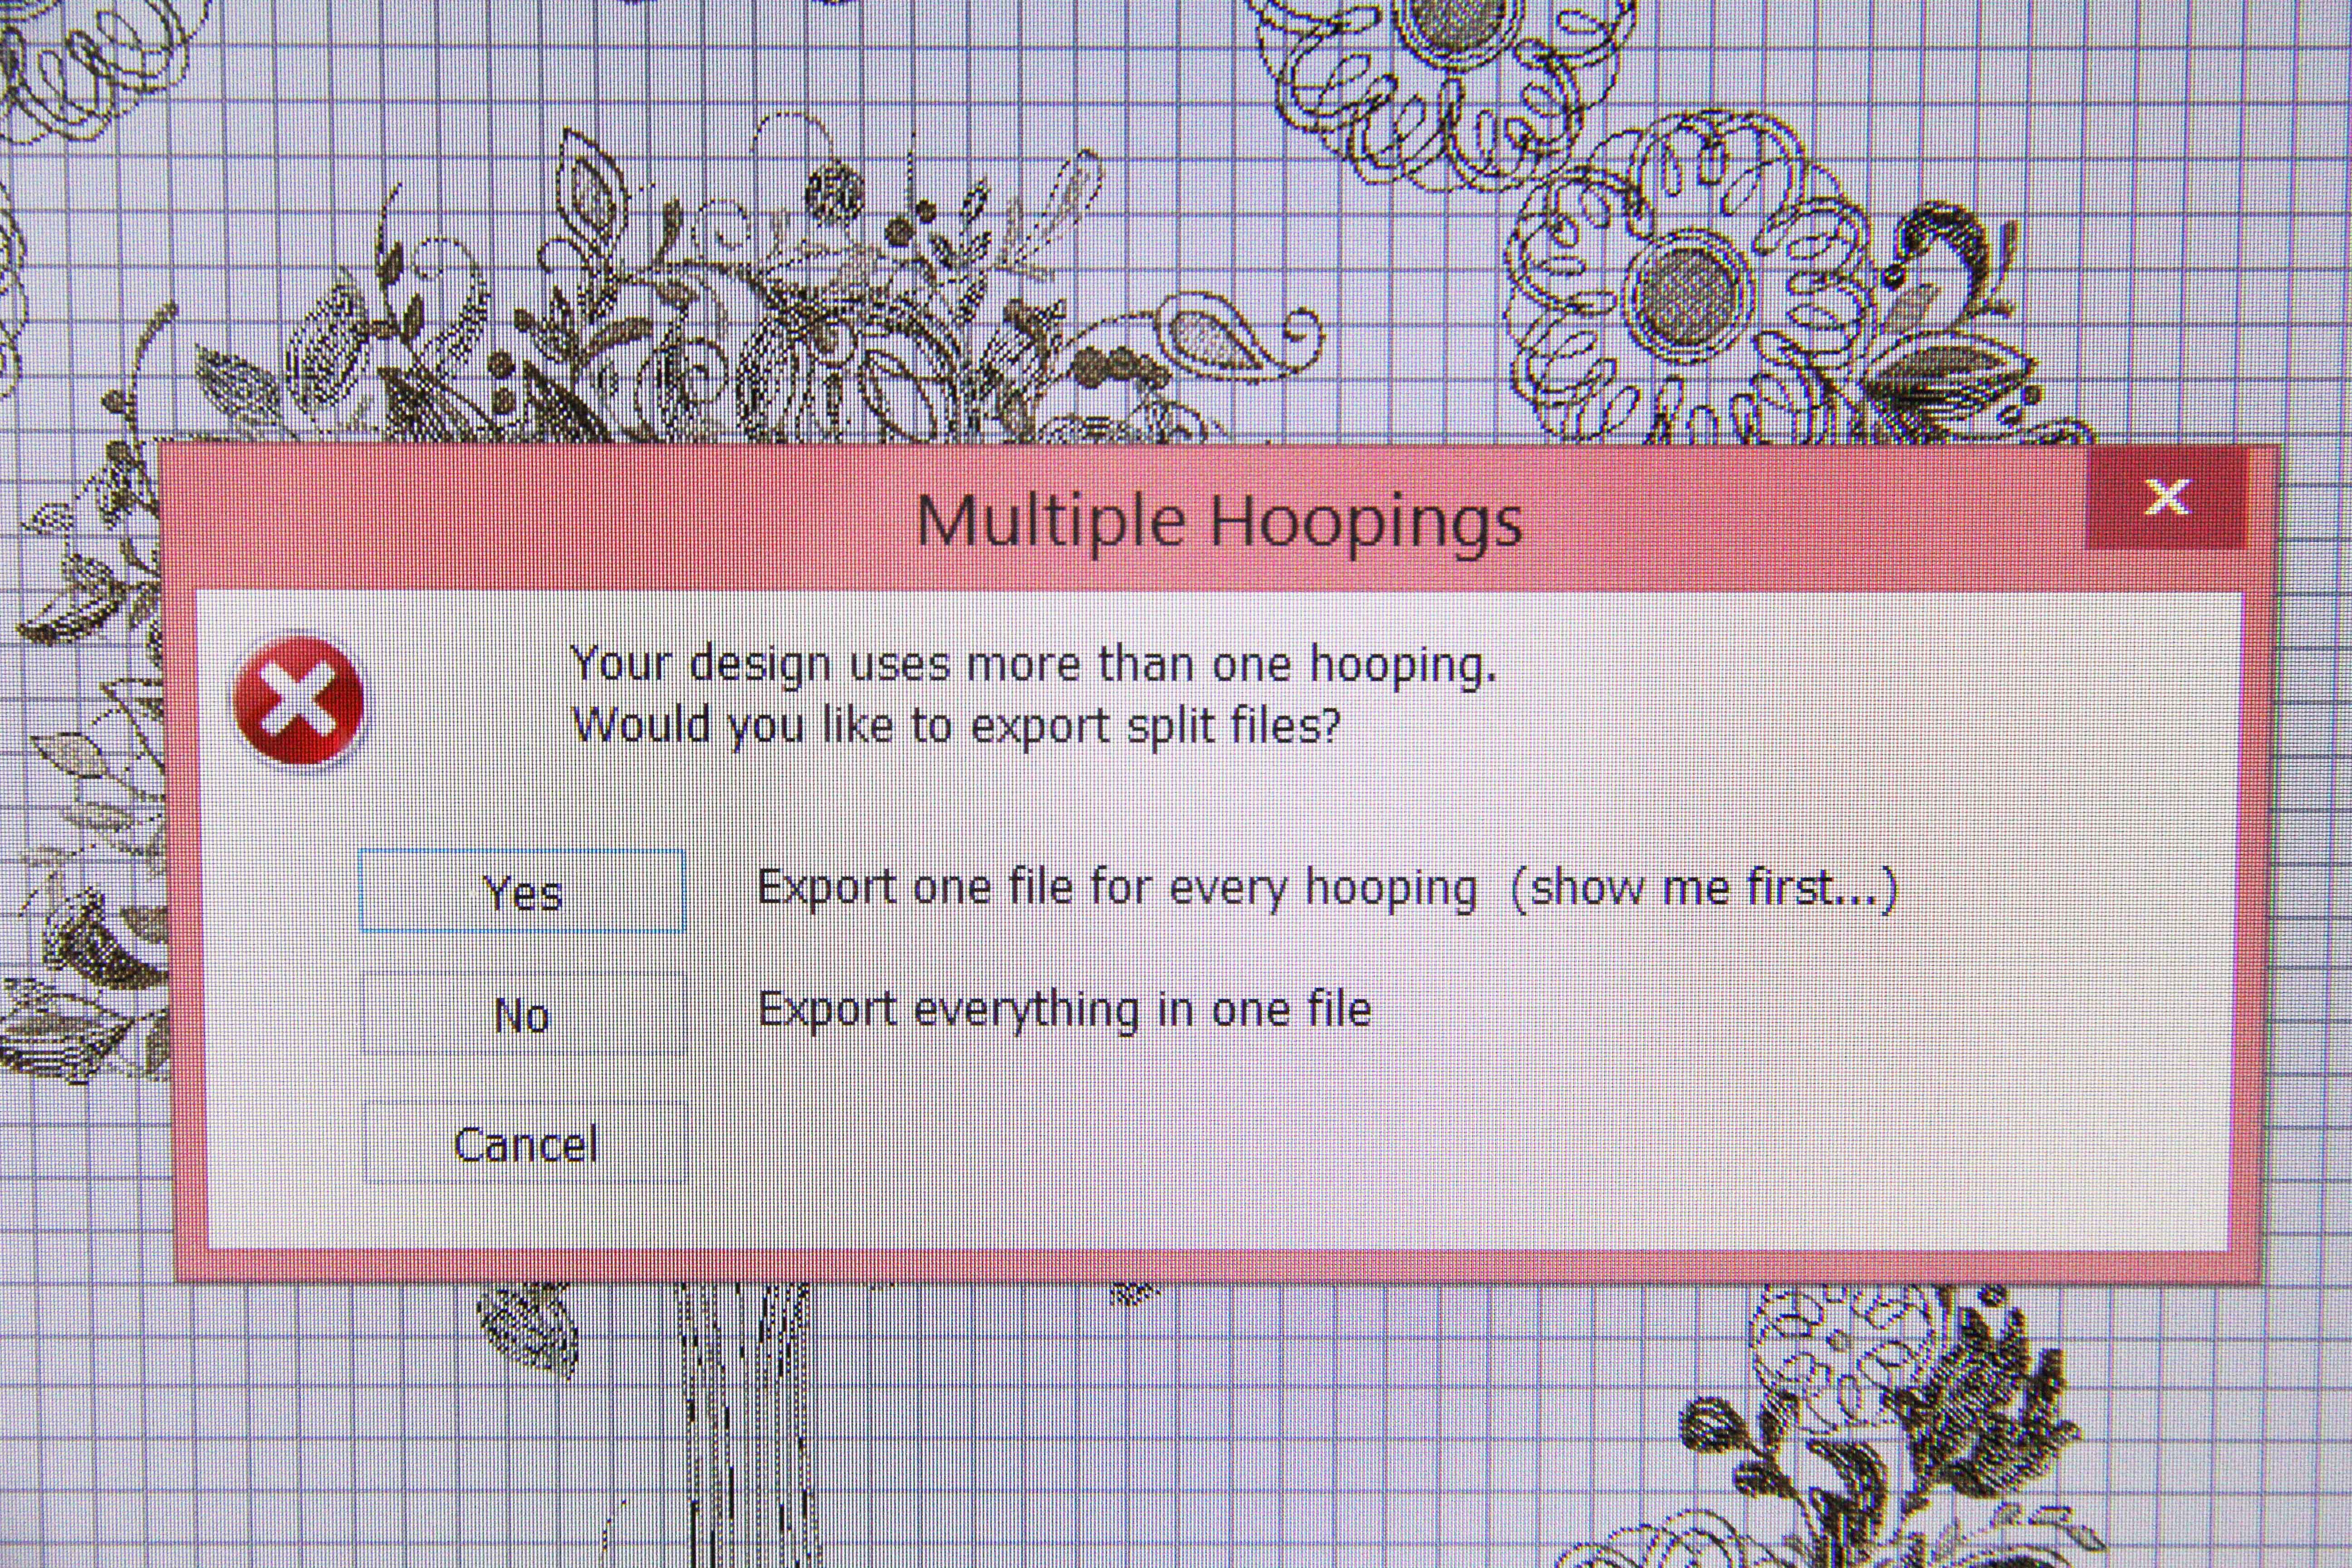
Some tips on multi-hooping in machine embroidery:

–Start small.  2 hoopings would be great.

–Use light airy designs.

–The fewer colors the easier it is to follow.

–If you have a machine that has “perfect positioning,” rely heavily on that.

–Grid your fabric before starting so you know what is absolute horizontal and vertical.

–Practice, practice, practice!

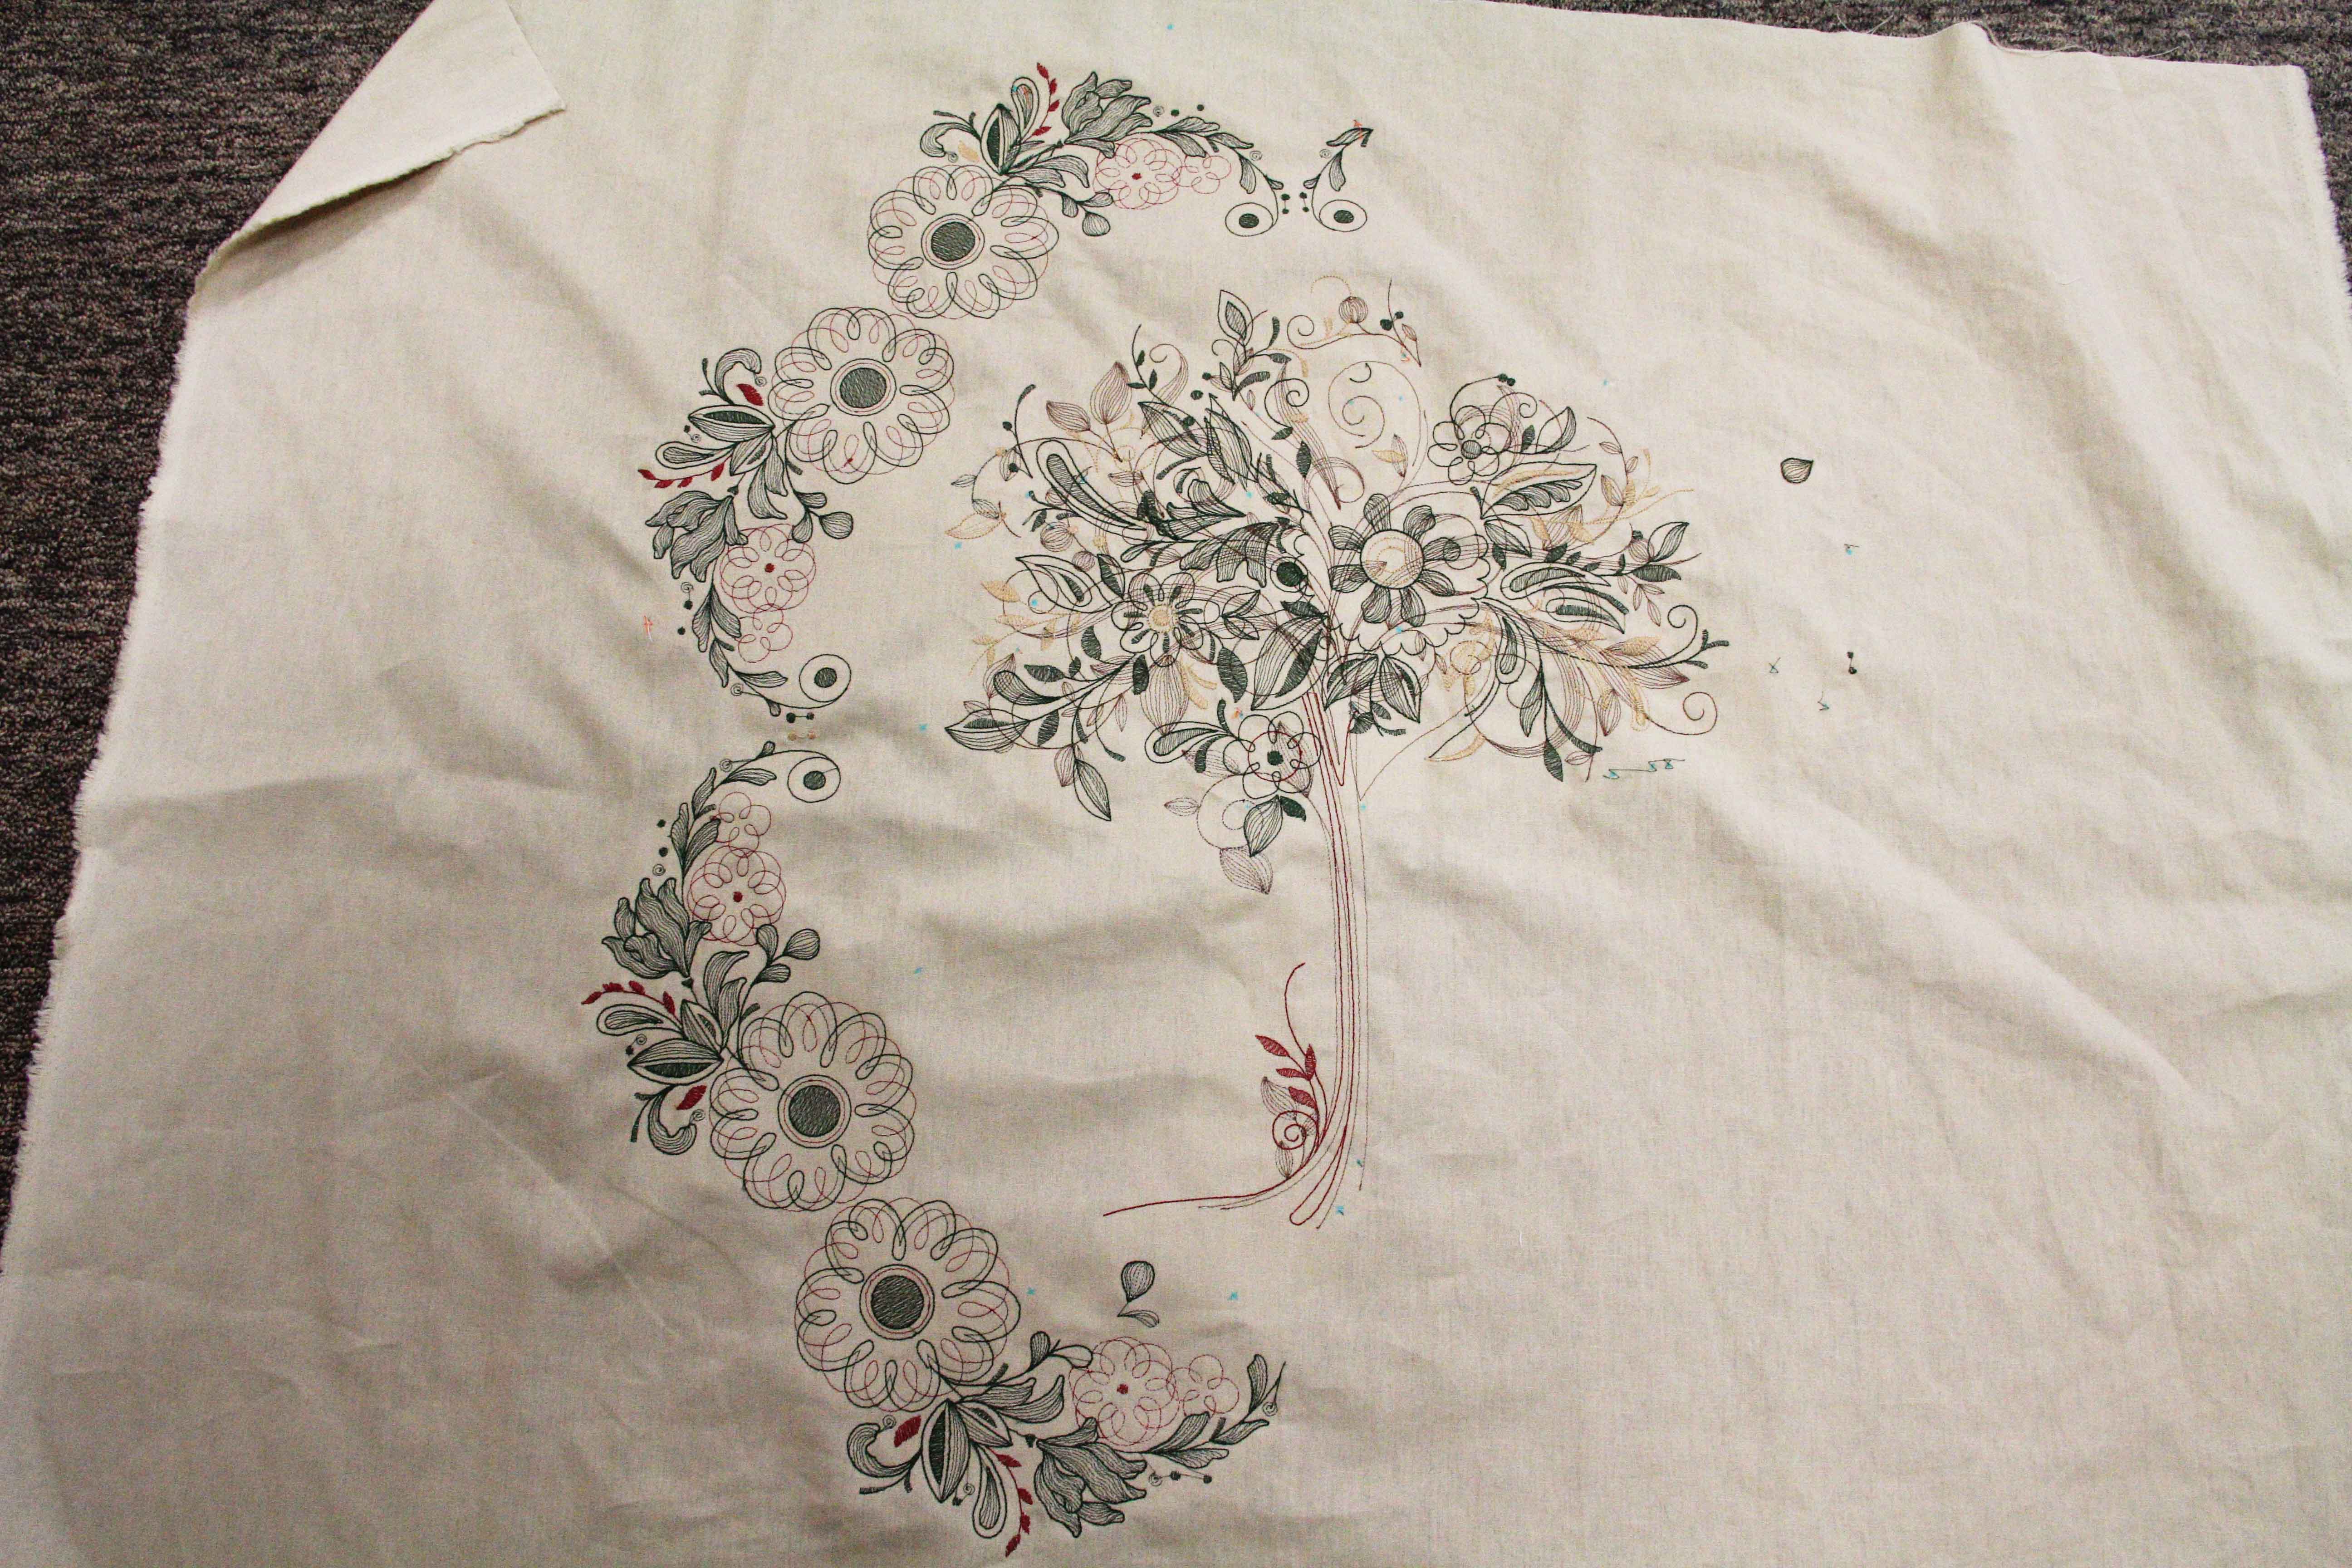
I always tell my students that if you’re not making any mistakes, you’re probably not learning anything new. Mistakes, errors, booboo’s and unstitching are the hallmark of a learning curve. Ask me how I know.

Rare is the person who sits down and implements something new perfectly.  And if they did, they probably didn’t try something challenging enough.

So get out there and push the envelope!  Waste a little thread and a little fabric and a little time! (We both know it’s not really wasted, right?)

Who knows what you’ll be able to create once you move past the fear.

multihooping1

In Over My Head…As Usual

Silly me.

I thought I would try multi-hooping in machine embroidery.

But I didn’t start with a simple design that might require 2 hoopings. No. Not me.

I didn’t even start with a design (as recommended by Amanda from Bernina) with 3 hoopings. Nope.

My design requires 14 separate hoopings. What could go wrong?

multi3The truth is, it’s a pretty nice design.  I used some of the Sepia Petals collection, resized them, wreathed, mirrored and aligned them.

The effect is lovely.  But the design is upwards of 157,000 stitches and measures about 2 ft. by 2 1/2 ft.


multi2I used the hoop canvas in Embroidery Software 7.  When I went to save, it asked me this question:  Would you like the export to split the files-one file for every hooping–SHOW ME first.

The SHOW ME turned out to be the most critical part of the design.  It displays a map of every hooping, in relation to every other hooping.

I am only 7 hoopings into this.

multi4Needless to say, after about 2 hoopings I was about to abandon the whole project.  The registration marks were pulling out.  Nothing was lining up properly.  But after about the third hooping I began to get better at facing the challenge.

I relied more on the precise positioning on the machine to help me line things up.

I got good at keeping the software open and showing the view of the hooping that I was stitching (was this number 6 or number 7??)  Anyway, at this point I managed to get the second half of the tree stitched…not yet shown in the pic below, and I am starting to see the light at the end of the tunnel.

multi1

This pic is obviously a work in progress and I don’t have a final to show you yet.  I am planning on adding some coordinating fabric and quilting before I am finished.  But at least you can see where it’s headed.

Remember, its about a 2 ft. x 2 1/2 ft. design when completed. It hasn’t been pressed in about 3 hoopings.  But I think I can make it work. What a learning opportunity this has been!

Stay calm and keep stitching. Amen to that.

I’ll share when it’s done.


Fresh Projects and Fresh Strawberries

software sampler2This is a project I worked on at work and at home for the June Bernina Software Sampler, which I teach.  The project involved learning techniques for machine embroidery applique.  The bud of the flower is part of the tutorial, but I went ahead and incorporated other elements as well, adding the stems, leaves etc. to create a simple but “summery” table runner. Once again, I was inspired by something I saw on Pinterest.

No pattern available, but for those of you with embroidery machines and Bernina Embroidery Software 7, it’s a piece of cake….well, once you work out the dimensions.  The flower panels are 8 x 8 inches finished, and everything else falls into place after that.

(How many pairs of glasses does one sewist need? Hint: At one point I used them both.)

strawberriesOne of my favorite times of the year is when the strawberries are harvested at the local farm. Here’s a shout out to friends at Norton Farm.  They are an important part of our summer!  We’ll be waiting for the tomatoes, broccoli and finally the fabulous corn! I’m growing a few tomatoes and cukes out back, but the weather has been a little cool, so they are taking their time developing.

Here’s to the sweetness of summer!  May we always appreciate the bounty!

strawberries2


Stitching on Paper? Leather? Fabric?

I don’t really know what to call it.

Technically, I believe it is paper.  But, apparently it can be machine washed and tumble dried. Call me skeptical.  Even so, it is a very fun product to stitch!

It’s called Kraft-Tex paper fabric.  The project is listed on weallsew.com.

kraftexkraftex explanationThe description on the packaging is pretty accurate. It DOES look and feel like leather.  It’s also a nice warm brown color, that makes everything pop out a bit.  I can see using it in a number of different ways.  For me, it borders a little more on the “crafty” side of sewing. But I could see it used in collage work, scrapbooking or anything that requires some dimension.


binder coverbinder spineI went ahead and created the binder cover in the pattern.  Of course, I used a different embroidery design.  Mine is a medallion from urbanthreads.com.  

The feel of this stuff is pretty hard to describe. It’s not rough, it’s rather soft. Which is why it compares to leather.

I have not tried to wash it yet, so that’s an experiment for the future.

The project went together quite easily and frankly, I was impressed by the quality of the paper/fabric. I had never heard of such a thing and it behaves, in my opinion, a little more like paper than fabric.


If you are someone who dabbles in multimedia, you’ll want to give this a try. I’d love to use this for painting and drawing and then incorporate sewing into the mix.  If only I had more time in a day, and more inspiration in a night.  The products are out there.  Might as well find out what you can do with them!

Christmas Embroidery

Maybe I’m feeling blue this Christmas.  Maybe I’m just inspired by all the recent snow we’ve had.  Whatever the reason, the other day, I was driving down Randall road and a small grove of trees (weeds?) against a snow bank caught my eye.

On a side road I can usually stop and take a picture to capture the scene and the light.  But not this time.  This time I was in a hurry, running around doing Christmas errands, etc. No time to stop and enjoy anything. No time to stop and take artsy pictures. No time.

But the little vignette stayed with me.

And eventually, I had to sketch it out.

Within minutes, I had embroidered it in my mind.  If I were using paints, it would be so much easier.  Mixing a paint color does not require hunting down the right fabric. When you paint, you don’t have to purchase 3 different colors of paint to help decide which is right.  You simply mix the colors yourself.

Besides, I wasn’t thread painting.  I was digitizing.  When you digitize you can start with a very simple sketch.  The rest is done in software.  I drew and assigned colors in software.

Here’s my little sketch.  Squeezed in during the holidays, because it simply wanted to exist. I had no time for it.  But it found its own way out.

Merry Christmas to all of you, and a happy and blessed new year.  May all your artwork find its way out.

snow embroidery

It's about 12 inches wide

It’s about 12 inches wide

In progress.

In progress.

The view from the sewing room.

The view from the sewing room.

The 30 second sketch I used to start digitizing.

The 30 second sketch I created to start digitizing.


Machine Embroidery Applique

I know you’re out there….all of you who have heard about applique using your embroidery machine, but have not seen a design created this way or have not had the courage to try it on your own.

No problem.

Last night I stitched out this design from one of the new Bernina collections called “Caravan”.  Now when I say “Bernina collections”, it just means that Bernina distributes the designs.  You don’t have to own a Bernina. The designs work on any embroidery machine, and come in all machine formats.

First start stitching out the design.  I chose a denim jacket to support all the craft stitches included in this design and I used 2 layers of poymesh cutaway stabilizer.

caravan1This embroidery machine applique collection contains designs for applique, cutwork, crystalwork, paintwork and a printable. The kit comes with a catalog of designs, as well as suggested thread colors, pattern pieces and even a way to get your designs back if you accidentally write over the usb stick!


Bernina embroider software 7Keep Bernina Embroidery Software 7 open nearby, or you can use any software or none at all. It just helps to keep track of the thread colors as you go.


placement lineBecause the design was originally digitized as an applique, one thread color will be used as a placement line. This is usually just a simple running stitch.


applique fabricAdd the fabric, then let the next thread color run.  It will trace the outline of the applique. Use applique scissors to cut away the fabric around the top running stitch.


applique scissorsI prefer to use these small rounded snips because they allow me to get into tight corners.  Because they point up, they’ll also prevent you from poking holes in the fabric underneath. You can find different types of applique scissors on the market.


caravan in progressTake your time with these designs as you will be stopping to lay down fabric, trim it away and the design will layer stitches on top to finish the look.  This particular design had 5 layers of applique.  Can you see them all?


Looks great on my denim jacket!

Looks great on a denim jacket!

I apologize for the darkness of some of these shots.  That’s what happens when I work at night!  Anyway, here’s the final design!  The detail on it is magnificent!  Machine embroidery applique is not difficult at all.  It’s just knowing when to lay down fabric.  Jump in and try this.  It will give your designs added dimension, color and complexity without adding more stitches.

Adding Some Sparkle

metallicI’m teaching a class at Sew Generously in November about using metallic thread for machine embroidery. The look can be absolutely stunning, perfect during the holidays or special ocassions.

Or it can make you want to throw your thread against a wall and storm out of the room.  (Ask me how I know.)

But some basic tips can go a long way.  Troubleshooting is another issue, and is exactly the reason I offer a hands-on class.  Until you try and fail, you will not know what works and doesn’t on your machine.

Here are a few very general tips on using metallic thread:

1.  Use good quality thread.

This should go without saying, but you know, I always run into people who will pay thousands for a machine and then purchase thread that is garbage.  Thread manufacturing is a science and it can be made to excellent standards or made on the cheap and, let’s face it, when it comes to thread, you get what you pay for.  I always recommend Superior Threads.  I have used their products numerous times with success IF you follow some of the following tips.

2.  Use a topstitch needle. 

They have a larger eye and that gives the thread some room, so it cuts down on breakage.

IMG_1731

3.  Don’t be afraid to change your upper tension.

Most of the time, you have to reduce the top tension all the way to 1.


4.  Use the correct thread in the bobbin.

I have had some success using OESD bobbin thread, but nothing works better than Superior’s Bottom Line in the bobbin.  It’s a lightweight poly, and is a perfect match for their metallic thread.  Use Bottom Line in the bobbin when sewing with monofilament too.

upright thread stand5. Know when to use your upright thread spool holder.

It may be easy to think this one can be overlooked, but you would be surprised what a difference it makes.  If your thread is straight wound, as this one is, make sure it’s on the upright holder.  If it’s cross-wound, as many other metallics are, you should be OK on the horizontal spool holder.

To learn a little more about horizontal vs. vertical spool holders, click here.

Metallic thread looks so gorgeous during the holidays–on linens, home decor accents, even on apparel…especially on apparel.

Work through your fear and try it!

Just Like Grandma Used to Make – Almost

This time of year, I really long for some snow.  Like everyone else, I’m really sick of it by March, but late November, early December, give me a little bit of holiday cheer in the form of weather.

At a recent community supper, I was lamenting about the lack of snow and how much I wanted to see it this year and global warming, blah, blah.    A friend looked at me and said, “As long as the weather stays moderate, I can work outside.  Working outside makes for a decent income.  When weather gets cold, we need different kinds of contracts–indoor work.  And while I can still get that, it’s never enough.  The longer I can work outside, the better.”

Oh. Now I see.  (I was blind and now I see.)   I don’t need the weather outside to be frightful, even though a fire is so delightful. I’d rather see people keep their jobs and income.

As for snowflakes, I can make my own.  Grandma used to make wonderful doilies by hand, some of them no larger than the palm of your hand. I still have a few.  But times have changed a bit, and now I can make ornaments with basically the same look, only they are done on an embroidery machine.  Free-standing lace is what they are called.  No teeny tiny crochet hooks.  Though I love the look of handwork, too often, I just don’t have the time.

I used two layers of Aquamesh  Washaway stabilizer.  Once the design stitches out,  cut away the bulk of the stabilizer, and rinse the rest under warm water. It disappears almost instantly.  I prefer Aquamesh over Badgemaster, having used them both now.  Badgemaster has a gummy, gooey feel to it as it rinses and does not seem to rinse as easily.  But in a pinch, it will work just fine.

Then just lay them flat and pin them onto a piece of styrofoam.  They dry out overnight, and maintain a slight stiffness.  Whenever I do this part it reminds me of the way my mom used to wash out doilies (she made plenty of them too).  But she had to starch them to get them to hold a shape, while mine will have a slight residue of the stabilizer to keep them in their shape. It’s a little hard to see the pins in the photo, but they are essential to maintaining the shape and flatness of the ornaments.  Free standing lace embroidery is everywhere these days, and I’ve seen some gorgeous designs for the holidays.

Most of these came from a collection by OESD called Snowflake Elegance #12429.

And I guess they are still homemade, though I have been contemplating exactly what that means.  If it’s made on a machine, is it really made by hand?  When I ask myself that question, I think about what Grandma might have done if she could have gotten her hands on a machine like I have.  I think about my mom and her knitting machines.  And the question then becomes not whether or not I should make use of technology, but with my heritage, why wouldn’t I?