LED DIY Wearables. Um, yeah.

Stop the presses. Hold your horses. Shut the door. Turn out the lights.

Because I’m starting a project I know so little about it’s scary.  And turning out the lights might actually be a good thing.

Luckily, I’m embarking on this project in partnership with a husband who happens to be an electrical engineer–a hardware guy. Someone who’s heard the term neopixel before.

And I, well, I know how to sew.

Together we’ve decided to create one of those DIY wearables the “kids” are building these days.

Go ahead.  Google DIY Wearables with LED.  It looks like fun, right?

I’m not starting totally clueless.  I purchased this book (Getting Started with Adafruit Flora by Becky Stern and Tyler Cooper) which, frankly, I only understand half the words on the cover.  However, diving into it is much easier with a handbook, and I do have someone to consult when I’m completely baffled.

wearables1


The first decision we had to make (as a couple) was what project to work on, and then how it would be lit.  After doing the research, I settled on a simple serged vest, to which I will add a lining.  The lighting would be sewn to the lining, and the lights will shine through the top layer.  That’s the plan.  For now.

vest1The pattern I’ve chosen is Modern Silhouette Vest from Amy Barickman.

The fabric is called Maker, from Art Gallery Fabrics.  Seemed appropriate.

Problems encountered so far:

–I wanted to run a string of lights from front to back on the vest in two places…not cheap to purchase those light strips by the way.  They come in meter long sizes. However, the strips are encased in hard plastic which is just not going to lend itself to the shape of a vest. Or a human being, for that matter.

–So I modified the design to have an all-over sprinkling of lights which I can program to patterns and colors.

–The battery is rather heavy for what I’m looking to do, so I might have to design a pocket in the lining to hold the battery, or we may actually need two batteries. This is something I’ll have to modify along the way.

Things to figure out next:

–How to attach all those lights. I think they must be hand sewn with conductive thread, and all connected to one another.  This is where my partner comes in.  He’s here to make sure I don’t electrocute myself or start the dang vest on fire.

–How to program and what sort of controller to use. I have to get into a few more chapters in the book for that.

Stay tuned.

This could get interesting.


Going to Market (Part 2)

As you know, I had the chance to go to Quilt Market in Houston this year, and so I’m sharing some of the things I saw.

Fig Tree and Co at her booth.

Fig Tree and Co at her booth.

Rennaissance ribbon ideas.

Rennaissance ribbon ideas.

Another cute idea from Rennaissance ribbons.  That's Kaffe Fassett  ribbon.  Rennaissance has a new idea book featuring his ribbon.

Another cute idea from Rennaissance ribbons. That’s Kaffe Fassett ribbon. Rennaissance has a new idea book featuring his ribbon.

Angela Walters with her new line. A real departure for her. This quilt was made with 3 half-yard panels--2 seams. The binding is made with leftovers from the panel.

Angela Walters with her new line. A real departure for her. This quilt was made with 3 half-yard panels–2 seams. The binding is made with leftovers from the panel.

Another color way from Angela Walter's line.  Really loving this pattern.

Another color way from Angela Walter’s line. Really loving this pattern.

Bonnie and Camille's booth, featuring their new line Vintage Picnic.

Bonnie and Camille’s booth, featuring their new line Vintage Picnic.

Sweet Amy Ellis with her new line.  Loving the corals and greys.

Sweet Amy Ellis with her new line. Loving the corals and greys.

Isn't this a great idea for a kid's room?  Same idea as the corded bowls we've made but just lays flat with fabric wrapped around the cording.  At the Ella Blue booth.

Isn’t this a great idea for a kid’s room? Same process as the corded bowls we’ve made but just lays flat. Wrap fabric around the cording. At the Ella Blue booth.

Kate Spain at her booth.  Another sweet, sweet lady!

Kate Spain at her booth. Another sweet, sweet lady!

Jen Kingwell's new line.

Jen Kingwell’s new line.

Jen Kingwell's fabulous booth.

Jen Kingwell’s fabulous booth.

Isn't that gorgeous?  Another angle of Jen Kingwell's booth.

Isn’t that gorgeous? Another angle of Jen Kingwell’s booth.

Your local store needs these, don't you agree?  In the hoop pin cushions from Smith Street Designs.

Your local store needs these, don’t you agree? In the hoop pin cushions from Smith Street Designs. Yum.

I hope you’ve enjoyed this little tour through market.  You’ll find MUCH more if you go to instagram or twitter #quiltmarket and #houstonquiltmarket.  Right now, Quilt Festival is going on in Houston, and of course, that’s open to the public.  #quiltfestival   #houstonquiltfestival #showmethemoda #fatquartershop

This Little Gal Went to Market (Part 1)

Finally.  I went to Quilt Market 2015 in Houston.  It was quite an experience as we all spent some time worrying about the remnants of the strongest hurricane in the western hemisphere, which blew through Houston over quilt market weekend. 12 inches of rain or more.  Thankfully, the day I left the sun had returned.

Weather notwithstanding, I had a great time.  I met so many designers, my head is spinning. Plenty of pictures to share with you, and you’ll get some idea of what the trends are for next spring.


Zen Chic Bridgette Heitland with her new line "Flow."

Zen Chic Bridgette Heitland with her new line “Flow.”

Zen Chic fabric "Flow".  don't you LOVE it?

Zen Chic fabric “Flow”. don’t you LOVE it?

Sue Sprgo has a coffee table book coming out in time for Christmas.  Glorious photos of her work.

Sue Spargo has a coffee table book coming out in time for Christmas. Glorious photos of her work.

The delightful Sue Spargo at her booth.  I want every bit of her thread.

The delightful Sue Spargo at her booth. I want every bit of her thread.


New line from French General. Those thread holders were cut with Sizzix, and French General will now be selling hand floss.

New line from French General. Those thread holders were cut with Sizzix, and French General will now be selling hand floss.

French General's new hand embroidery. You can purchase the design and the thread from them.  This sample was the one that was hand drawn by her husband 2 days before market and used as the prototype for the new pattern.

French General’s new hand embroidery. Stores will be able to sell the design along with the matching thread.  Perfect! This sample was the one that was hand drawn by her husband 2 days before market and used as the prototype for the new pattern.

New collection by Luke Haynes a new Moda designer.

New collection by Luke Haynes a new Moda designer.

Here's Luke's self-portrait in the gallery.  Yes, the entire background and his name are made from flying geese.  So interesting!

Here’s Luke’s self-portrait in the gallery. Yes, the entire background and his name are made from flying geese. Love it.

Designer Pat Sloan alongside and Aurifil rep who made a log cabin quilt and cut it up into her skirt!

Designer Pat Sloan alongside an Aurifil rep who made a log cabin quilt and cut it up into her skirt! She had to twirl all day to show everyone!

Vanessa fro V and Co. with her FABULOUS ombre fabric all around, including her skirt.

Vanessa from V and Co. with her FABULOUS ombre fabric all around, including her skirt.

Stay tuned for more.  As I process the photos, I’ll share what I can.


How Would You Fix This?

Rummaging through my closets this week I came across an embroidery project I worked on back in high school…yes high school.  I think it was for an art class.  It’s actually pretty big, 18 x 24 I would guess, with a large wood frame.

high schoolHave to love the signature.

carolAt any rate, back in the day that I stretched and framed this thing, I obviously had no stabilizer behind it.

You can see that after moving, I don’t know, 5 or 6 times since high school, somewhere along the line I managed to poke a small hole through the muslin.

the holeThe weave on this fabric is amazingly loose.  I thought about just adding another tree.  However, now that it’s stretched on a frame, it’s very difficult to embroider–but probably not impossible.

I hate to just give up on it, as the details are interesting.

close up2stitchesI’m open to suggestions.

I think the best I can do is to finish the edges of the tear with Fray-Check, and then somehow add another tree on top of the hole.

It may not be perfect, but, hey, after 40 years (or 50 or 60), how many of us are?

Things that go bump in the night…

ornamentsI have always enjoyed Halloween more than Christmas, or whatever mid-winter holiday you celebrate.  Too much pressure, too many gifts, too much hype.

And when you work in retail, Halloween isn’t much better.  Most chain stores start putting their Halloween decorations out July 5.  But when that first crisp fall breeze rolls in, and those first few leaves begin to fall, I get inspired.  Many people do. Once the kids are all back in school and the “official” fall season starts, it’s amazing how many of us turn to our craft, our hobby or our passion once again.

So this year I am teaching some students to use the cross stitch program in Bernina Embroidery Software 7.  I am not a big fan of cross stitch..at least not actually DOING it.  However, I love the way it looks, and I love how easy it is to get some things done in software (which I DO love to use).

I stumbled across some lovely cross stitch designs in Just Cross Stitch Magazine.

They always include many  many patterns for people to use.  I scanned a few of their Halloween “ornaments”, and brought the jpegs into the cross stitch software.

Then you can use the software to create stitches following the image in the background.  I wanted to keep these very simple so I could make many, but not take a lot of time.  The cross stitch program within Software 7 saves the file as .arx extension.

pumpkimcrossstitchThe next step of course, is to bring the cross stitch design into the actual embroidery software.  I love this technique because it turns all those little x’s in the Cross Stitch program into machine-readable stitches.  And then it’s just an embroidery design.

pumpkinspngOnce one file is in the software, you can repeat it multiple times.  I also rearranged the color film, along the right, to stitch all of one color at once instead of all the colors in one pumpkin at a time.  This is a huge step and really cuts down on thread changes.

At the end, I added a double run stitch around the outside of the ornament, leaving the bottom open, so the little critters could be turned inside out and stuffed.  Before that last double run thread stitches, I added the backing, with right sides together. Under the backing I taped down some ribbon, so that they could be hung.  As you can see, in the hoop, they look like little ravioli.

inthehoopWhen all is done stitching, I cut everything out, clipped corners, turned it inside out, stuffed them with polyfill, and used the machine to stitch along the bottom closure.

cat doneVoila!  Six or eight of them will fit into the jumbo hoop.  I managed to create a cat, a witch and a pumpkin.  I also made some larger ornaments with regular embroidery on them.

pumpkin hoopI bought a cheap Halloween tree for the house and one for the shop…these will be on display for awhile!  And if I have time, I’ll make more…it’s a little addictive.  And really pretty fast and easy when you make use of technology!  Gotta love it.

halloweentree2

Messin’ with Minky

I love minky.

I hate minky.

I have a love/hate relationship with minky.

It started with this little box of pre-cut minky fabric I bought in Shipshewana.

minky in a boxYummy, right?  Like a box of candy.  They came with a matching backing in a textured grey.

Now, just like everyone else, I had read a little about working with minky. It’s hard to describe.  You want to forgive all its faults and difficulties because it is so delightfully soft to touch.

But it behaves like a knit.  The gal at the store recommended a stretch needle.  I armed myself with a 90/14 stretch needle and some So Fine thread from Superior Threads.  I’m sure this seems like a mismatch because a 90/14 is a pretty big needle, and So Fine is, well, so fine.  Yet, when working with minky, you have some bulk to contend with, soft as it may be.  By the time I was adding the binding, I had 4-5 layers of minky with batting in between.

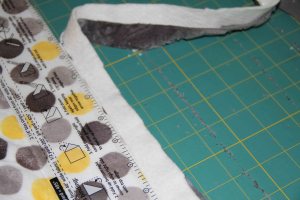
Assembling the strips was easy enough, and not too messy.  Apparently, the textured minkies are the ones that do most of the shedding.  It wasn’t until I cut the binding that I really started to see it begin to shed along the raw edge.

minky assembledminkymess3The trick to working with minky is to clean up as you go.

Even yourself.  Believe me, every time I turned around I had more minky on myself than there was near the sewing machine.

Two tools you won’t be able to do without:  a vacuum, and a lint roller.

I used them both basically every time I moved the quilt before the binding was finished.

minkymessminkymess2Another trick is to make sure the area you work in is already clean.  In other words, don’t have a stack of your favorite fabric underneath the sewing machine where you are working on minky.  In fact, move everything away from the area, so that you can see the fuzz and get at it.

I used the lint roller at least 20 times, each time taking off another layer of paper so that it would still work. I cleaned up after every cut so that I did not spread the little fuzz all over the place.

The whole process is not for the faint of heart, and I basically cleaned the entire sewing room afterward.

I used an older machine, just in case it dirtied my larger one too much.

minky cleanupLuckily, as you can see, my machine got dirty, but it’s not the machine that takes in the most fuzz.  It’s everything around you.

I used a walking foot for everything – stitching and quilting. Minky is slippery.  Many people suggest pinning everything, but in a strip quilt like the one I just did, the walking foot did the job completely.

minkysewI know all you Pfaff people and even Bernina 7 Series and 8 Series folks will think you can get away with just your IDT or dual feed.

I wouldn’t try it.  Minky likes a walking foot.

When I finished, I immediately marched out the back door and shook the quilt out over the back lawn.  Then went straight to the washing machine and washed and dried it. Once the raw edges are sewn in, no more fuzzies!

If you are good at cleaning up after yourself and taking care of your machine, you will do just fine. If I were going to do this again, I would likely only put minky on the back of a quilt, and I definitely would not use it for binding–even though it looks great when you’re done.

No matter how you feel about minky, this is the truth: it makes the snuggliest, cuddliest, most huggable quilts ever.

finished minky


Shipshewana Dreamin’ – Part 2

My first stop of the the day was Yoder’s Department Store which opens at 8 am.  Honestly, they have a TON of fabric, and every book, (including modern quilting books) imaginable. I love this place.

yoders3 yoders4I had vowed to myself during this whole trip that I would only purchase items unique to the area.  I love Moda fabric, but I can get that at home.  So I began hunting for “local” goods.

First thing I ran into was this display of reproduction toweling.  I could purchase by the yard and got myself a vintage-looking design.  They had some very cute tablecloths in carriers that looked like handbags and I’d really like to use the toweling to make a handbag…add a little ricrac and I’m good to go!  Also in the display was a special edition “Yoder’s 70th Anniversary” hand towel.  While waiting in line to check out, another woman told me she was going to use hers to create a quilt around it.  What a great idea!

yoders2Of course, I purchased a little bit of anything that had some local charm.

yoders1Do you collect Row by Row?  Get your Shipshewana version at Yoder’s.

rowbyrowNext stop is the Davis Mercantile where you can find many stores, but I just had to see the famous Lolly’s Quilt Shop.

lollysLolly’s is another wonderful place with everything you could want or need — current fabric lines, reproductions, batiks galore, and plenty of solids, books, patterns. Found a wall of Kaffe Fassett florals, with an opposite wall of all his colorful stripes.  Really the largest selection of Kaffe I’ve ever seen.

Lolly’s has a “sister” store downstairs at the mercantile, called Cuddle Corner.

Don’t miss it.

I was amazed at the wonderful things being done with minky!

cuddlecornerFresh textures, colors and patterns…all in minky!  If you have a baby in your life, you need to stop here.  You won’t believe how soft and cuddly this stuff is.  If you’re like me, you’ll want one for your own home for winter snuggling.

Special tip from the gal at the counter: a stretch needle works best with minky.  We have this discussion at work from time to time…what needle for minky?  This gal says stretch is best and I believe her, but I will try for myself as soon as I sew up my quilt.

cuddlecorner2cuddlecorner3Around every corner in Shipshewana, you’ll find merchants that are selling hand-quilted quilts.  Having done a bit of this, I fully understand the time, effort and work that goes into these kinds of handmade masterpieces.

wallofquiltsIn the next post, I’ll share a few Amish handmade quilts I was shown when an Amish woman showed me the quilts she sells for herself and for other Amish women from her home.

Hint: absolutely breathtaking.

Quilting vs. Gardening: It Must Be June

I’ve been busy.  Too busy to write a blog.

And not only too busy, but too boring.  And while I don’t mind writing a boring blog, I’m not sure you want to read one.  All of that aside, I have also reached the point in the year where all good quilters/gardeners have to make some decisions.  Inside or outside.  Quilt or garden. Flowers and vegetables or blocks and table runners.

And while I may be able to hold it all in my mind simultaneously, I certainly can’t work on it all simultaneously.  So although I have some very ambitious sewing plans and classes lined up, as my farmer grandfather used to say (and do), “Make hay while the sun is shining.”  Of course, he made hay in August, but you get the idea.

In the hopes of providing a little temporary entertainment, here’s a gallery of recent flowers from the garden.  Most are done blooming, so I’ll be back in the sewing room shortly.  In the meantime…it’s summer…let’s all go for a walk!

Improv and More

I have started working on an improvisational quilt.

Basically , it means I start sewing before I have any idea what I’m creating. For anyone who knows me, this way of doing things is right up my alley.  I just purchased this book, “An Improv Handbook for Modern Quilters” by Sheri Lynn Wood.

improv2

Naturally, I flipped through the book and then started without so much as reading a paragraph.  I promise I will go back and read. The book looks great.  I just was inspired by the word “improv” and began immediately.

improv1


Here’s a sneak peak and to be honest , I don’t know how I will complete it. Just know that it’s a gift, so I don’t want to divulge the whole quilt til it’s been given away.  At that point, it’s done and there can be no regrets or turning back.  For now, it’s simply a work in progress.

In machine embroidery, I am preparing to teach a Software Inspirations class based on a tutorial from Sylvain Bergeron, Bernina educator.  In it, we learn to create textile fabric using embroidery…like argyle.

argyle1This is done completely in software, then stitched out as machine embroidery.  It can now be cut up and used as a handbag piece, or in a quilt, or basically used as any other fabric.  Would be fun to do a small series of these in different shades and then put them together as a quilt or table runner.  Although I’m sure this image looks black and white, the thread used in the squares is actually a mauve with white lines, on Moda’s black grunge fabric.

That being said, like many sewists, I spend a lot of time in the garden in the spring, head back into the sewing room when it rains or as the weather gets too warm and buggy to be hanging around outside.  I leave you with a few lovely pics from around the area this past couple of weeks.  The earth is stunning.

peonies2

Peony tree

Wild  phlox

Wild phlox

Crabapple tree

Crabapple tree