When Your Sewing Machine Needs to go to the Spa

Well, I finally broke my machine.

Actually, I’m not sure I did anything wrong.  I just changed thread colors during an embroidery, started the machine up again and WHOA.  Needle broke and gears of death appeared.

It’s all OK.  I cleaned everything out and could only find 2 pieces of the needle.  A tiny tip is missing.  Normally I can set everything back to normal and just continue, but I think that little needle tip is scraping somewhere, so off to the tech we went.

Tech Update for Bernina 7 Series Owners

I chatted with my new tech for a while and told him about my machine issue.  He asked me if I knew that we were not supposed to oil in the top reservoir any more.

I did not know that.  I had heard some buzzing…questions from customers around the time the shop I previously worked for was closing.  However, we had not received any definitive information from Bernina at that time.

So here’s the deal:

–If you own a 7 Series, DO NOT put oil in the red-ringed reservoir under the stitch plate.

–DO oil the two felt pads in the hook and around the outside of the hook.

Heirloom Creations has a nice video showing and explaining this.

It’s important to know about this change.  If you purchased your machine longer than 6-7 months or so ago, you were likely taught to fill that red reservoir, and keep it filled.

The tech told me that too much oil was spreading, not only into the hook but also getting into the auto-thread cutter, and pieces of felt were working their way into the mix as well. I remember our tech at the store showing me how the machine looked with the thread cutter pulled out and oil getting on everything. At that time we had not heard the official “fix” from Bernina. Now it’s here.

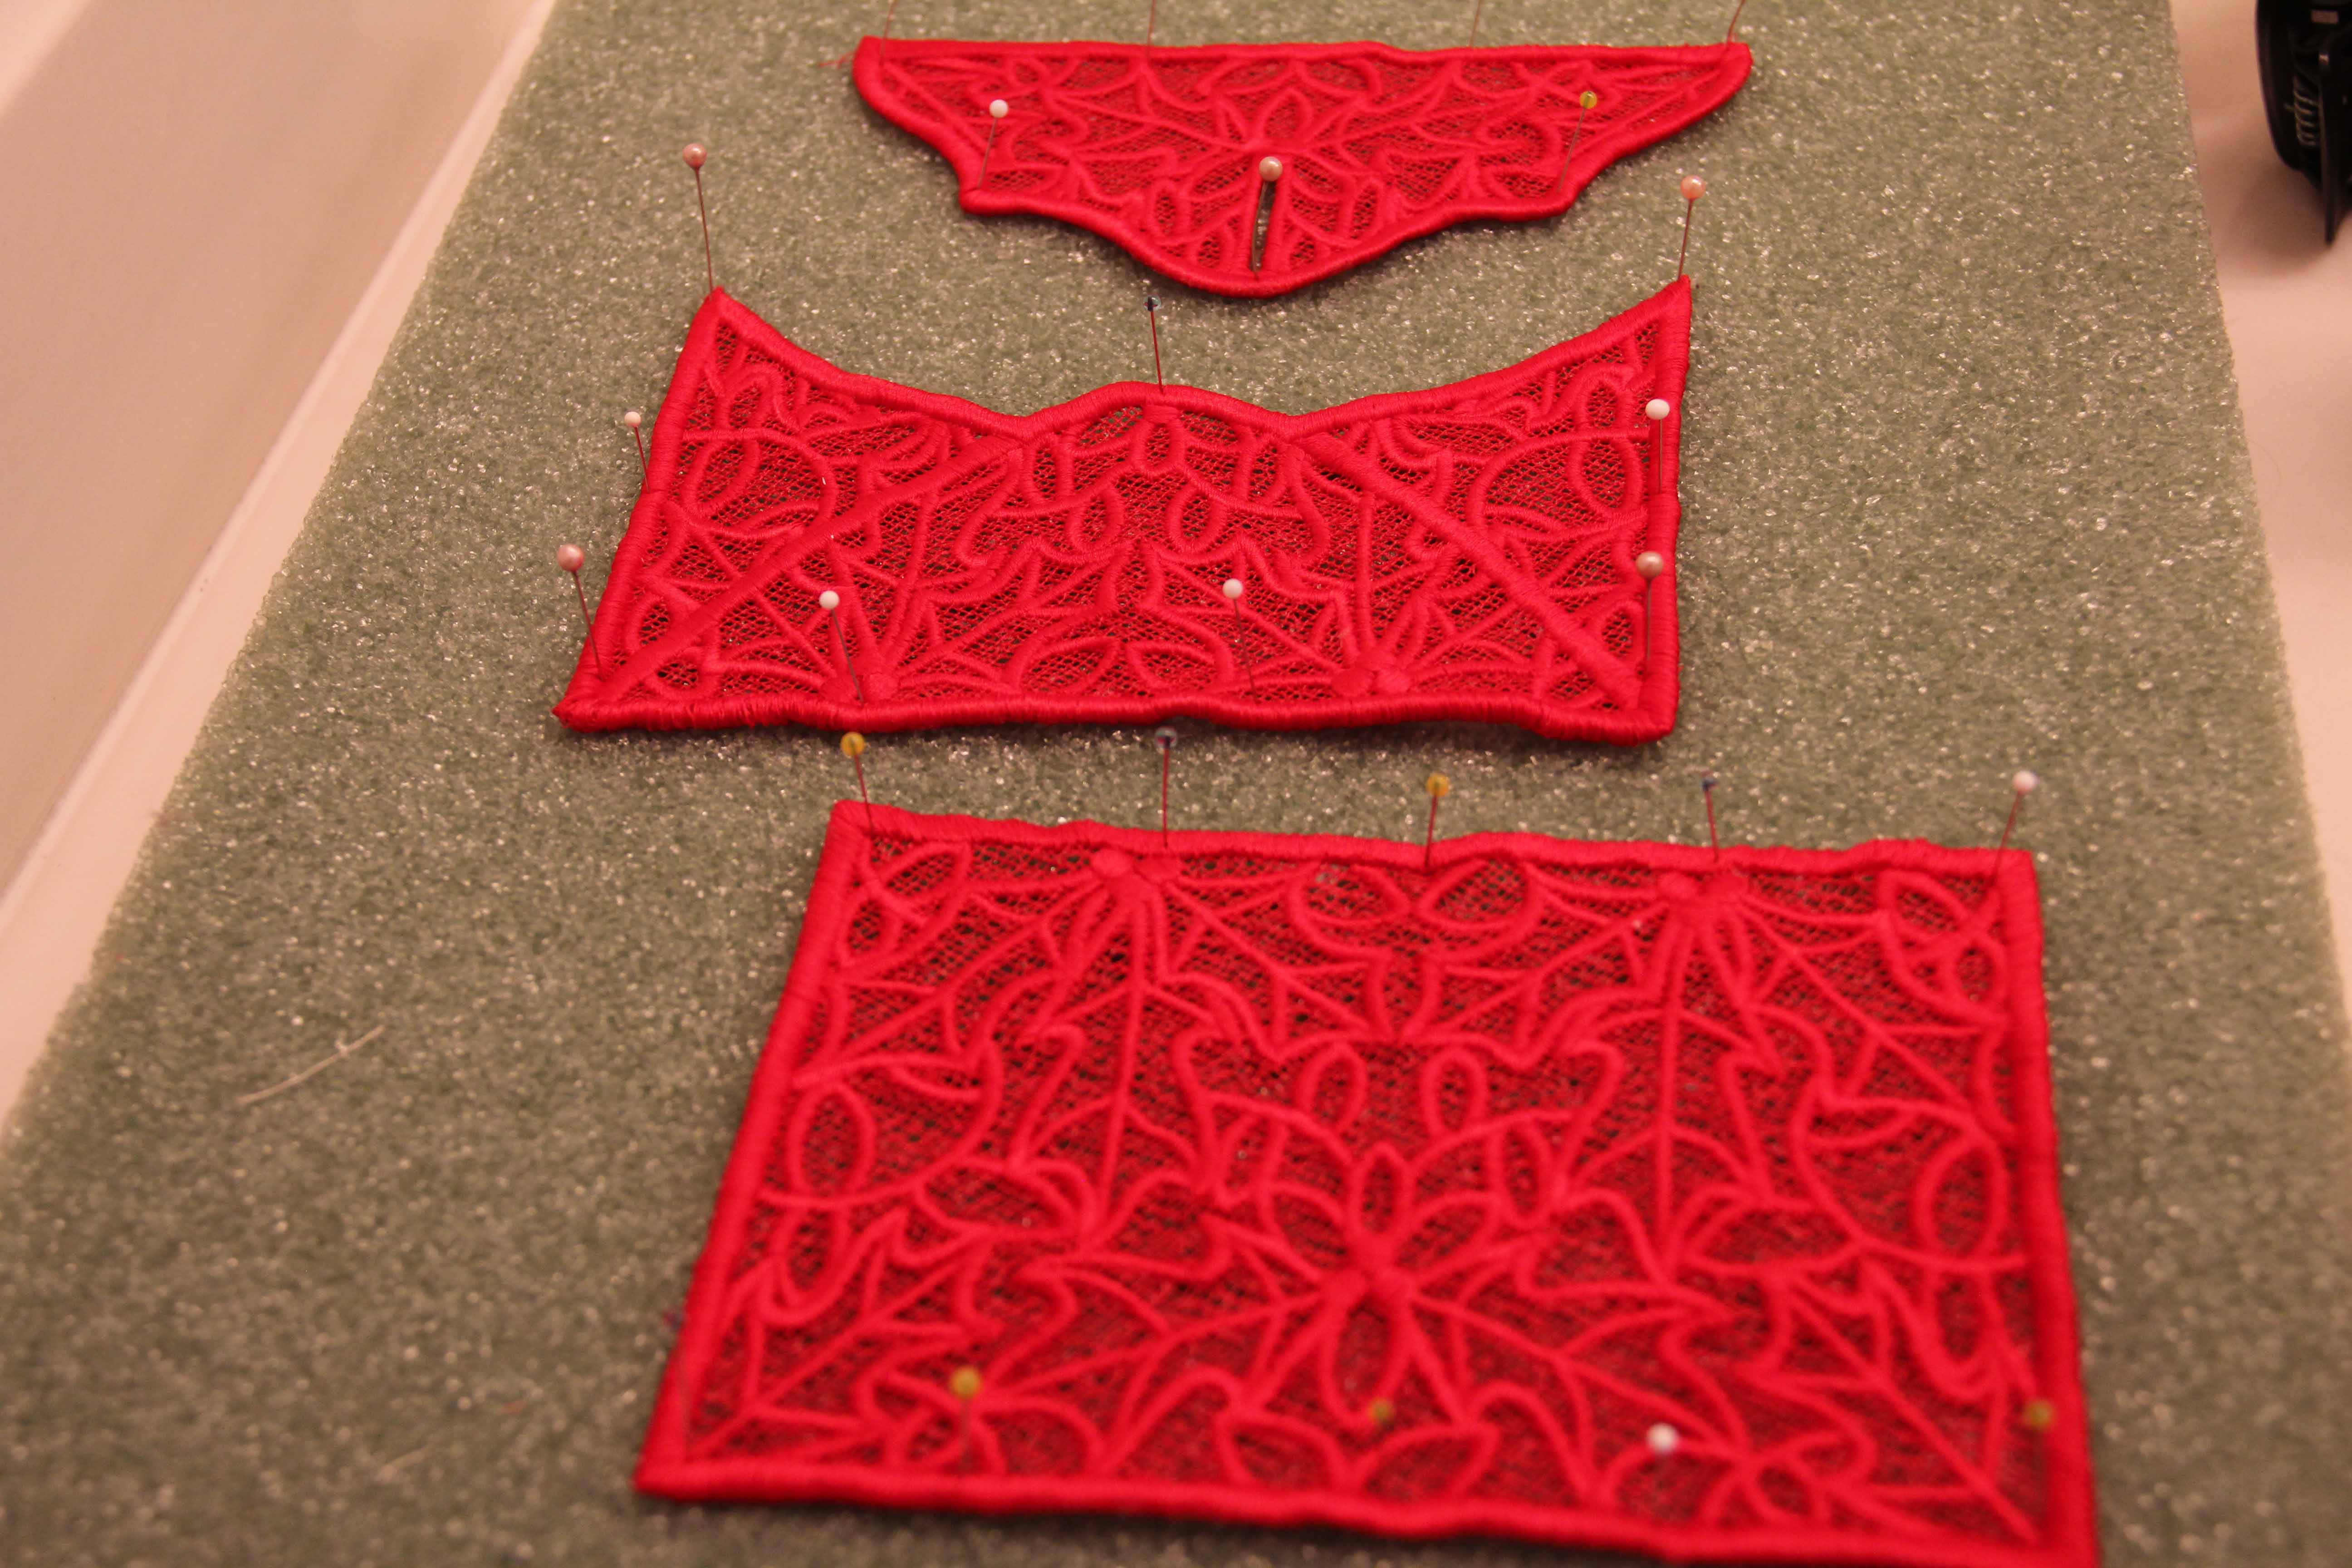
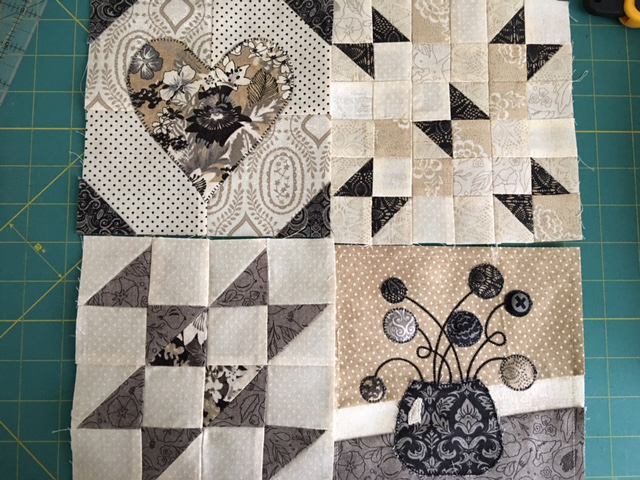
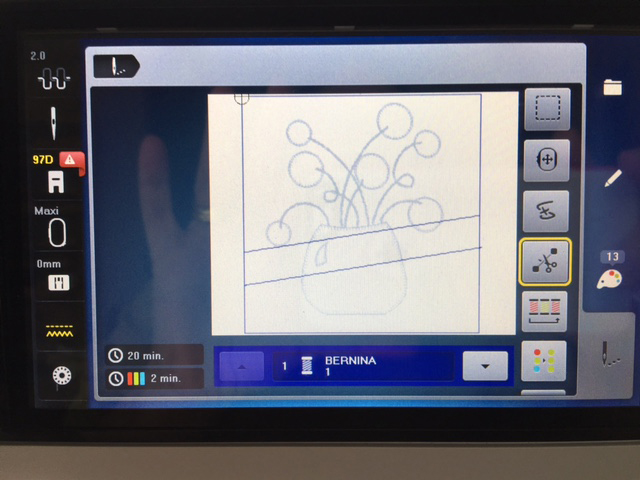
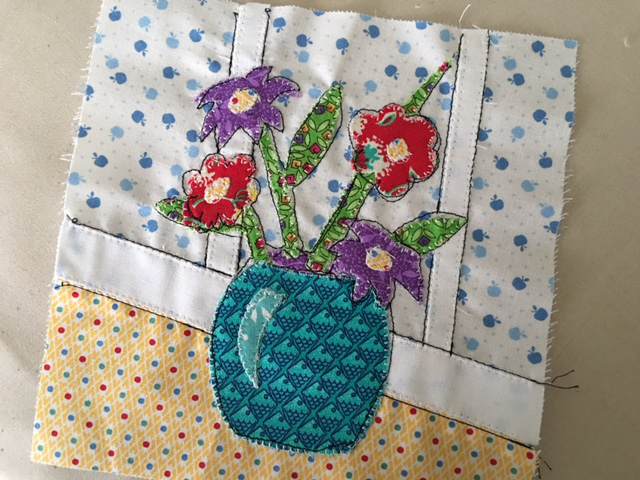
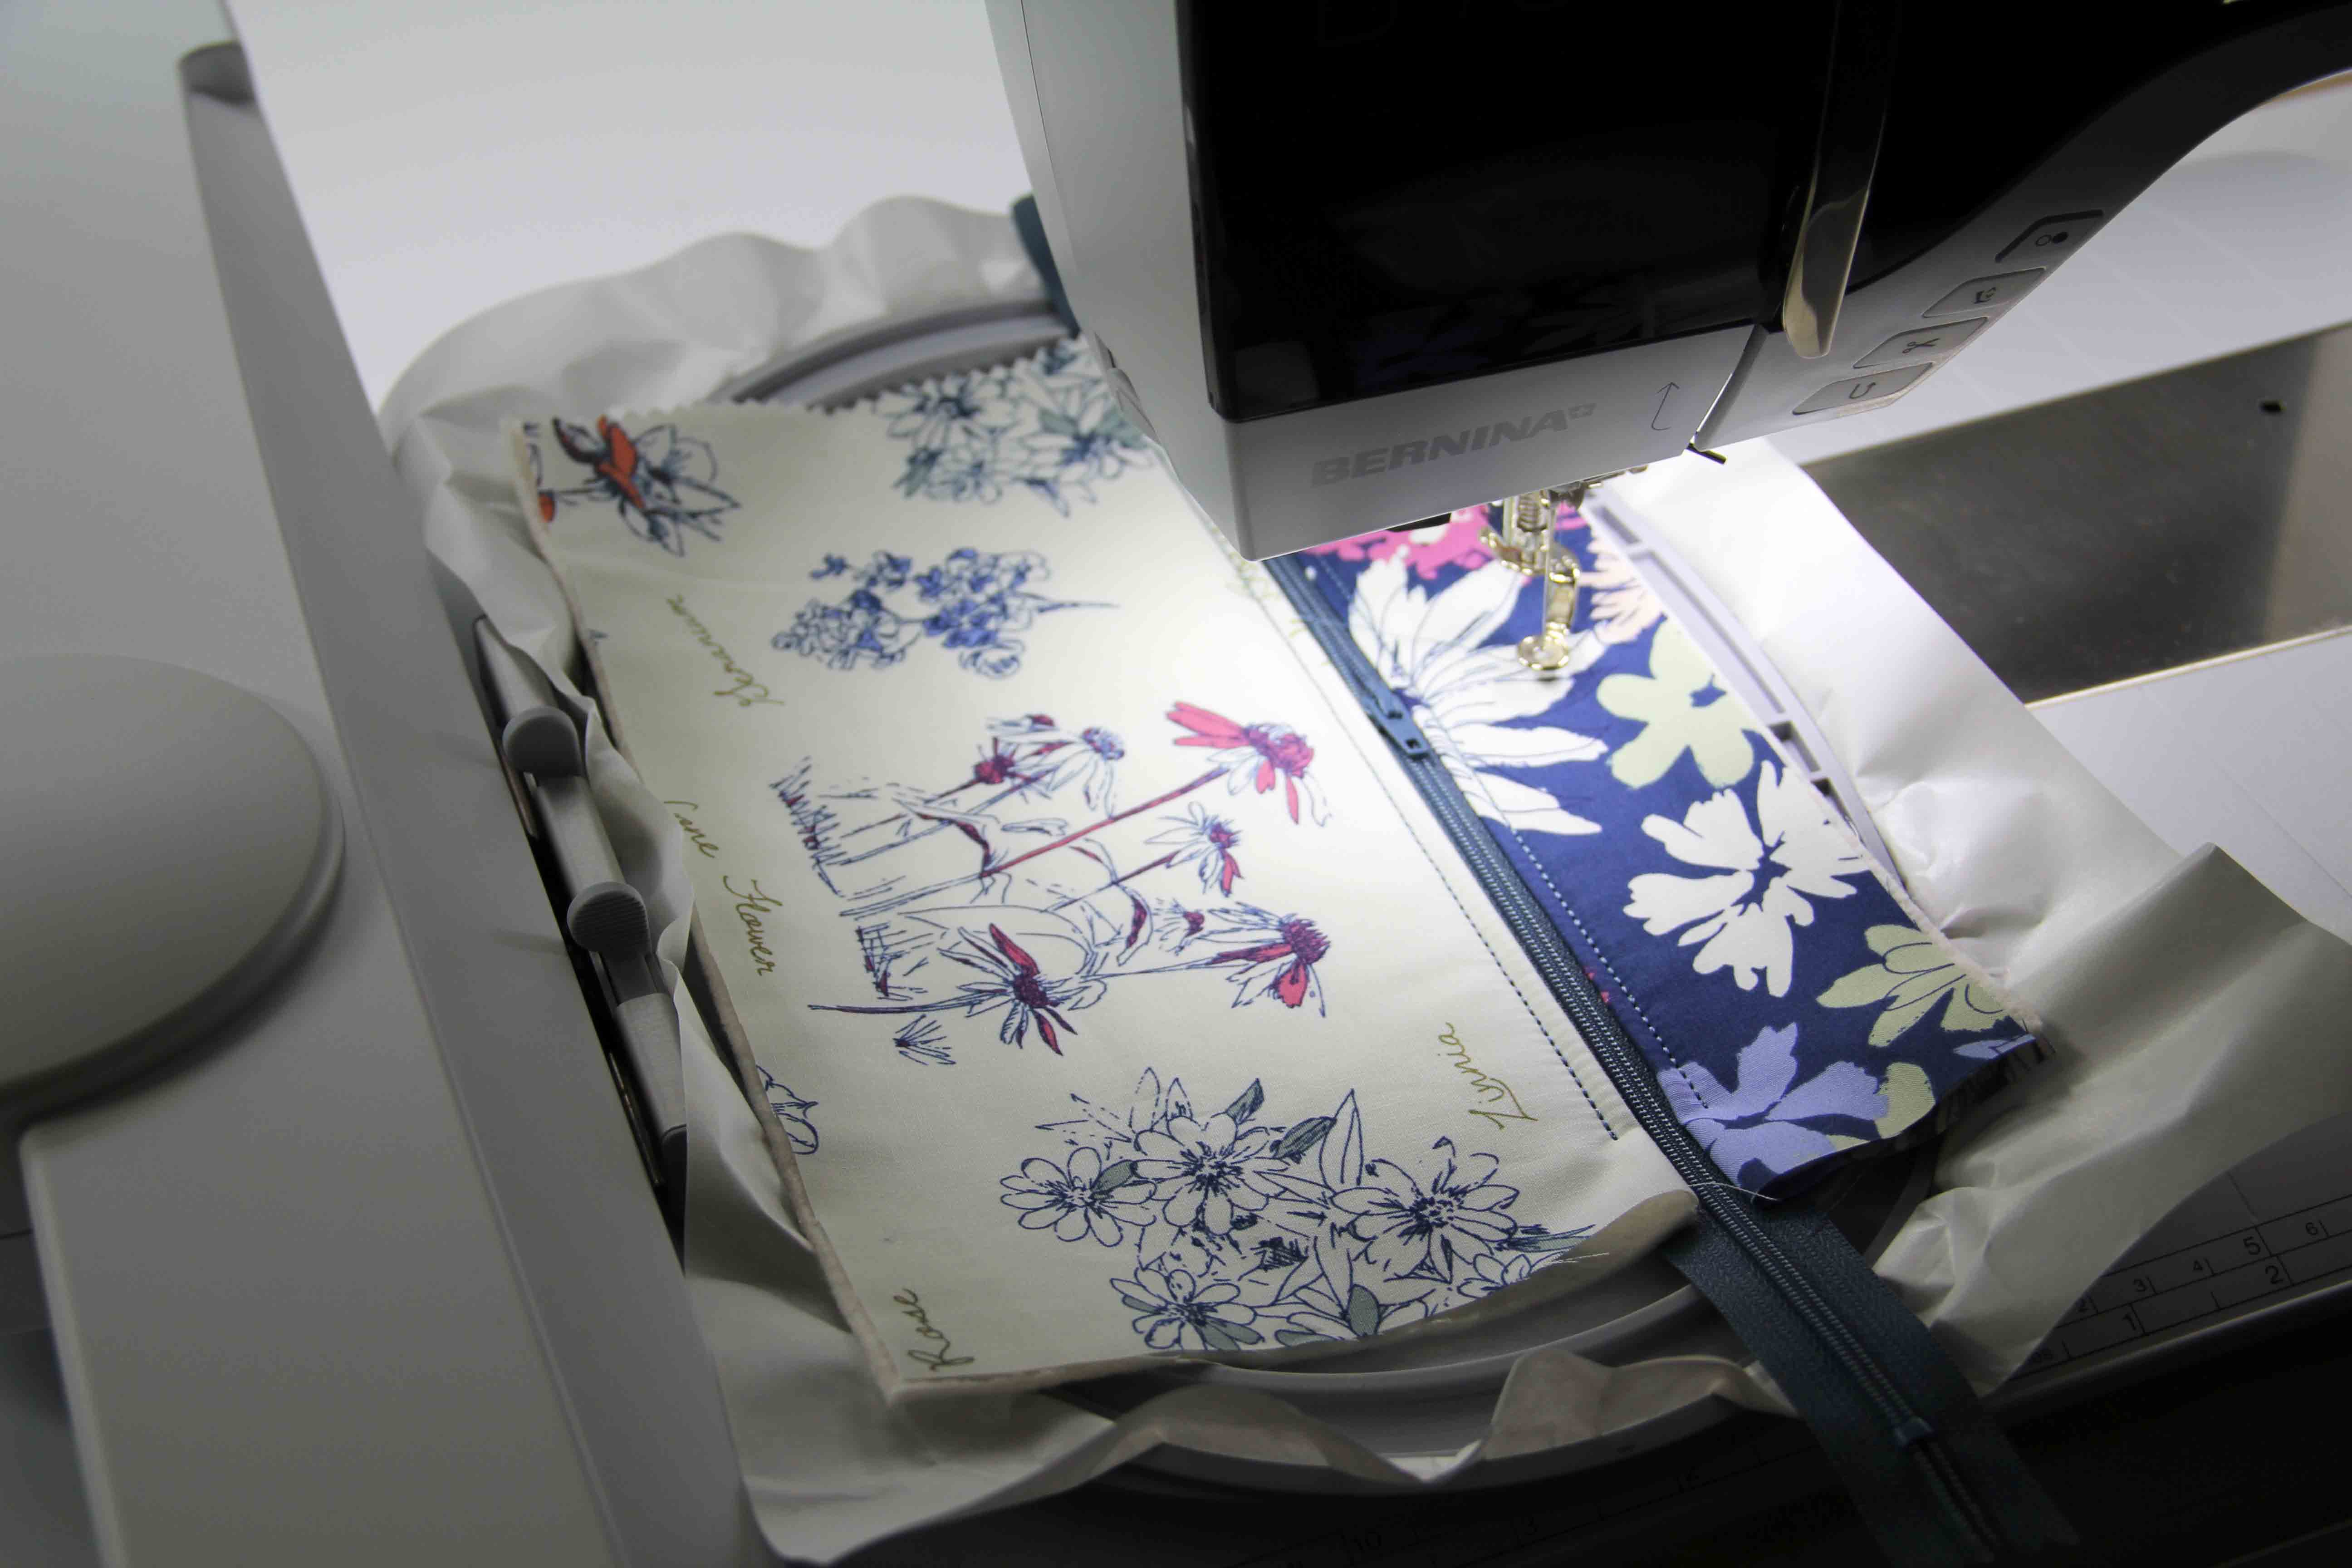
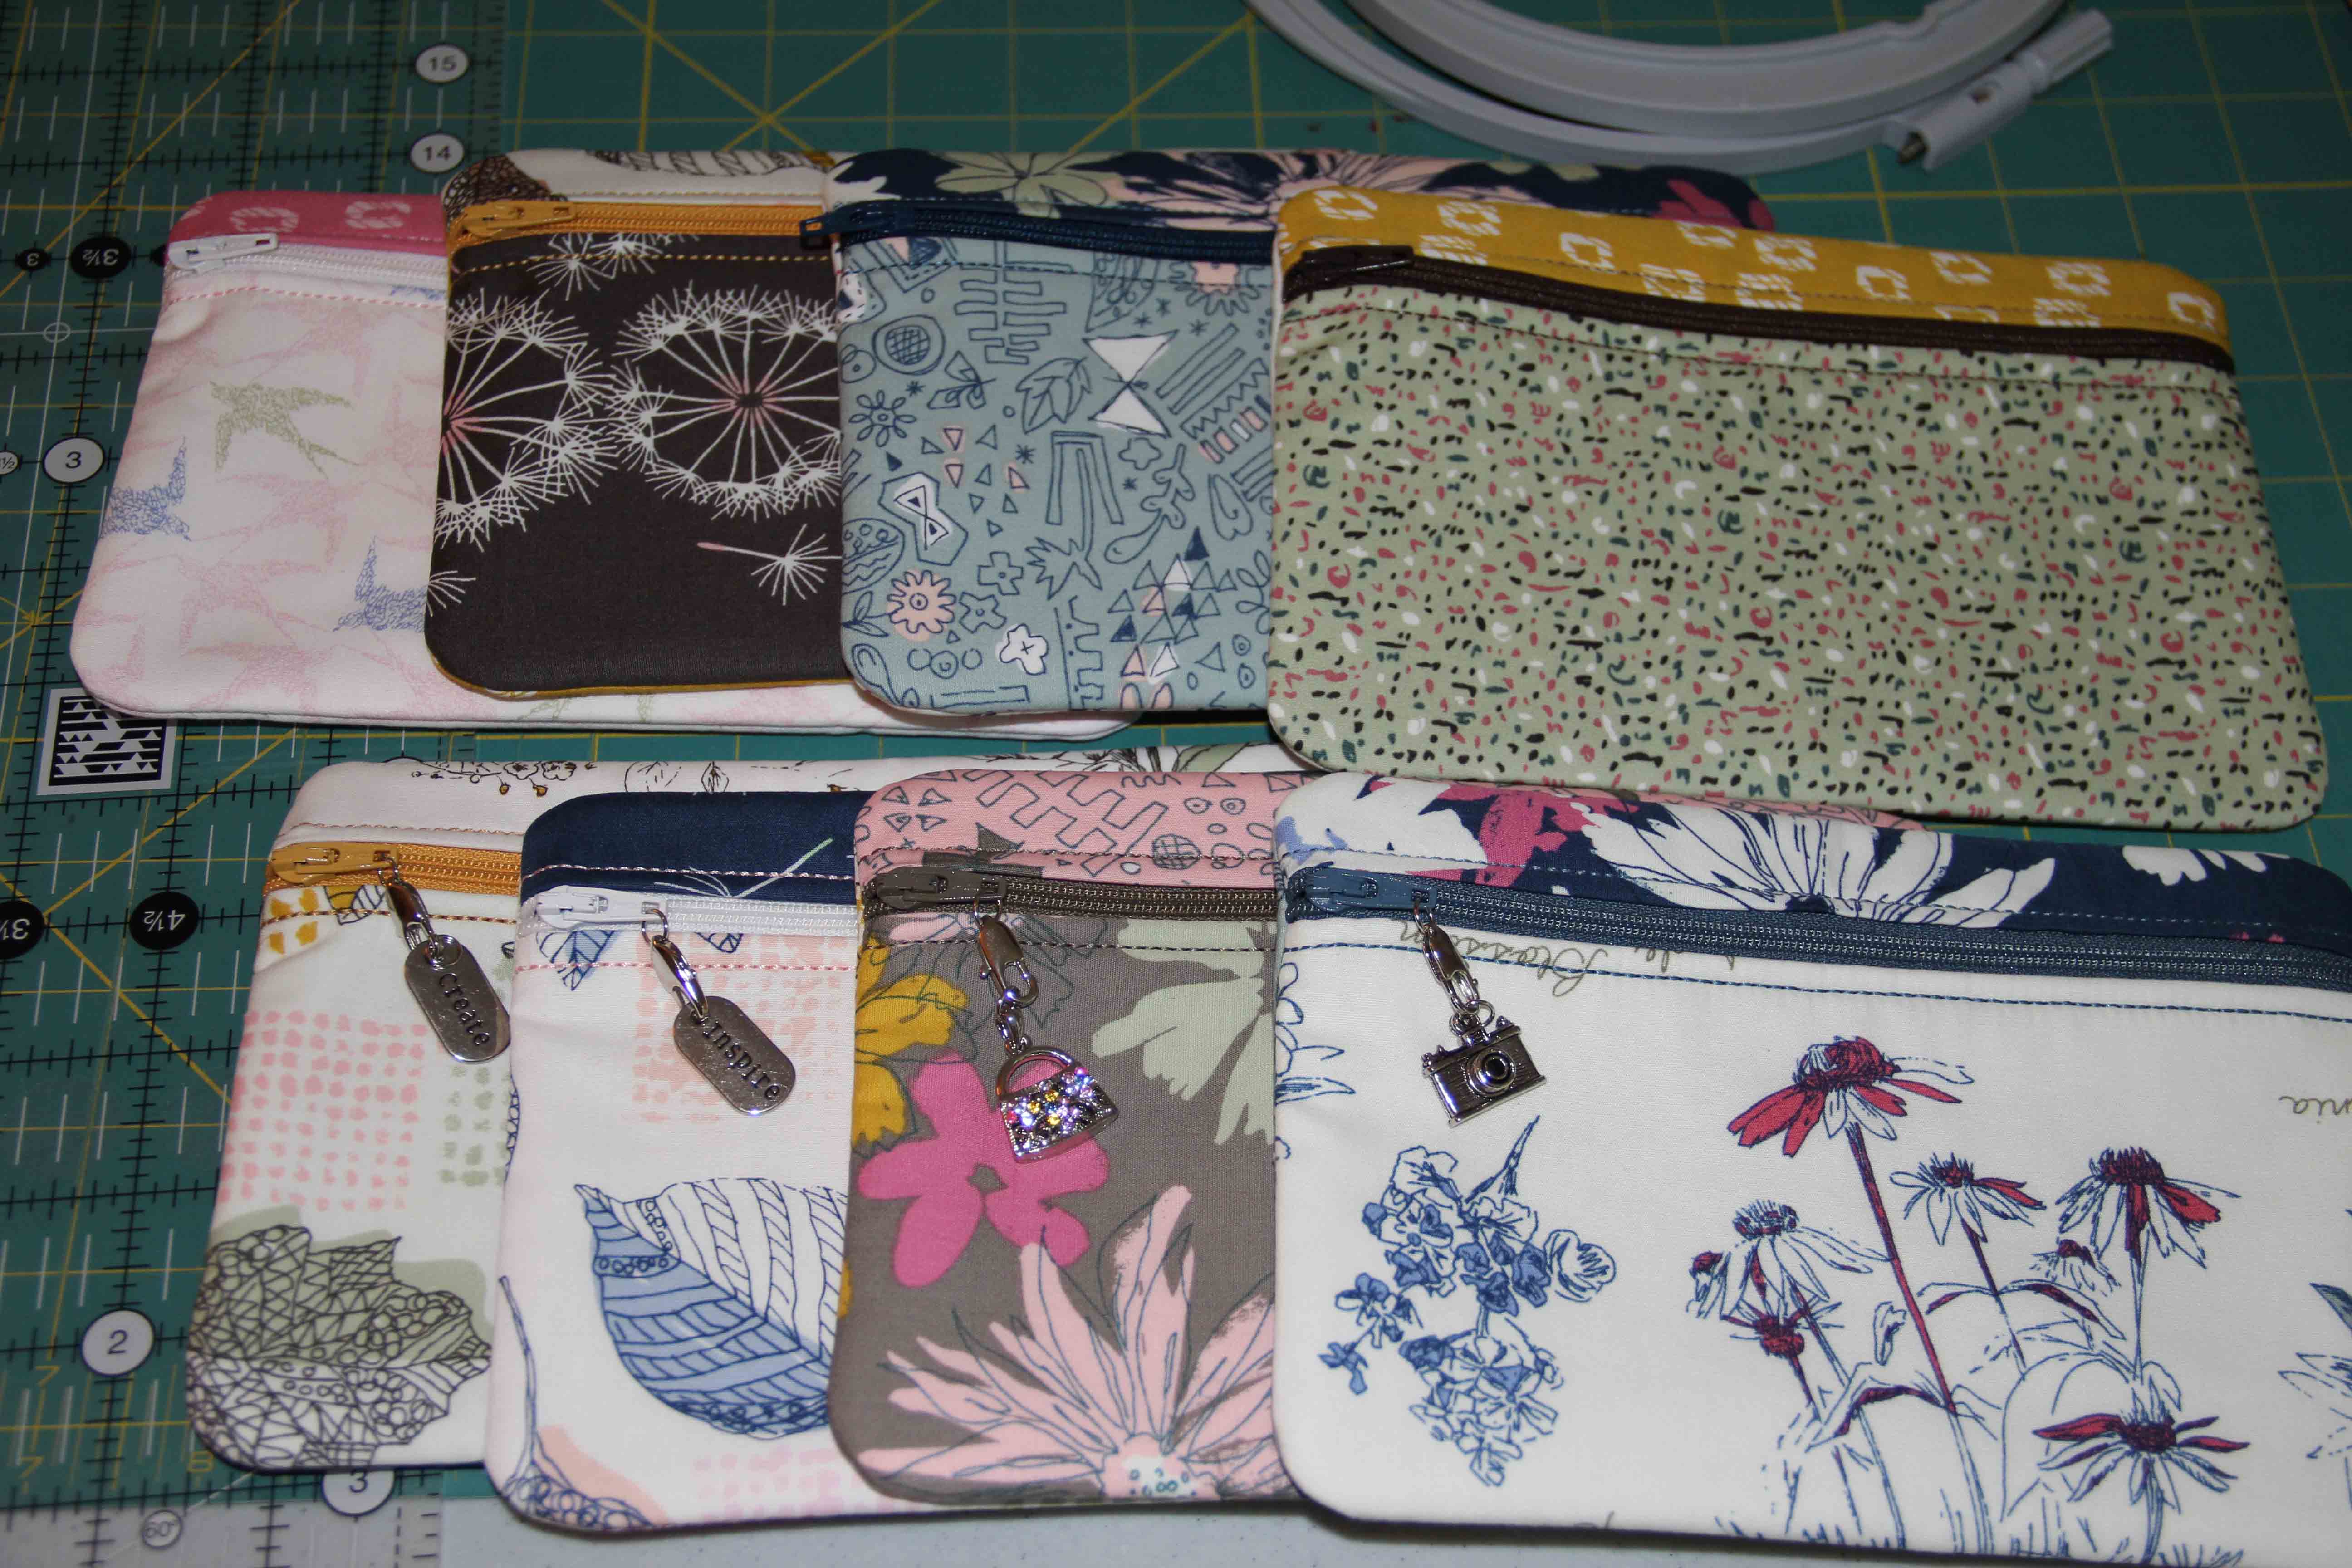
With that resolved, I now have an embroidery design that’s not complete.

See those cute little flower buttons?  They are supposed to be embroidery.  Luckily, my “breakdown” occurred in a convenient place, and I think I can just add those flowers instead of embroidery.  Not exactly perfect, but it’s effective and I think it will work.

I’ll share the rest of the project as I get further along.

I’m determined to THINK SPRING. It has to get here eventually, right?

In the meantime, of course I have another sewing machine that I can use to continue piecing my quilt project. And it won’t hurt for my larger machine to be in the spa for a bit.

What’s Happening in Machine Embroidery?

I’ve been scrounging around on my machine embroidery sites looking for the most interesting projects and new ideas.  I’ve found that with machine embroidery, there’s always a new way to do something that’s been around awhile, or an old way to do something very fresh.

We have snow on the ground here this April, but I just KNOW that spring will get here eventually.  So I focused my search on all things inspirational for spring.

Enjoy!

Embroidery Library

Although they always have new product, I found their Garden Party Lookbook to be charming and full of spring-like ideas. You’ll want to check out all their lookbooks.  But the Garden Party book had an interesting technique (something I hadn’t seen before) for embroidering on straw hats.


Embroidery Design Studio

They are featuring a strong graphic spring collection called Grow Love. These cute little flowers and butterflies would be great on jeans or anything denim.  They also have their washaway stabilizers on sale through April 13.  If you are someone who loves freestanding lace (which I’m thinking about for Halloween) now’s the time to stock up on Aquamesh.


Urban Threads

So the big trend I’ve seen lately and it’s reflected quite a bit at Urban Threads is embroidery on garments everywhere.  Jeans up and down the legs, t-shirts, sweatshirts, hoodies, everything.  This trend extends far beyond just the embroidery world.  The newest Dolce and Cabbana runway collection is just loaded with over-sized, all-over embroidery.  The kitschy-er, the better.  Urban Threads has some great examples in their Fashion Look book.  But it’s everywhere.


Kreations by Kara

OK, I was drawn to these lovely purple flowers in her sale bin.  I need them along the hemline of a summer skirt.  Wouldn’t that be lovely?


Kimberbell

Kimberbell, if you’re not familiar, is a wholesale design distributor. Their store locator is actually pretty accurate so feel free to use that to find a dealer near you.

Their products are always cheerful and sometimes over the top for me, but I fell in love with the designs on Hello Sunshine quilt. The quilt itself is a bit much at the moment, but who can live without the charming bike design, the mason jars, the watermelon?  Not me. I bought the collection and am already laying out something for a wall hanging for this spring/summer.


I recognize this list is not comprehensive, just a little tour to get your creative juices flowing about machine embroidery again.  I hope you find something that inspires you to dust off that embroidery module and rev it up for spring!

Freestanding Lace for the Holidays

freestanding laceI found these wonderful designs on Urbanthreads.com.  I immediately thought of Valentine’s Day, although these were likely meant for the Christmas Season.  I have not yet whip-stitched these together, but I love the look of them.

If you are not familiar with freestanding lace, a lot depends on the density of the designs and the stabilizer you use.

I used OESD Aquamesh, 2 layers for each piece.  Each envelope has 3 pieces.

freestanding-lace-4You can see the double layer of washaway stabilizer in the above photo.  Each section of the envelope took at least an hour to stitch out, so be sure you start with a full bobbin, a well-oiled machine, a new needle and plenty of thread.  I matched the bobbin thread to the top, using Isacord on everything.

free-standing-lace-2There were two different envelope designs to choose from, one was roses, as shown above.  The other was holly leaves, and I stitched that out in red.  Both of the envelopes I stitched were about greeting card size.

But I do have a smaller size design that would be perfect for business cards or a gift card.

freestanding-lace-3Once the design was complete, I trimmed away all the stabilizer, leaving 1/4 inch or so around the outside.

drying-frestanding-laceEach piece gets rinsed in warm water.  Some people recommend filling the sink and letting the lace soak.  That will work, but I usually keep the warm water running and rinse it thoroughly until all the stabilizer has dissolved.

The design needs to dry overnight, and I use a piece of florist’s styrofoam as a base, and flatten each design and pin in place.  This prevents any curling as they dry.

After that, it’s just a whip stitch to assemble the front and the back, and then the top to the back.

I had the most fun searching for just the right button for each of envelopes.  I plan to make a few more…I want the rose design in red. (Shhhhh…I think that’s part of this year’s Valentine’s Day gift.)

knitted-scarfFinally, I thought I’d share my scarf, which is moving along nicely now.  In fact, it’s probably twice as long as this photo shows…but not quite long enough to be complete.

The scarf will also have to be gently washed and stretched flat to dry. That way it will hold the shape.

If you enjoy designs from Urban Threads, you’ll get a kick out of their new holiday Look Book.

They also have their own line of fabric from Spoonflower now.

I actually have created my own fabric on Spoonflower with some of my black and white photography.  But I’ll have to save that for another post once I come up with how I’m going to use the fabric!

Little Ruby, Little Bags

minibags1cropSo I’ve been having fun with Little Ruby fabric from Bonnie and Camille.

At first I made some larger bags from a layer cake.  Then I made a bunch of tiny little coin purse sized bags from a charm pack.

All of this is done with machine embroidery using software.

smallbag1smallbag2I took the simple design of the larger bag and reduced the sides and bottom, keeping the zipper positioning lines the same.  Then I switched to a larger hoop and made three copies of the bag.

smallbagmulti

In the hoopI hooped sticky-back tearaway stabilizer, stitched out the zipper placement lines for all three.  Then, I placed the zippers and stitched out the line at the top of the zipper first for all three bags, then the bottom part of the zipper for all three.  Those fabrics top and bottom are just folded charm squares, with a small piece of batting in between.

After stitching the first batch, I went back to my software and moved them all a little farther apart from one another, so they don’t overlap.  I also added thread color changes between each step, just so the machine would stop stitching for me to place the fabric.

Finally, I put a tiny charm square quilt sandwich on top to form the back and lining of the bag.

multibagThen an outline stitches around each of the bags. It is set as a triple stitch and goes over the same line three times.

NOTE: DON’T FORGET TO MOVE THE ZIPPER PULL INTO THE CENTER OF THE BAG BEFORE ADDING THE BACKING!

That note is mainly for myself…believe me, if you do it once, you’ll remember not to do it again.  It’s not a terrible fix, but takes a little time and fidgeting.  You have to rip the seam to get the zipper pull through, and then re-sew the outline seam on the machine (not embroidery.)

When I take them out of the hoop, the first thing I do is tear away all the stabilizer from the outside.  Then with a little more care, I tear away the stabilizer from the inside of the bag.  This is actually pretty easy…a little bit of fussing to get it out, but not much.  Because the outline of the bag is a triple stitch, as well as the lines holding in the zipper, the stabilizer tears away very easily.

minibag2The final step is to cut away the excess fabric and zipper, and turn the little goodies inside out.  I give them a quick press and done!

minibagmultiThe final mini bags are about 4 1/4 inches by 3 inches.  My main goal was to use as much of the charm squares as possible without wasting.

If you own software…any kind…I encourage you to try building bags like this.  The digitizing is only rectangle and lines, and the corners are slightly curved.  Your expenses?  A charm pack and some matching zippers.  You likely have some scraps of batting lying around that can be used.

In a day, you can have stacks of lovely little bags to give away or to keep.  They are just about the perfect size for credit cards, ID, business cards, etc.

Here are some peonies for you, just for fun. Because they’re blooming and are gorgeous.

peonies


Machine Embroidery News

I have long thought that someone needs to create a place where we can all share news and ideas about machine embroidery.  All the information seems so scattered online.

It’s a lot of work to find out what designs are new out there on all the different sites and to see some inspiration.

So I thought that once in awhile, I might put together a bunch of links to things that are new, or hot, or just inspirational in machine embroidery.  I come across things regularly in my online travels, so I thought it would be fun to share…even if I haven’t had time to stitch some of it out yet.

Chalkboard ideas:

I’ve seen this in a number of places, and by now most of you are familiar with the chalkboard fabric out there.  It’s easy enough to purchase at your local quilt shop or hobby shop.

Embroideryonline.com has some great new chalkboard floral designs. These are next on my list of embroideries to try.

Here’s another link to chalkboard ideas from emblibrary.com.

Need some ideas?  Chalkboard creativity is everywhere on Pinterest.  Check out this and this.

Machine Cross Stitch:

Here’s something else that’s fun.  I made a few cross stitch designs last Halloween and loved it.  I think the cross stitch look for the holidays is charming.  Here’s a peek at my previous Halloween post.

But I found a site that specializes in machine embroidery cross stitch. They have designs for all occasions. They are appropriately named machinecrossstitch.com.

Again, on my list to do.  I am intrigued by the possibilities.

New Releases as of May:

This is obviously not a complete list, but I hope to be able to build on this list every time I publish a Machine Embroidery News blog. So many times I have wished that someone would organize all this info for me.  So now I’m doing it, and sharing it with you. And I’ll update it as often as I can.

embroideryonline.com (new releases)

emblibrary.com (new releases)

urbanthreads.com (new releases)

amazingdesigns.com (new releases)

I prefer to stay with major digitizers until I have some idea of the quality, but I am happy to publicize the place where you purchase your designs if you want to share.

In fact, if you have something you’d like to see with regard to machine embroidery, feel free to leave me a message in the comment bubble at the top of the post.  I’d love to hear what you want to see more of in machine embroidery…whether it’s in the hoop, freestanding, contemporary or all of the above.  Let me know, and I’ll try to do a little homework on it for next time.

For now,  happy stitching!

Needle Punch Felting with Machine Embroidery

needle punch felting 2
I’ve been playing with wool lately, and was reminded by the upcoming Bernina Inspirations class, that I can do needle punch using my machine embroidery.

For anyone who is a Bernina software user, Designer Plus allows you to do needle punch.  All you need is the needle punch accessory (which you can use with or without embroidery).

needle punch toolWhen you set up your machine for needle punch, you need to do a few things:

  • Inset the needle punch needles in your needle holder in place of your regular needle.
  • Change your stitch plate (there’s a special one for needle punch) and be sure to tell your machine that you made the change.
  • Put on the correct needle punch foot.  This not only helps to glide over roving and other wool or fabrics, but it also keep your fingers away from those needles.  You’ll often want to hold the roving in place to keep your design intact.
  • Completely remove your hook system, not just the bobbin.  Take everything out, and close the bobbin door.
  • Turn off your top and bottom thread sensors.

needle punch feltingIn the software, you literally just go to the Digitize toolbox, click on the PunchWork icon and digitize a shape.  Any shape.  And the software will generate one thread color to outline the shape, and then fill it with needle punch.  It’s amazingly easy.

I digitized the shape of this tree, measured it out and laid out the roving within the parameters of the shape.

And then I watched the machine do all the needle punch work.  Pretty impressive.

However, I did follow along with my fingers positioning and re-positioning the roving to be sure it stayed where I wanted it to be while the needle was punching.

Next, I layered an embroidery design on top.  Since I had gone with a tree shape, I was reminded of the tree of life embroidery design in the Sepia Petals collection from OESD. I ended up using the tree background file.

The result was interesting both visually and texturally.

Still exploring my love of wool.  It’s freeing and almost unpredictable as an art form or craft.  I think that’s why I enjoy it so much.

If you are interested in learning more about Bernina Embroidery Software or needle punch, think about attending your May Software Inspirations at your local Bernina dealer.

You just never know what you’ll be inspired to create!

needle punch felting 3

The Splendid Sampler — The Beauty of Sewing With Others

I am loving the Splendid Sampler.  If you’re not on board, jump in at any point, the water’s fine.  So are the people–from all over the world.  And everyone’s blocks are all so different!  I was afraid we’d all end up with the same quilt, but everyone’s personality is shining through.

Here’s your link to jump in.

Here’s the Splendid Sampler Facebook page.

Because of recent happenings in my life, I got started a little late, and many people haven’t started at all.  Some are just enjoying looking at others’ blocks.

I’ll share with you where I am so far.

splendidsampler2I am missing one of the blocks which I haven’t had time yet to go back to, but another block came in today that I think will be fun to add.  The fourth block, the vase and flowers (kudos to Jen Kingwell) probably inspired some of the most creativity so far.  The blocks have been stunning and all different.

splendidsampler5splendidsampler4I created mine in Bernina Embroidery Software, but many others stitched theirs out by hand or did machine applique.

splendidsampler6Like others, I am keeping a file of all the blocks and their instructions.

While I am in love with the color story of “Black Tie Affair” which I have been using, I am also adding some little touches from my own stash.  As Bonnie Hunter reminded folks, a quilt is always more interesting when all the fabric doesn’t come from one collection.  I agree.

In fact, I also did the little vase block in a whole other color story, just to see how I’d like it.  It’s a little more ‘folksy” as I free motioned it, and I think it has it’s own charm. So maybe I’ll run some parallel blocks with these brighter colors too!

splendidsampler1Truth is, anything can happen this year!  I intend to do as much as I can, when I can.

A few things I’ve learned:

  1.  Don’t try to keep up with everyone else.
  2.  6 inch blocks sound easy.  They’re not. They take more time than many 12 inch blocks.
  3. Slow down and enjoy the process.
  4. Enjoy everyone else’s blocks: get inspired, be challenged, but do your own thing.
  5. Try new techniques.
  6. Purchase the designer’s books. (Pat Sloan has 2 great books — one on applique and one on triangles)
  7. SHARE!  We really do want to see what you’re up to!  On Facebook, Twitter, Instagram #thesplendidsampler

Things that go bump in the night…

ornamentsI have always enjoyed Halloween more than Christmas, or whatever mid-winter holiday you celebrate.  Too much pressure, too many gifts, too much hype.

And when you work in retail, Halloween isn’t much better.  Most chain stores start putting their Halloween decorations out July 5.  But when that first crisp fall breeze rolls in, and those first few leaves begin to fall, I get inspired.  Many people do. Once the kids are all back in school and the “official” fall season starts, it’s amazing how many of us turn to our craft, our hobby or our passion once again.

So this year I am teaching some students to use the cross stitch program in Bernina Embroidery Software 7.  I am not a big fan of cross stitch..at least not actually DOING it.  However, I love the way it looks, and I love how easy it is to get some things done in software (which I DO love to use).

I stumbled across some lovely cross stitch designs in Just Cross Stitch Magazine.

They always include many  many patterns for people to use.  I scanned a few of their Halloween “ornaments”, and brought the jpegs into the cross stitch software.

Then you can use the software to create stitches following the image in the background.  I wanted to keep these very simple so I could make many, but not take a lot of time.  The cross stitch program within Software 7 saves the file as .arx extension.

pumpkimcrossstitchThe next step of course, is to bring the cross stitch design into the actual embroidery software.  I love this technique because it turns all those little x’s in the Cross Stitch program into machine-readable stitches.  And then it’s just an embroidery design.

pumpkinspngOnce one file is in the software, you can repeat it multiple times.  I also rearranged the color film, along the right, to stitch all of one color at once instead of all the colors in one pumpkin at a time.  This is a huge step and really cuts down on thread changes.

At the end, I added a double run stitch around the outside of the ornament, leaving the bottom open, so the little critters could be turned inside out and stuffed.  Before that last double run thread stitches, I added the backing, with right sides together. Under the backing I taped down some ribbon, so that they could be hung.  As you can see, in the hoop, they look like little ravioli.

inthehoopWhen all is done stitching, I cut everything out, clipped corners, turned it inside out, stuffed them with polyfill, and used the machine to stitch along the bottom closure.

cat doneVoila!  Six or eight of them will fit into the jumbo hoop.  I managed to create a cat, a witch and a pumpkin.  I also made some larger ornaments with regular embroidery on them.

pumpkin hoopI bought a cheap Halloween tree for the house and one for the shop…these will be on display for awhile!  And if I have time, I’ll make more…it’s a little addictive.  And really pretty fast and easy when you make use of technology!  Gotta love it.

halloweentree2

More Bags

IMG_4216Now that I’ve made 8 or 9 more of these little bags, I think I have them out of my system. This batch was done with the new line from Bonnie and Camille, Hello Darling.

I was a skeptic, but these cheerful, cheerful colors really inspire me to keep going.  Mood-lifting, without a doubt.

May you find the thing that inspires you to keep going, and may it make your world more colorful.

Bag Obsession

bag3

I’ve been making these little cosmetic/chotchke/jewelry bags now for a couple of days.  So easy and fun to make.

They’ve become an obsession.

All the ones I’ve made (8 of them in total, so far) are made from Art Gallery Fabric, Sketchbook.  The look of the fabric is artsy and lends itself well to these small bags. They are approximately 6 x 8 in. finished.

These are all done in embroidery, by the way.  I digitized the lines for the bags, and all the work is basically in the cutting of fabric.

First stitch is a placement for the zipper, then you lay down the zipper, then folded fabric with batting in the middle across the top of the zipper, stitch a line, same thing with the bottom layer of fabric, stitch a line, then lay the lining/backing down (a quilt sandwich) and stitch around the outside.

bag4Voila! That’s it. You’re done. Trim and turn it inside out.

You use a sticky back stabilizer, so you end up picking that off the back at the end, but other than that, these bags go REALLY FAST.  Use batting in between every layer to give the bags a nice hand.

I’m thinking these would make great holiday gifts. I have gone through my stash and have come across some old home dec fabric that I think would be fun.  Denim would also be great.  Who doesn’t have an old pair of jeans that need to be repurposed into new life?  Add some embroidery or a little bling…anything is possible.

These in-the-hoop projects are great stash busters.  Gotta run, I need more zippers.

bag2